OPERATORS MANUAL
I
T IS THE RESPONSIBILITY OF THE OPERATOR TO MAINTAIN CUSTOMER SAFETY
AT ALL TIMES
,
AND IT IS IMPERATIVE THAT THE DETAILS SET OUT IN THIS MANUAL
ARE FOLLOWED PRECISELY
Part No. 90500135
Issue 1
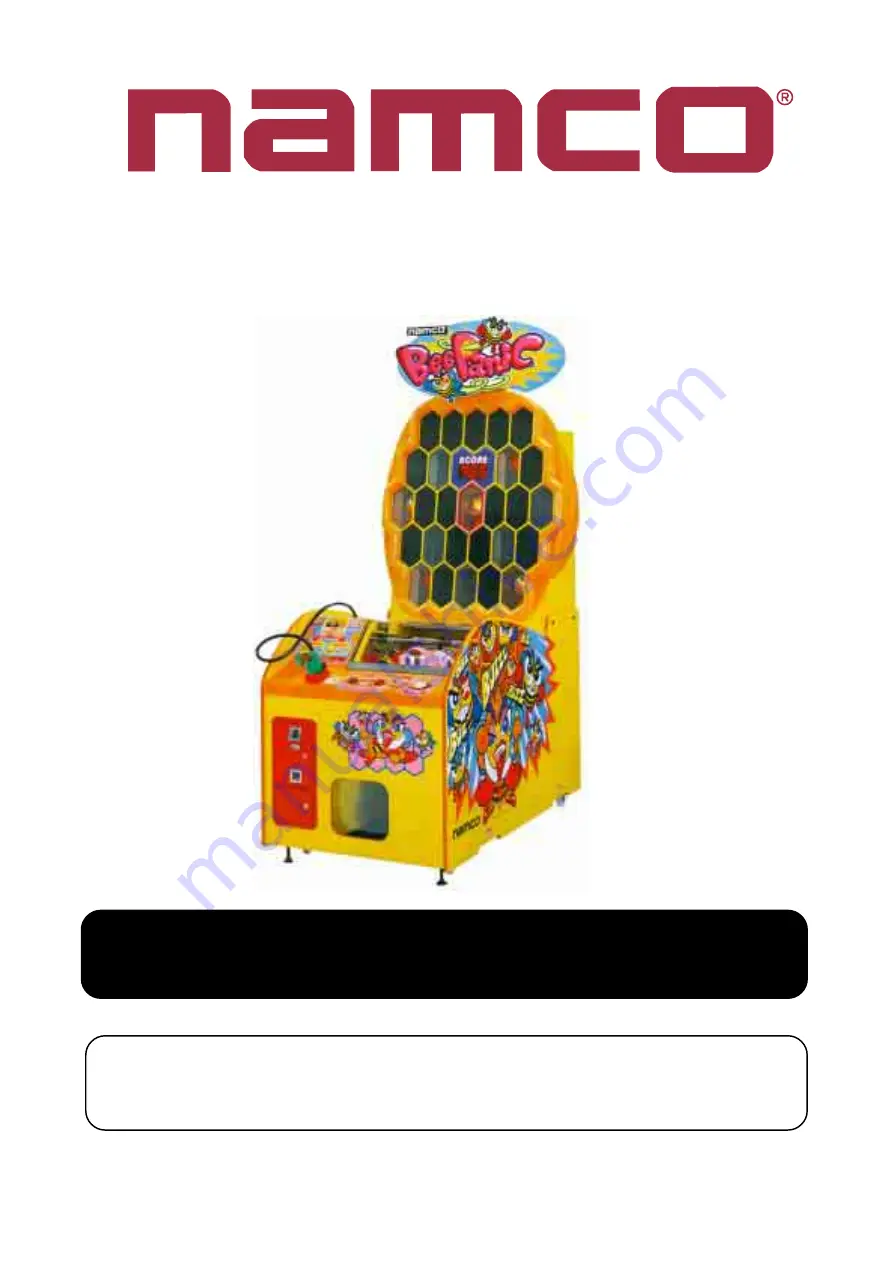
BEE PANIC
Страница 1: ...MANUAL IT IS THE RESPONSIBILITY OF THE OPERATOR TO MAINTAIN CUSTOMER SAFETY AT ALL TIMES AND IT IS IMPERATIVE THAT THE DETAILS SET OUT IN THIS MANUAL ARE FOLLOWED PRECISELY Part No 90500135 Issue 1 B...
Страница 2: ...ckboard 37 5 4 Assembling the Logo Panel 38 5 5 Attaching the Logo Panel and Backboard 38 6 PRIZES 39 6 1 Prize Sizes and Type 39 6 2 Preparing Prize Items 41 6 3 Loading Prizes 41 7 ADJUSTMENTS 43 7...
Страница 3: ...ng the Play Panel Switches 70 8 12 Replacing the Prize Sensors 71 8 12 1 Lengthwise Front 71 8 12 2 Lengthwise Rear 72 8 12 3 Widthwise 73 8 13 Payout Assemblies 74 8 13 1 Removing the Payout Assy 74...
Страница 4: ...available to the operating or service personnel at all times This equipment is for indoor use only and should only be used for the purpose intended Namco Europe Ltd bears no responsibility for acciden...
Страница 5: ...nector from the equipment or the mains plug from the wall outlet always grasp the plug and not the cable MOVING THE EQUIPMENT l l l l l This equipment is fitted with castors to make it easier to move...
Страница 6: ...hlie lich f r den gewerblichen Gebrauch in geschlossenen R umen bestimmt und darf nur dort betrieben werden NAMCO EUROPE Ltd bernimmt keinerlei Haftung f r Unf lle Verletzungen oder Besch digungen die...
Страница 7: ...e Vorsicht auf absch ssigem Boden l l l l l Die Gesamth he de Ger tes betr gt 2 24m Daher Vorsicht bei tiefer h ngenden Beleuchtungsk rpern AUS UND EINBAU VON KOMPONENTEN UND TEILEN l l l l l Aufstell...
Страница 8: ...ed for det arbejdende og servicerende personale Denne rnaskine er kun til indend rs brug og b r kun bruges til det beregnede form l Namco Ltd b rer intet ansvar for ulykker eller skader som er et resu...
Страница 9: ...kun udf res af kvalificeret personale l l l l l Skift ikke noget p maskinen uden godkendelse det kan f re til uforudset fare l l l l l Der b r kun bruges dele specificeret af Namco Europe Limited n r...
Страница 10: ...del personal de mantenimiento y operaci n en todo momento Esta m quina es nicamente para ser usada en interiores y s lo debe usarse para aquello para lo que ha sido creada Namco Ltd queda exenta de c...
Страница 11: ...apagada antes de conectar o desconectar cualquier enchufe o conector l l l l l Al retirar el conector principal de la m quina o la clavija de alimentaci n del enchufe de la red agarre siempre la clavi...
Страница 12: ...saires l installation de la machine et doivent tre mis la disposition de l utilisateur et du personnel de maintenance tout moment Ce jeu est uniquement destin un usage int rieur et devra tre utilis co...
Страница 13: ...rincipal est de 2240 mm prendre garde aux encombrements de la partie sup rieure ex illuminations du bandeau DEPLACER ET REMPLACER LES UNITES ET LES PIECES DETACHEES l l l l l L installation le service...
Страница 14: ...LIMITED NAMCO EUROPE LIMITED 89 336 72 23 55014 1 55014 2 60335 2 82 CE reset processor 89 392 l l l l l l l l l l l l l l l l l l l l l l l l l l l l l l l l l l l l l l l l l l l l l 456789 i 0 12...
Страница 15: ...ore 1m90cm or more 1m or more 2m45cm or more 50cm or more 50cm or more l l l l l l l l l l l l l l l BCD EFG HE I7J l l l l l l l l l l l l l l l l l l l l l l l l l l l l l l l l l l l l l l l l 500M...
Страница 16: ...sempre al personale operante e di servizio Quest macchina deve essere usata solo in interni e deve essere usata solo per gli scopi per cui progettata Namco Europe Ltd non si assume responsabilit per i...
Страница 17: ...idonee e qualificate l l l l l Non apporre alcuna modifica alla macchina senza autorizzazione preventiva Il fare questo pu causare un pericolo non prevedibile l l l l l Quando si rimpiazza o si ripara...
Страница 18: ...hoved sikringen bare byttes ut med en av samme type og verdi Bruk av andre sikringer eller materiale er forbudt l l l l l Str mforsyningen inne i monitoren vill v re varm og ha omr der med h y spennin...
Страница 19: ...r sl tt av f r du kopler sammen eller tar fra hverandre plugger eller koplinger l l l l l N r du fjerner hoved koplingene fra maskinen eller hoved pluggen fra st pselet ta bestandig tak i pluggen og i...
Страница 20: ...enshuis en dient alleen gebruikt te worden voor bedoelde doeleinden Namco Ltd is niet verantwoordelijk voor ongelukken letsel of schade die voortkomt uit ongeoorloofde veranderingen aan of onjuist geb...
Страница 21: ...luggen of connectors ingestoken of uitgetrokken worden l l l l l Als het netsnoer uit de machine of uit het stopcontact verwijderd wordt dient altijd de stekker vastgepakt te worden en niet het snoer...
Страница 22: ...is de prote o s o sempre substituidos por fusiveis de igual valor ou calibre aos de origem O uso de outro tipo de fusiveis ou material proibido l l l l l A fonte de alimenta o do monitor encontrar se...
Страница 23: ...zonas da fonte de alimenta o e do monitor ficam quentes e transportam correntes de alta voltagem mesmo depois de a maquina ter sido desligada podendo causar queimaduras e choques electricos Tome cuida...
Страница 24: ...rvice personal Maskinen r avsedd f r inomhusbruk och ska endast anv ndas f r detta ndam l Namco Ltd b r inget ansvar f r olyckor eller skador som orsakats av icke auktoriserade ndringar i maskinen ell...
Страница 25: ...underh ll p denna maskin skall endast utf ras av kvalificerad personal l l l l l G r inga ndringar p denna maskin utan ett godk nnande i f rv g Detta kan f rorsaka of ruts gbar fara l l l l l Endast...
Страница 26: ...ihin tarkoituksiin Namco Ltd ei vastaa niist onnettomuuksista loukaantumisista tai vahingoista jotka johtuvat laitteeseen ilman Namco Ltd n lupaa tehdyist muutoksista laitteen v r st k yt st YLEISET T...
Страница 27: ...alustalla l l l l l Laitteen kokonaiskorkeus on yli 2240 mm Varmista ettei katossa ole esteit esim valaisimia l l l l l Vain riitt v n ammattip tevyyden omaava henkil saa suorittaa asennus huolto s t...
Страница 28: ...900 w x 1590 d x 2240 h Lower Cabinet 800 w x 1520 d x 970 h Upper Cabinet 900 w x 440 d x 1100 h WEIGHT Assembled 140kg Lower Cabinet 110kg Upper Cabinet 30kg ACCESSORIES Keys Cash Door 2 Coin Door...
Страница 29: ...splays Target Assy 1 Target Assy 4 Target Assy 6 Target Assy 8 Target Assy 9 Target Assy 7 Target Assy 5 Target Assy 3 Target Assy 2 Target Assy 10 7 Segment Display Payout Assy 1 Payout Assy 2 Payout...
Страница 30: ...g a red bee reduces the players score by 5 points Note When set to Kids mode 5 points bees do not appear see page 52 section 7 3 11 Kids Mode setting n When the player s score is 500 points or more at...
Страница 31: ...g Light Fittings Electric Cables etc 4 1 Separating the Cabinet i The Upper Cabinet weighs approx 30kg Ensure that at least two 2 people are used to separate the cabinets 1 Remove 2off pozi head scre...
Страница 32: ...tilt the Upper Cabinet backwards while supporting the edge of the Upper Cabinet on the Lower Cabinet 5 When the Upper Cabinet is level remove the Upper Cabinet Upper Cabinet Assy Upper Cabinet Assy Lo...
Страница 33: ...ke renses med en vandstr le eller monteres et sted hvor det er muligt at bruge en vandstr le ESTA M QUINA ESTA DISE ADA NICAMENTE PARA USO EN INTERIORES NO INSTALE LA M QUINA EN LOS SIGUIENTES LUGARES...
Страница 34: ...ource de chaleur aux endroits tr s chauds ou froids 3 Dans des zones de proximit des sorties de secours ou d acc s aux quipements d extinction du feu 4 Dans des emplacements instables ou soumis de for...
Страница 35: ...nna maskin f r inte reng ras med en vatten str le eller monterad inom ett omr de d r en vatten str le kan anv ndas T M LAITE ON SUUNNITELTU VAIN SIS K YTT N L ASENNA LAITETTA SEURAAVIIN PAIKKOIHIN 1 U...
Страница 36: ...supply is 230volts AC 5 1 Notes on Installation NOTE If the location site of this machine has a polished floor it is recommended that rubber pads are fitted under the level adjusters to prevent the m...
Страница 37: ...Page 37 5 3 Assembling the Backboard Assemble the Logo Panel by following the diagrams below 1 Backboard 2 3 4 Double sided adhesive tape...
Страница 38: ...Page 38 5 4 Assembling the Logo Panel 5 5 Attaching the Logo Panel and Backboard Logo Panel 3 2 1 Stick here Backboard Logo panel Signboard Assy Upper Cabinet Assy...
Страница 39: ...f dispensing operations a no prize item error is generated See section 7 3 8 page 51 to adjust the dispensing operations setting This will allow a greater spacing for larger prizes 6 1 Prize Sizes and...
Страница 40: ...Maximum 200mm l x 200mm w x 200mm h Minimum 10mm l x 50mm w x 50mm h 200mm 200mm 250mm 50mm 10mm 50mm Items containing liquid Live Animals etc Items that can easily melt Fresh food or items that deca...
Страница 41: ...of each prize including the string must be as specified below String length 30 to 50mm or more Height of Prize Item including string 300mm or less 6 3 Loading Prizes 1 Open the Cover and the push the...
Страница 42: ...tions a no prize item error is generated See section 7 3 8 page51 to adjust the dispensing operations setting This will allow a greater spacing for larger prizes If prize items are loaded too tightly...
Страница 43: ...glage ou la maintenance doivent tre effectu s uniquement par les personnes qualifi es Regolazioni e manutenzione su questa macchina devono essere fatti solo da personale specializzato Justering eller...
Страница 44: ...settings Refer to section 7 2 Test Mode page 45 3 Select Switch This switch is used to select the test required when in the Test Mode 4 Volume Control This is used to set the volume of the Sound 5 Pr...
Страница 45: ...elected the following sequences will automatically operate To discontinue this test and step to the next test press the Select switch Selection switches 1 and 2 and Challenge switch flash simultaneous...
Страница 46: ...st is selected the Selection switches 1 and 2 and the Challenge switch are illuminated Press one of the Selection switches or the Challenge switch The lamp of the selected switch will turn off and the...
Страница 47: ...Target Assy 1 illuminates For Payout Assy 2 the white lamp on Target Assy 2 illuminates For Payout Assy 3 the white lamp on Target Assy 3 illuminates 7 2 6 Sound Test This Test allows the checking of...
Страница 48: ...n n n n 5 Normal Stage Difficulty Setting n n n n n 6 Special Stage Difficulty Setting s 7 Attract Sound Setting a 8 No Prize Item Error pe 9 Prize Sensor Failure Setting ps 10 Payout Assy Error Sett...
Страница 49: ...signals from the CashFlow required for 1 continued game Use Select switch 1 or 2 to change the setting value This item is disabled during a Free Play y a l p s i d e r o c s t n e m g e s 7 g n i t t...
Страница 50: ...ets the difficulty level of the special stage game The lower the difficulty level is the longer the targets are displayed thus making the game easier Use Select switch 1 or 2 to change the setting val...
Страница 51: ...ons exchanging sensors and setting this item allows temporary operation of the machine Use Select switch 1 or 2 to change the setting value When a prize sensor is disabled a dispensed prize may not be...
Страница 52: ...targets are displayed Use Select switch 1 or 2 to change the setting value The Kids Mode is designed for very young children When the 5 points targets are not being used the game becomes very easy to...
Страница 53: ...o de esta m quina deben ser realizados s lo por personal cualificado Aseg rese de que la m quina est desconectada antes de comenzar cualquier trabajo de mantenimiento reparaciones resoluci n de proble...
Страница 54: ...pessoal qualificado Certifique se que a maquina se encontra desligada sempre que iniciar qualquer tipo de trabalho de manuten o identifa o de avarias repara o etc Justeringar och underh ll p denna ma...
Страница 55: ...the Target Assys may not detect the light emitted from the Gun Assy and fail to register a hit correctly 1 Clean the surface of the Target Panel using a cloth dampened with water or mild detergent 2...
Страница 56: ...Assy rimane caldo ed ha zone di alto voltaggio anche se la macchina stata spenta c quindi la possibilit di bruciature o scosse elettriche Fare attenzione a non toccare queste zone Xenon assy en vill...
Страница 57: ...ife of the Xenon Tube If you do touch the Xenon Tube with your fingers wipe the Xenon Tube thoroughly with isopropyl alcohol Part No 95000031 1 Remove the Fibre Optic Cable as described in section 8 1...
Страница 58: ...o p e e s e g a p t x e n n o s t r a h c n o 2 E h t i w r e h t e g o t y a l p s i d e h t 9 5 e g a p y t l u a F s i r o s n e S t u o y a P d n a d e p p a r t g n i h t e m o S n o i t a r e p...
Страница 59: ...t Motor 3 Error Left Centre Right Error Motor Location 7 Segment Score Display Prize Sensor 1 Error Prize Sensor 2 Error Prize Sensor 3 Error Left lengthwise sensor Centre lengthwise sensor Right leng...
Страница 60: ...e 3off pozi head screws M5x12 and remove the Side Cover then remove 2off cap screws M5x12 to remove the Guard 3 Disconnect the 2 connectors 4 Remove the Lamp Base by pressing down on the latch and til...
Страница 61: ...Page 61 5 Remove 2off cap screw M4x10 and remove the Target Assy 6 Reassemble in reverse order Cap screws M4x10 Target Assy...
Страница 62: ...ns with the holes in the PC Board and ensure that the Latch Hooks engage over the PC Board to prevent damage to the light receiving sensor Check the direction of the Target PC Board before refitting R...
Страница 63: ...emble in reverse order Note Take care when seperating the Target Assy not to damage the Target PC Board Do not touch the Half Mirror If it is dirty lightly wipe with a clean dry cloth Do not overtight...
Страница 64: ...Lamp Base by pressing down on the latch and tilting the Lamp Base forwards 2 Remove the lamp by unscrewing it from the Lamp Holder 3 Reassemble in reverse order Lamp Base Latch Lamp Holders Lamp Base...
Страница 65: ...4off cap screws M4x10 and remove the 7 Segment Score PC Board 3 Reassemble in reverse order Note To prevent serious electrical damage to the game ensure that the connector is re fitted the correct wa...
Страница 66: ...Page 66 8 7 Replacing the Fluorescent Lamp or Starter 1 Open the Hood 2 Replace the Fluorescent Lamp or Starter 3 Close and lock the Hood Fluorescent Lamp 15 watt Starter...
Страница 67: ...ear door 2 Disconnect the 5 connectors 3 Remove 4off cap screws M3x6 and remove the Main PC Board 4 Reassemble in reverse order Note To prevent any electrical damage ensure that connectors are refitte...
Страница 68: ...ng the PC Board 1 Remove the lower rear door 2 Disconnect the 8 connectors 3 Remove 4off cap screws M3x6 and remove the Main PC Board 4 Reassemble in reverse order Note To prevent any electrical damag...
Страница 69: ...Lamp 2 Remove 3off security screw M5x12 2off security screw M5x20 and 2off whizz nuts M6 3 Lift the Play Panel only sufficient to gain access to the connector 4 Disconnect the connector and remove the...
Страница 70: ...itch body 3 Reassemble in reverse order Note When replacing the switch lamp assy ensure that the correct colour wires are refitted to the correct terminals Play Panel Select Sw1 Select Sw2 Challenge S...
Страница 71: ...h the Sensor Bracket B 4 Remove 1off cap screw M3x12 flat washer M3 and hex nut M3 from the Sensor Replace the Sensor 5 Reassemble in reverse order Note Ensure that the front Prize Item Sensors have 4...
Страница 72: ...ew M3x12 flat washer M3 and hex nut M3 from the Sensor Replace the Sensor 5 Reassemble in reverse order Note Ensure that the rear Prize Item Sensors have 2 pin connectors light emitting Cap screw M4x1...
Страница 73: ...rse order Note Ensure that a Sensor with a 2 pin connector light emitting and Sensor with a 3 pin connector light receiving are installed alternately on each side Cap screw M3x12 Cap screw M4x10 Conne...
Страница 74: ...Earth connector 3 Loosen 1off cap screw M5x12 located under the Payout Assy Remove 2off cap screws M5x12 located on both sides of the Payout Assy 4 Lift the Payout Assy to clear the bottom screw and r...
Страница 75: ...out Sensor 1 Remove the Payout Assy see 8 13 1 page 74 2 Remove 1off pozi button head screw M3x8 with flat washer and replace the Payout Sensor 3 Reassemble in reverse order Pozi button head screw M3x...
Страница 76: ...74 2 Remove 2off cap screws M4x10 and detach the Guide Base 3 Loosen 1off double point screw M4x8 4 Remove 4off cap screws M4x10 and remove the Payout Motor 5 Reassemble in reverse order Cap screw M4...
Страница 77: ...ing the Gun Assy 1 Remove the Play Panel see 8 10 page 69 2 Remove 2off cap screws M4X6 and remove the Xenon Assy Cover 3 Remove the Fibre Optic Cable from the holder Cap screw M4x6 Cover Xenon Assy F...
Страница 78: ...to the Xenon Tube When installing the fibre optic be careful not to touch the Xenon tube with your fingers or hands If the Xenon tube is accidentally touched clean the area touched with alcohol Part N...
Страница 79: ...nd Lens 1 Remove 7off cap screws M3x8 and remove Gun Body R The grip is permanently fixed to the gun body R 2 Disconnect the two Fast On terminals from the Trigger Switch Cap Screws M3x8 Grip Gun Body...
Страница 80: ...Fibre Optic Holder has come off re attach it by aligning the marking on the Fibre Optic Holder with the marking on the Gun Body L Install the Lens so that the convex curved surface is facing outward...
Страница 81: ...e 1off pozi button head screw M5x20 and hex nut M5 4 Remove the Pipe Clip Pipe Bracket and O ring 5 Remove 1off cap screw M3x20 1off cap screw M3x8 2off hex nuts M3 and separate the Hand Protectors L...
Страница 82: ...der Fibre Optic O Ring Flexible Hose Flange nut M3 Pipe Clip Fibre holder Gun Harness Assy Self tapping screw M3x8 Sleeve M3x8 Trigger Gun Bracket Gun Switch Fast On Terminals Note The tie wraps on th...
Страница 83: ...ane caldo ed ha zone di alto voltaggio anche se la macchina stata spenta c quindi la possibilit di bruciature o scosse elettriche Fare attenzione a non toccare queste zone Xenon assy en vill v re varm...
Страница 84: ...the game to discharge any static they may have built up before touching the PC Board 1 Remove the Play Panel see 8 10 page 69 2 Remove the Cover from the Xenon Assy Remove the Fibre Optic from the ho...
Страница 85: ...fibre optic should be fitted as close as possible to the Xenon Tube When installing the fibre optic be careful not to touch the Xenon tube with your fingers or hands If the Xenon tube is accidentally...
Страница 86: ...th your fingers or hands If the Xenon tube is accidentally touched clean the area touched with alcohol Part No 95000031 1 Remove the Xenon Assy see 8 15 1 page 84 2 Disconnect the 3 connectors 3 Using...
Страница 87: ...rom inside the Filter Bracket 3 Disconnect the connector remove 4off pozi head screws M4x35 with spring and toothed lock washers and remove the Xenon Fan 4 Reassemble in reverse order Xenon Assy Filte...
Страница 88: ...P e c n a n e t n i a M 4 6 1 3 0 7 P B X 6 r e v o C n a F 5 6 1 3 0 7 P B X 7 d r a u G 6 6 1 3 0 7 P B X 8 P X E e c n a n e t n i a m r e k c i t S n o i t u a C 9 5 3 1 6 4 P B X 9 y s s A A t e...
Страница 89: ...7 7 1 3 0 7 P B X D l e n a P r e t c a r a h C 9 7 1 3 0 7 P B X 2 L t e g r a T 1 7 1 3 0 7 P B X 3 R t e g r a T 2 7 1 3 0 7 P B X 4 e s a B p m a L 3 7 1 3 0 7 P B X 5 r o r r i M f l a H 4 7 1 3...
Страница 90: ...B B B B A A B B A A A A C C C C C C Y X X Y Fork Here Fork Here Z on opposite side 15 11 10 1 13 15 30 28 17 20 9 18 8 21 5 12 27 26 16 18 3 25 7 6 29 14 2 19 4 Main Main PC Board PC Board Drive Drive...
Страница 91: ...4 1 t e k c a r B e p i P 4 9 1 3 0 7 P B X 5 1 n o i h s u C m e t I e z i r P 5 9 1 3 0 7 P B X 6 1 L t e e h S r o r r i M 6 9 1 3 0 7 P B X 7 1 R t e e h S r o r r i M 7 9 1 3 0 7 P B X 8 1 C t e...
Страница 92: ...A A A C C C C C C Y X NAMCO LIMITED X Y Fork Here Fork Here Fork Here Fork Here Z 41 36 58 49 55 37 43 44 45 48 42 46 57 38 39 56 57 47 35 34 32 40 33 48 O p e r a t o r s M a n u a l 52 Main Main PC...
Страница 93: ...n e c s e r o u l F 9 4 3 3 0 0 P B X 4 4 8 1 p m a L t n e c s e r o u l F 6 4 0 0 0 5 4 6 5 4 r e t r a t S 0 0 0 0 0 0 3 6 6 4 d e R l l a m s h c t i w S d e t a n i m u l l I 0 9 2 0 0 0 P B X 7...
Страница 94: ...l a r i p S e z i r P 0 2 2 3 0 7 P B X 2 e d i u G l a r i p S 1 2 2 3 0 7 P B X 3 t e k c a r B r o t o M 2 2 2 3 0 7 P B X 4 e s a B e d i u G 1 1 7 9 9 6 P B X 5 t i l S r o s n e S 2 1 7 9 9 6 P...
Страница 95: ...G 7 E L p i r G 8 r e g g i r T 6 1 6 8 8 6 C Q X 9 r e d l o H e r b i F 8 1 6 6 8 6 C Q X 0 1 t h g i e W n u G 6 3 2 3 0 7 P B X 1 1 E R r o t c e t o r P d n a H R L r o t c e t o r P d n a H t e...
Страница 96: ...i t p i r c s e D o N t r a P 1 x o B d r o C 0 5 7 1 6 4 P B X 2 6 0 6 2 2 2 9 N F r e t l i F n I s n i a M 8 2 1 7 0 0 P B X 3 t n u o M l e n a P m m 0 2 r e d l o H e s u F 6 8 7 0 0 5 3 6 m m 0...
Страница 97: ...t S e c i v e S 3 7 1 1 6 4 P B X 3 h c t i w S n o t t u b h s u P 9 5 0 0 0 0 0 6 4 m h o 0 0 1 r e t e m o i t n e t o P d n u o W e r i W w 0 1 4 6 1 0 0 0 6 7 b o n K d e t u l F 9 0 0 0 0 0 4 4...
Страница 98: ...g n i t n u o M r e t l i F 2 4 0 0 0 0 7 4 5 h s e M r e t l i F n a F 6 4 0 0 0 0 7 4 6 r e t l i F 1 4 0 0 0 0 7 4 7 l a c e D g n i n r a W n o n e X 0 4 5 0 0 0 0 4 8 m h o 0 5 r o t s i s e R r...
Страница 99: ...io Wht Vio Gry Grn Yel Org Gry Grn Yel Org Red Brn Red Brn Vio Blk Org Blk Blk Blk Org Blk Blk Org Vio Grn Wht Red Wht Brn Wht Blk Wht Gry Wht Lt Blu Yel Org Red Brn Grn Yel Wht Vio Wht Blu Gry Org Bl...
Страница 100: ...t Grn Wht Vio Wht Blu Wht Org Wht Brn Org Org Gry Red Wht Blk Lt Blu Gry Pnk Gry Yel Brn Blk Grn Blu Vio Blk Red Grn Blk Red Wht Gry Wht Wht Gry Gry Blu Vio Gry Blk Yel Blk Brn Red Target Wht Blk Blk...
Страница 101: ...The Vale London W3 7QE www namco co uk For Technical Support Warranty and Advance Replacement Parts 44 0 20 8324 6120 For Consumable Parts 44 0 20 8324 6102 Fax for both 44 0 20 8324 6126 Copies of N...