EN
WWW.NAKAYAMATOOLS.COM
14
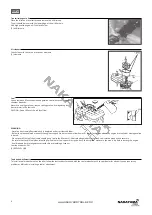
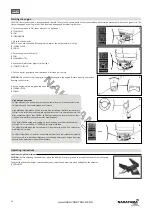
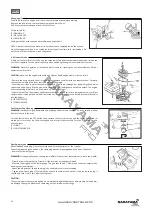
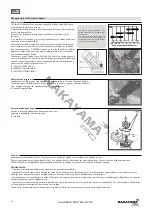
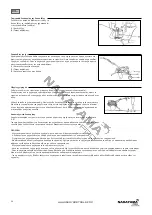
Changing oil
Drain the oil while the engine is still warm to assure rapid and complete draining
·Remove the oil filler cap, remove the drain plug and drain the oil.
·Refill with the recommended oil and check the level.
Oil capacity: 0.6 L
(1) DRAIN PLUG
(2) OIL FILLER CAP
(3) UPPER LEVER
Wash your hands with soap and water after handling used oil.
NOTE: Please dispose of used motor oil in a manner that is compatible with the environ
-
ment. We suggest you take it in a sealed container to your local service for reclamation. Do
not throw it in the trash or pour it on the ground.
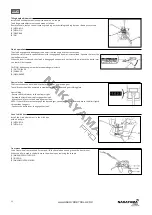
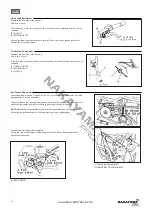
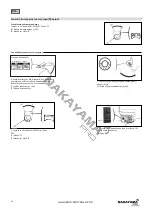
Air Cleaner Service
A dirty air cleaner will restrict air flow to the carburettor. To prevent carburettor malfunction, service the
air cleaner regularly. Service more frequently when operating the engine in extremely dusty areas.
WARNING:
Never use gasoline or low flash point solvents for cleaning the air cleaner element. Afire or
explosion could result in.
CAUTION:
Never run the engine without the air cleaner. Rapid engine wear will be the result.
- Remove the wing nut and the air cleaner cover. Remove the elements and separate them. Carefully
check both elements for holes or tears and replace if damaged.
- Foam element: clean in warm soapy water, risen and allow to dry thoroughly or clean in high flash-point
solvent and allow to dry. Dip the element in clean engine oil and squeeze out all the excess. The engine
will smoke during initial start –up if too much oil is left in the foam.
- Paper element: Tap the element lightly several times on a hard surface to remove excess dirt or blow
compressed air through the filter from the inside out. Never try to brush the dirt off. Brush will force dirt
into the fibbers.
(1) PAPER ELEMENT
(2) FOAM ELEMENT
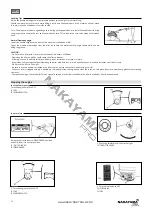
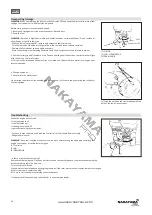
Fuel Strainer Cup Cleaning
WARNING:
Gasoline is highly flammable and explosive under certain conditions. Do not smoke or allow
flames of sparks in the area.
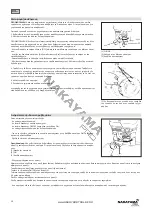
Turn the fuel valve to the OFF position and remove the fuel strainer cup and the O-ring. Wash the re
-
moved parts in solvent, dry them thoroughly and reinstall them securely. Turn the fuel valve ON and
check for leaks.
(1) O-RING
(2) FUEL STRAINER CUP
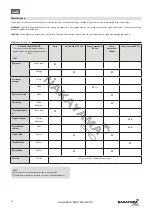
Spark plug service
Recommended spark plug: Please contact the after sales department of the supplier.
To ensure proper engine operation, the spark plug must be properly gapped and free of deposits.
- Remove the spark plug cap.
WARNING:
If the engine has been running the muffler will be very hot. Be careful not to touch the muffler.
- Visually inspect the spark plug. Discard it if the insulator is cracked or chipped.
- Measure the plug gap with a feeler gauge. The gap should be 0.7-0.8mm and correct as necessary by
bending the side electrode.
- Attach the plug washer, thread the plug in by hand to prevent cross-threading.
- Tighten a new spark plug 1/2 turn with the wrench to compress the washer if you are reuse a plug, it
should only take 1/4-1/2 turn after the plug seats.
CAUTION:
The spark plug must be securely tightened. An improperly tightened plug can become very hot and possi
-
bly damage the engine. Never use a spark plug with an improper heat range.
Содержание 042808
Страница 1: ...en el WWW NAKAYAMATOOLS COM ART NO MB6100 042808...
Страница 17: ...EL WWW NAKAYAMATOOLS COM 18 1 2 3 4 1 2 3...
Страница 18: ...EL WWW NAKAYAMATOOLS COM 19 4 5 1 2 3 4 5 6 7 8 9 10 11 12 13 14 1 2 3 4 5 6...
Страница 20: ...EL WWW NAKAYAMATOOLS COM 21 SAE 20W 50 SAE30 1 2 MAX 3 MIN 1 1 95...
Страница 22: ...EL WWW NAKAYAMATOOLS COM 23 1 1 2 3 4 1 2 3...
Страница 23: ...EL WWW NAKAYAMATOOLS COM 24 1 2 3 6 8o 300mm 1 2...
Страница 24: ...EL WWW NAKAYAMATOOLS COM 25 ON OFF OFF 1 OFF 2 ON OFF 1 1 1 2 2 ON OFF OFF 1 OFF 2 ON OFF 3 OFF 1 2 OFF 1 2...
Страница 25: ...EL WWW NAKAYAMATOOLS COM 26 20 3 50 6 100 300 1 2 2 2 2 1 2...
Страница 26: ...EL WWW NAKAYAMATOOLS COM 27 0 6 L 1 2 3 1 2 OFF ring ON 1 O RING 2 0 7 0 8mm 1 2 1 4 1 2...
Страница 27: ...EL WWW NAKAYAMATOOLS COM 28 3 8mm 1 2 5 10mm 1 2 3 60 65mm 2 4 2 6 in 1 2 1...
Страница 28: ...EL WWW NAKAYAMATOOLS COM 29 1 2 OFF ON 3 4 5 1 O RING 2 3 1 ON OFF ON ON 1 2 ON 3 ON OFF ON...
Страница 29: ......


