


36
4
How to use
4 – 1
Basic Operation
1, 5
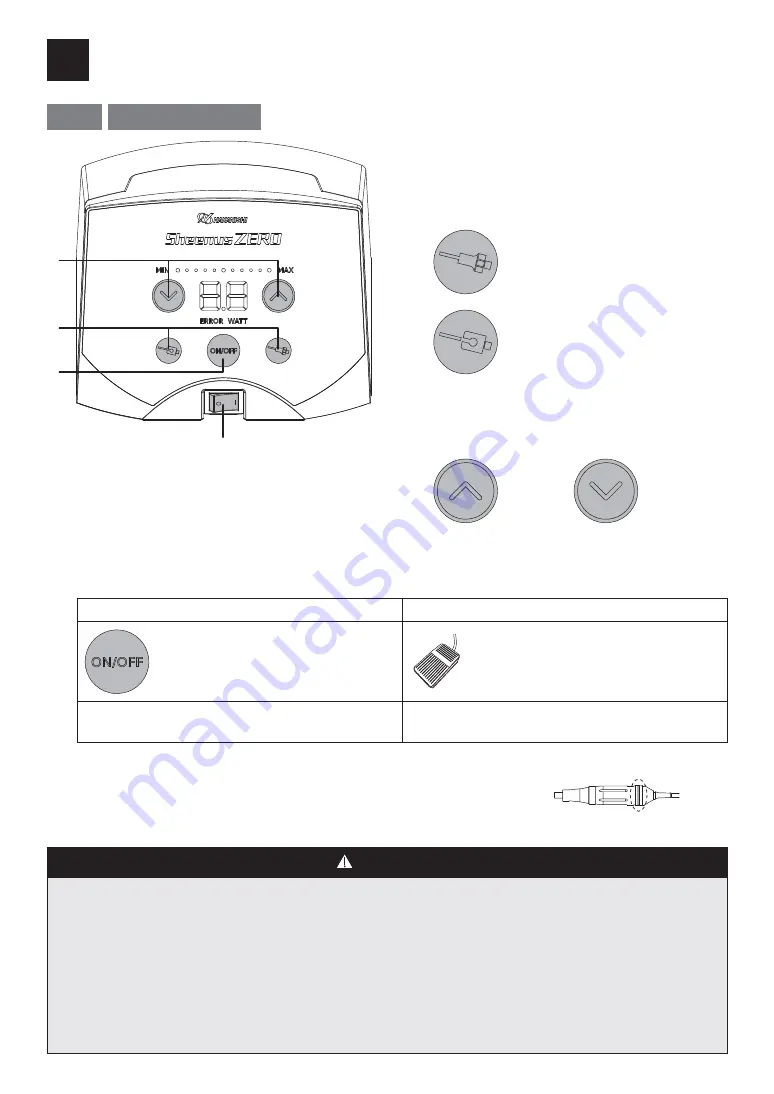
2
3
4
1
Power ON
The LED on the control panel lights up.
2
Mode Selection
The LED of the selected key lights up.
UNCLAMP mode
CLAMP mode
3
Power level adjustment
Press and hold down the key
to activate the key repeat function.
UP key
DOWN key
4
Startup / Stop
You can start and stop the program in one of the following two ways
(1) Manual ON / OFF
(2) When using the foot switch
Press the ON / OFF key to activate
and Stop.
It is activated by pressing the
pedal.
Release the pedal to stop.
(See "6
̴
–
̴
5 Setting the foot switch")
If it is started by the ON / OFF key, it can only be
stopped by the ON / OFF key.
If activated by a footswitch, it can only be stopped
by a footswitch.
The ON / OFF key and the LED on the handpiece light up when starting up.
As long as the LED is on, it is vibrating.
5
Power off
CAUTION
Ɣ
When using the tip holder, be sure to use it in CLAMP mode.
Ɣ
When using the One piece tool , it can be used in UNCLAMP or CLAMP mode (low power).
Ɣ
The thread of the One piece tool is M6 x 0.9. Do not install screws of different size.
Ɣ
Setting the WATT display (see "6 – 4 Setting the amplitude display and WATT Display."), use 8W or less for
continuous use.
Ɣ
Using the handpiece at high power can cause the tool and tip holder to become very hot, which can cause
handpiece failure and injury.
Ɣ
Do not plug or unplug the handpiece and foot switch while the foot switch is depressed. Failure to do so may
result in failure or malfunction.
B6KHHQXV=(52B(1BLQGG