


DTS - ES™ MATRIX 6.1
In this format, the additional signals of the back channel receive a matrix
encoding and are inputted into the right and left surround channels.
During reproduction they are decoded to the right, left and back surround
channels.
Since this bit-stream format is 100% compatible with conventional DTS
signals, the DTS-ES Matrix 6.1 format effect can also be achieved from
sources with DTS-ES 5.1 signals.
Naturally, it is also possible to reproduce from a DTS 5.1 channel decoder,
signals recorded in DTS-ES 6.1.
When a DTS-ES decoder processes a discrete DTS-ES 6.1 or in Matrix 6.1,
these formats are automatically detected and the Optimum Surround
mode is selected. However, some DTS-ES Matrix 6.1 sources may be
detected as DTS. In this case the DTS-ES Matrix mode should be selected
manually in order to reproduce them.
DTS NEO: 6™ SURROUND
This mode applies the conventional 2-channel signals such as digital PCM
or analog stereo signals to the high precision digital matrix decoder used
for DTS-ES Matrix 6.1 to achieve 6.1-channel surround playback. DTS Neo: 6
surround includes two modes for selecting the optimum decoding of the
signal sources:
DTS NEO: 6 CINEMA :
This method is ideal for the reproduction of
movies. The decoding takes place by emphasizing the separation in
order to achieve the same atmosphere with 2-channel, as with 6.1-
channel sources.
DTS NEO: 6 MUSIC :
Mainly recommended for music reproduction.
The right and left front channels do not pass through the decoder and
are reproduced directly so there is no loss in sound quality, and the
effects of the right surround, left surround, central and back surround
channels add a natural sensation of expansion of the sound field.
ENHANCED STEREO
Please refer to the same description of ‘ENHANCED STEREO’ under the
‘LISTENING MODES’ segment of the ‘OPERATION - USING THE T 175 - MAIN
MENU’.
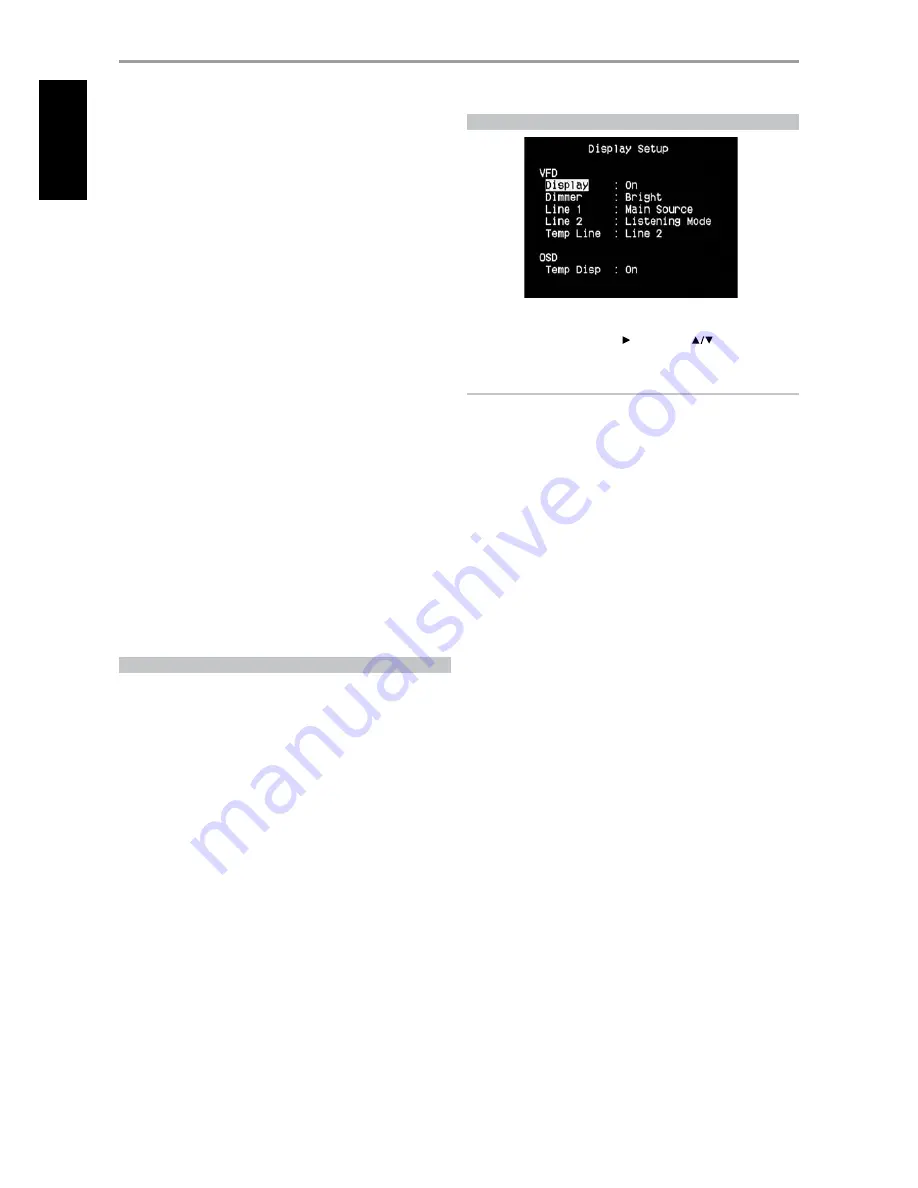
DISPLAY SETUP
The Vacuum Fluorescent Display (VFD) and On-Screen Display (OSD) can be
shown in various ways by navigating through the parameters at the ‘Display
Setup’ menu. Use a combination of or ENTER and
keys to step
through the ‘Display Setup’ menu items.
NOTE
The configurations set forth at ‘Display Setup’ are carried over whenever
it is enabled during A/V Preset setting. Please see also the section below
about ‘AV Presets.’
VACUUM FLUORESCENT DISPLAY (VFD)
Display :
Select ‘On’ to display all applicable data or characters at the
VFD. Nothing will be shown at VFD if ‘Temp’ is selected. At ‘Temp’ setting
however, whenever any of the front panel controls or their corresponding
keys in the remote control is activated, the appropriate VFD characters will
be shown temporarily and then fade away. Note that if any of the Zones
are at powered state, they will be continually shown at VFD even at ‘Temp’
setting.
Dimmer :
If it is desired to reduce the brightness of the VFD, set Dimmer to
‘Dim’. Otherwise, select ‘Bright’ to return to normal VFD brightness.
Line 1, Line 2 :
The VFD shows two main lines of data or characters. Line
2 is the line of data or characters located at the lower bottom of the VFD
while directly above it is Line 1. For both lines, one can select which display
could be shown by choosing through the following
Main Source :
Shows the active Source.
Volume :
Current Volume level is shown.
Listening Mode :
Selected Listening Mode is shown.
Audio Src Format :
Shows the active Source’s detected audio format.
Audio Codec:
Displays the detected audio stream format like Analog,
PCM Surround, Dolby TrueHD, DTS-HD Master Audio and other formats.
Video Mode:
Show the video resolution of the active input source.
Details shown include the video resolution with frame rate. For a better
understanding of these video details, consult with your NAD Audio
Specialist or your distributor’s technical department.
Zone 2-Zone 3-Zone 4 Source :
The assigned Source for the
applicable Zone is shown.
Off :
Select ‘Off’ if it is desired not to show any data at the applicable Line.
Temp Line :
Choose between Line 1 and Line 2 as the desired line where
VFD will be temporarily shown if ‘Temp’ is selected at ‘Display’ option as
described above.
ON-SCREEN DISPLAY (OSD)
Temp Disp:
This applies to the OSD that is temporarily shown at video out
whenever any of the front panel controls or their corresponding keys in the
remote control is activated. Set to ‘On’ if it is desired to show the applicable
OSD at the monitor/TV; otherwise, select ‘Off’.
OPERATION
USING THE T 175 – SETUP MENU
0
EN
G
LIS
H
FR
A
N
Ç
A
IS
ES
PA
Ñ
O
L
IT
A
LIA
N
O
D
EU
TS
CH
N
ED
ER
LA
N
D
S
SV
EN
SK
A
РУ
СС
К
И
Й