background image


5 of 26

www.NabcoEntrances.com 

GT 710-8710 OPUS Low Energy Swing Doors Quick Set-Up and Parts Guide

Rev 12-20-17 

P/N C-00178

Note: It may be necessary to remove the Motor/Operator from the Header to reduce weight, while positioning the Header onto 

the Door Frame.

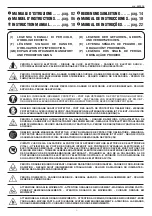
1. Remove the Header Cover. Remove boxes and/or parts bags from inside Header. Set aside.

DN 1089

Cover in Closed Posi on

Swing

UP

to Open

Li  UP to 

Pull out 

Remove Screws

GT 8710 Header

GT 710 Header

Figure 2 

Remove Cover from Header

SECTION 4 .1: Drill Holes in Header (GT8710)

FOR GT710 UNITS SKIP TO 

SECTION 4.2

Note: Protect Header Components from metal chips when drilling.

1. Go to the Strike side of Header. Drill one 7/8 inch hole through the Header to allow all wiring to be drawn inside.

a.  The GT-8710 Header can be ordered with a Knockout hole located at either end of the Header. For details, please call 

Customer Service at 1-888-679-3319.

b.  For Simultaneous Pair Swing Doors, it is acceptable to drill a 7/8 inch hole in the back of the header.

2. Go to the back wall inside Header on the Pivot side.
3. Measure 1 inch from the End Cap of Header towards the center. Mark a Vertical Line.
4. Measure at least 1/2 inch from the bottom of Header towards the top. Mark a Horizontal Line across the Vertical line. This is 

the center of the first screw hole. Drill 1/4 inch screw hole.

5. Mark (1) more Horizontal line across the Vertical line directly above the first screw hole. This is the center of the second 

screw hole. Drill 1/4 inch screw hole. Go to the Strike side of Header. Repeat steps 3 thru 

5

.

DN 1086

Pivot side of Header

1/4” Screw holes

1”

at least

1/2”

Figure 3 

Drill 1/4” Screw holes on both sides of Header

SECTION 4 .2: Prepare the Door Frame

Note: The following instructions are for typical Metal Doors and Frame Profile. It is recommended to use lag bolts.
Note: If the Door Frame is not properly reinforced nor anchored to the building surface, and/or is hollow, reinforce the Door 

Frame with 1/4-20 blind rivnuts (not provided by NABCO).

Note: If the Door Frame is not Metal, ensure the Door Frame being used is of equal strength.
Note: Spindle location is very important when measuring from the Door Jamb.

1. Go to the Pivot Side of Swing door. 
2. Measure up from the top of door to the face of Top door frame:


X

GT 710: 1/8 inch 


X

GT 8710: 1-1/8 inch

3. Mark a Horizontal Line on the face of Top door frame, at both ends.

Содержание GT-710

Страница 1: ...on systems operational WARNING Table of Contents CHAPTER 1 WARNING LABELS 3 CHAPTER 2 GENERAL SAFETY RECOMMENDATIONS 3 CHAPTER 3 SCOPE 4 SECTION 3 1 TO THE INSTALLER 4 SECTION 3 2 OBJECTIVE 4 CHAPTER...

Страница 2: ...LL THE ARM STOP 16 CHAPTER 9 120 VAC GENERAL WIRING 17 CHAPTER 10 ADJUSTMENTS 18 SECTION 10 1 ADJUST OPENING CLOSING FORCE ON LCN TENSION SPRING 18 SECTION 10 2 HYDRAULIC SPEED CONTROL 18 SECTION 11 T...

Страница 3: ...less you have read and understand the General Safety Recommendations Warning Labels contained in this manual Failure to do so may result in bodily injury or property damage Read study and understand t...

Страница 4: ...ntil corrective action can be achieved by a NABCO trained technician Failure to follow these practices may result in serious consequences NEVER leave a Door operating without all Safety detection syst...

Страница 5: ...the End Cap of Header towards the center Mark a Vertical Line 4 Measure at least 1 2 inch from the bottom of Header towards the top Mark a Horizontal Line across the Vertical line This is the center o...

Страница 6: ...les 1 1 8 GT 8710 Pivot Door Jamb 1 8 GT 710 Pivot side of Header 1 4 screw holes Pivot Door Jamb Figure 5 Position Header onto Door Frame 6 Ensure the Header is square and level Use the Header as a t...

Страница 7: ...ft or right side of Header End Cap 2 Flush Header to the Pivot Door Jamb and then line up the screw holes 3 Secure the Header to the Door Frame It is recommended to use 1 4 20 Hex Head Bolts or Lag Bo...

Страница 8: ...Center Pivot DN 1933 10 3 4 Outswing Center Pivot 1 3 4 Header Overlap ON 14 13 12 11 10 9 8 7 6 5 4 3 2 1 4 5 3 Inswing Butt Hinge DN 1934 6 1 2 Bu Hinge Inswing 1 3 4 Header Overlap ON 14 13 12 11...

Страница 9: ...side edge of the Pivot Door Jamb or the Center Pivot to the center of the first Sex Bolt hole used to attach the Arm Shoe 2 Measure and mark a Vertical line on the face of the Swing door 3 At the Vert...

Страница 10: ...5 20 1 2 8 1 4 23 1 4 11 1 2 26 3 16 14 3 4 29 1 8 2 18 1 8 5 1 4 20 3 4 8 1 2 23 1 2 11 3 4 26 3 8 15 29 3 8 2 1 4 18 5 16 5 1 2 20 15 16 8 3 4 23 3 4 12 26 5 8 15 1 4 29 9 16 2 1 2 18 1 2 5 3 4 21...

Страница 11: ...ION 5 3 Secure the Arm Shoe to the Door 1 Go to the back of the Swing door Insert 1 Sex Bolt into each drilled hole 2 Go to the front of the Swing door Secure the Arm Shoe to the Swing Door with 2 1 4...

Страница 12: ...3 11 16 6 3 4 18 9 16 17 7 8 1 1 2 8 11 16 8 5 16 4 1 4 14 3 16 13 3 4 7 18 9 16 17 7 8 1 3 4 8 7 8 8 1 2 4 1 2 14 7 16 7 1 4 18 5 8 17 15 16 2 8 1 16 8 3 4 4 3 4 14 1 2 7 1 2 Long Track only 2 1 4 8...

Страница 13: ...er of the first Sex Bolt hole X X L Shape Arm Go to the bottom of the Door Frame Measure 1 11 16 inches down to the face of Door Mark a Horizontal line across the Vertical Line This is the center of t...

Страница 14: ...the Operator Spindle by aligning the appropriate pre load number to the pre load mark on the underside of Swing Arm RH Outswing LH Outswing RH Inswing LH Inswing RH Inswing 0 Reveal LH Inswing 0 Reve...

Страница 15: ...d e l N o N A B C O E N T R A N C E S G Y R O T E C H 1 1 5 V o l t s A m p s M a x 5 0 1 S i n R L I S T E D R BACK CHECK 2 1 3 4 3 2 1 4 MAI LATCH CHEC BACK CHECK For Commercial or Industrial Use M...

Страница 16: ...ew holes 5 Secure the Arm Stop with 2 1 4 20 x 1 inch Self Tapping screws DN 1064 INSWING ARM 0 1 4 REVEAL INSWING ARM GREATER THAN 1 4 REVEAL OUTSWING ARM Outswing 8400 8500 8600 8710 Inswing 8400 85...

Страница 17: ...tween high voltage and low voltage wiring 120 VAC Power wires must be routed separate from other wiring located near the top of inside Header Ensure that incomming electrical ground is properly secure...

Страница 18: ...n wrench counterclockwise not more than 4 full turns SECTION 10 2 Hydraulic Speed Control DN 0562 Swing Arm Hydraulic Speed Controls The main sprocket may block access to the main speed hydraulic adju...

Страница 19: ...s Control if the MPU Error occurs repeatedly Drive Circuit Error If the Drive Circuit detects an unusual state the Opus will stop door movement Possible causes are X X Over current at motor X X Abnorm...

Страница 20: ...rgy Swing Doors Quick Set Up and Parts Guide www NabcoEntrances com P N C 00178 Rev 12 20 17 DN 1123 Service Parts GT 710 LOW ENERGY HEADER 2 3 4 6 7 8 9 10 11 13 14 15 17 16 18 19 21 20 1 5 4 5 22 23...

Страница 21: ...13 M 01072 HARNESS POWER MAGNUM OPUS 14 T 00015 Zinc FHMS 1 4 20x0 750L PHIL ZINC T 00017 Dark Bronze FHMS 1 4 20x0 750L PHIL BLK ZN 15 A 00805 SWITCH ROCKER SWINGER ON OFF HOLD OPEN 16 A 00454 ARM ST...

Страница 22: ...nergy Swing Doors Quick Set Up and Parts Guide www NabcoEntrances com P N C 00178 Rev 12 20 17 DN 1128 Service Parts GT 8710 LOW ENERGY HEADER 1 2 3 4 5 6 7 8 9 10 11 15 16 17 18 19 14 20 2 21 22 23 2...

Страница 23: ...CTING 13 M 01072 Simultaneous Pair only HARNESS POWER MAGNUM OPUS 14 A 00805 SWITCH ROCKER SWINGER ON OFF HOLD OPEN 15 A 00454 ARM STOP ASSEM FOR 400 8400 500 8500 16 T 00325 PHMS 1 4 20X1 500L PHIL T...

Страница 24: ...P N C 00178 Rev 12 20 17 DN 1073 Service Parts SWING ARM ASSEMBLIES Inswing Arm Reveal Equal to 0 degrees Outswing Arm Assembly CU Inswing Arm Assembly Reveal Greater than 0 inches Inswing Track Asse...

Страница 25: ...YPE F 11 A 00471 KIT GT710 PARTS 12 A 60658 RH Clear INSWING ARM 0 TO 2 REV RH 204 A 70658 RH Dark Bronze INSWING ARM 7 3 4 RH 313 A 60671 RH Clear INSWING ARM 2 TO 5 1 2 REV RH 204 A 70671 RH Dark Br...

Страница 26: ...ng Doors Quick Set Up and Parts Guide www NabcoEntrances com P N C 00178 Rev 12 20 17 Swing Arm Assemblies Item Part Finish Sizes Notes Description 19 A 60435 Clear C U GUIDE TRACK 21 0L 204 A 70435 D...

Отзывы: