DE
Lieferumfang:
› PICO W04
› Produktblatt
IT
Contenuti:
› PICO W04
› Scheda tecnica
EN
Contents:
› PICO W04
› Product sheet
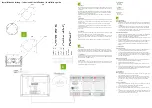
Installationsanleitung / Istruzione di installazione / Installation guide
DE
Anschluss:
Verbinden Sie zuerst das Netzwerk an den Ethernet-Anschluss, um eine Netz-
werkverbindung aufzubauen. Dann verbinden Sie die 24 V DC Spannungsversor-
gung. Sobald die Stromversorgung hergestellt wurde, startet der Gebäuderegler.
IT
Collegamento:
Collegare prima la rete alla porta Ethernet per stabilire una connessione di rete.
Quindi collegare l‘alimentazione a 24 V CC. Non appena viene stabilita l‘alimenta-
zione, il controller dell‘edificio si avvia.
EN
Connection:
First connect the network to the Ethernet port to establish a network connection.
Then connect the 24 V DC power supply. As soon as the power supply has been
established, the building controller starts.
2
DE
Ersteinrichtung:
Netzwerkeinstellungen:
1.
Kontrollieren Sie als erstes die Netzwerkeinstellungen des Gebäudereglers.
Melden Sie sich hierzu als Konfigurator an und öffnen sie die Netzwerkein-
stellungen.
2.
Standardmäßig wird die IP-Adresse von einem DHCP-Server im Netzwerk
gelesen und in den Netzwerkeinstellungen angezeigt. Falls eine statische
IP-Adresse benötigt wird, wählen sie die Option „LAN-STATIC“ beim Typ aus
und konfigurieren Sie dann die IP-Adresse manuell.
Plus Dienste Einstellungen:
1.
Registrieren Sie sich online auf my-gekko.com mit der ID Ihres Gebäudereg-
lers. Diese finden Sie unter in den Einstellungen des Gebäudereglers.
2.
Aktivieren Sie die Plus dienste im Online-Portal.
3.
Stellen Sie sicher, dass der myGEKKO Gebäuderegler eine Verbindung zum
Internet herstellen kann.
4.
Aktivieren und kontrollieren Sie die Einstellungen zu den Plusdiensten und
ob diese für den Gebäuderegler nun erreichbar sind. Diese Einstellung
finden Sie unter den Netzwerkeinstellungen unter dem Punkt „Plus Ver-
bindung“
IT
Configurazione:
Impostazioni di rete:
1.
Verificare innanzitutto le impostazioni di rete del controller dell‘edificio. Per
fare ciò, accedi come configuratore e apri le impostazioni di rete.
2.
Per impostazione predefinita, l‘indirizzo IP viene letto da un server DHCP
sulla rete e visualizzato nelle impostazioni di rete. Se è richiesto un indirizzo
IP statico, selezionare l‘opzione „LAN-STATIC“ in Tipo e quindi configurare
manualmente l‘indirizzo IP.
Impostazioni servizi Plus:
1.
Registrati online su my-gekko.com con l‘ID del controller dell‘edificio. Puoi
trovarlo nelle impostazioni del controller dell‘edificio.
2.
Attiva i servizi plus nel portale online.
3.
Assicurati che il controller di edificio myGEKKO possa connettersi a Inter-
net.
4.
Attivare e verificare le impostazioni per i servizi plus e se ora possono esse-
re raggiunti dal controllore dell‘edificio. Questa impostazione si trova nelle
impostazioni di rete in „Collegamento Plus“.
EN
Configuration:
Network settings:
1.
First check the network settings of the building controller. To do this, log in
as a configurator and open the network settings.
2.
By default, the IP address is read from a DHCP server on the network and
displayed in the network settings. If a static IP address is required, select
the „LAN-STATIC“ option under Type and then configure the IP address
manually.
Plus services settings:
1.
Register online at my-gekko.com with the ID of your building controller. You
can find this under in the settings of the building controller.
2.
Activate the plus services in the online portal.
3.
Make sure that the myGEKKO building controller can connect to the inter-
net.
4.
Activate and check the settings for the plus services and whether these can
now be reached by the building controller. This setting can be found under
the network settings under „Plus connection“.
3
1
DE
Montage:
Das Display wird im besten Fall auf Augenhöhe des Benutzers montiert, um eine
einfache Bedienung zu ermöglichen. Zu tiefes Montieren kann zu Rückenproble-
men führen.
Befestigen Sie die Montageplatte mit Schrauben auf einer regulären Unterputz-
oder Hohlwanddose mit einem Durchmesser von 68mm. Bringen Sie dann den
myGEKKO PICO auf die Montageplatte an.
Alternativ können Sie die Montageplatte auch an eine Vimar/ Ticino Dose an-
bringen.
IT
Montaggio:
Nella migliore delle ipotesi, il display è montato all‘altezza degli occhi dell‘utente
per consentire un facile utilizzo. Un montaggio troppo basso può causare proble-
mi alla schiena.
Fissare la piastra di montaggio con viti su una normale scatola da incasso o
intercapedine con un diametro di 68 mm. Fissare quindi myGEKKO PICO alla
piastra di montaggio.
In alternativa è possibile fissare la piastra di montaggio anche ad una cassetta
Vimar/Ticino.
EN
Assembly:
In the best case scenario, the display is mounted at the user‘s eye level to enable
easy operation. Mounting too low can lead to back problems.
Fasten the mounting plate with screws on a regular flush-mounted or cavity wall
box with a diameter of 68mm. Then attach the myGEKKO PICO to the mounting
plate.
Alternatively, you can also attach the mounting plate to a Vimar/ Ticino box.
1
2


