9. RISER RAIL FITTING INSTRUCTIONS
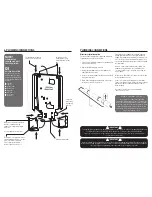
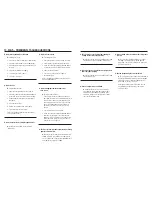
1. Establish position for the riser rail, and mark
the wall for the lower mounting bracket. Make
allowances for the tallest person likely to use the
shower regularly.
2. Remove covers from the wall brackets.
3. Position the lower bracket and mark the wall for
the screw fixing. Then drill and plug the wall and fix
the lower bracket without the rail location notch.
4. Fit the rail into the lower bracket. Place the
remaining bracket with the rail location notch
on top of the rail, making sure that the rail slot is
located into the notch. Ensure the hole position is
vertically aligned and mark the wall. Remove the
rail and bracket, then drill and plug the wall.
5. Slide the height adjuster onto the rail. Tighten to
the rail by turning the locking cap. Then fit the
soap dish, dampening the rail will make it easier to
slide on. Finally fit the hose retaining ring onto the
bottom of the rail below the soap dish.
6. Replace the rail assembly into the lower bracket.
Refit the top bracket, ensuring the slot in the rail is
located into the bracket notch and fix to the wall.
7. Slide covers onto both brackets.
8. Firmly attach flexible hose to showerhead making
sure sealing washer is in place after first passing
through the hose retaining ring.
NOTE: The adjustable height adjuster grips the conical
ends of the hose, not the handle of the showerhead.
CAUTION
Check there are no hidden cables or pipes before drilling holes for wall plugs.
Exercise great care when using power tools near water.
The use of a residual current device (RCD) is recommended.
!
!
!
!
Duo
QI
eco
eco
Temperature
TIPS
A piece of insulating or masking tape applied to
the wall before marking out the Fixing holes will
help stop the drill from wandering, particularly on
tiled surfaces. When working near a basin or bath,
insert the plug in the waste fitting so that small
parts cannot be lost.
Take care not to drop accessories or tools into
basin or bath.
!
!
10. COMMISSIONING THE SHOWER
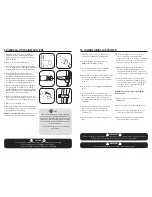
1. Make sure that the electrical supply has been
isolated at the double pole isolating switch.
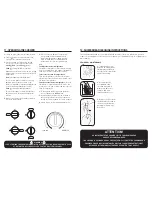
2. Turn the top power selector knob to the
‘Cold’ setting (Solid Blue Symbol).
3. Turn the bottom temperature control knob
anti-clockwise to the full cold position.
4. Ensuring the water supply is fully on at the mains
stop cock and isolating service valve (if fitted),
check that water is not leaking from the bottom
of the case.
5. Switch on the electrical supply at the double pole
switch.
6. Turn the power selector knob to the cold
position. Check that water flows freely from the
shower within a few seconds. The water from
the showerhead will be at full force and at a cool
temperature.
7. Rotate the bottom temperature control knob
slowly clockwise fully. This will gradually
reduce the flow with the water temperature
remaining cool.
8. Return the knob anti-clockwise to maximum
flow.
9. Now turn the top power selector knob to the
‘Low’ setting (Outline Red ECO Symbol).
Allow a few seconds for the warmer temperature
to reach the showerhead - this shows that the
‘ECO’ power setting is operating correctly.
10. Now turn the top power selector knob to
the ‘High’ setting (Solid Red Symbol). The
temperature should rise further - this shows
that the full power setting is operating correctly.
11. Turn the bottom temperature control knob
clockwise for hotter water and anti-clockwise
for cooler water. Allow a few seconds between
selections - for the temperature change to
reach the showerhead.
NOTE. When the temperature is changed the
flow rate alters.
12. Turn the power selector knob to the
OFF position.
13. Switch off pull-cord or wall mounted switch.
14. Remove the shower head and make sure no
debris has worked into it. Clean and refit.
15. Remove the filter and clean out any debris
from the pipework, clean and refit.
IMPORTANT
The shower unit must be full of water before heat settings are used.
IMPORTANT
Turn the Temperature control knob anticlockwise until the valve is fully open before switching on the unit.
This will ensure a fast fill up of the unit when the shower is first switched on.
!
!
!
!
!
!
!
!
Содержание Solo QI
Страница 12: ...NOTES NOTES ...


