


KVM DVI over IP PoE Extender - 500771
© MuxLab Inc. 2016
94-000846-A / SE-000846-A
Page 9
Note: The KVM Transmitter name can be set via the web interface of the said KVM Transmitter.
To do so, follow the procedure in the section “Setting the Transmitter/Receiver Name”.
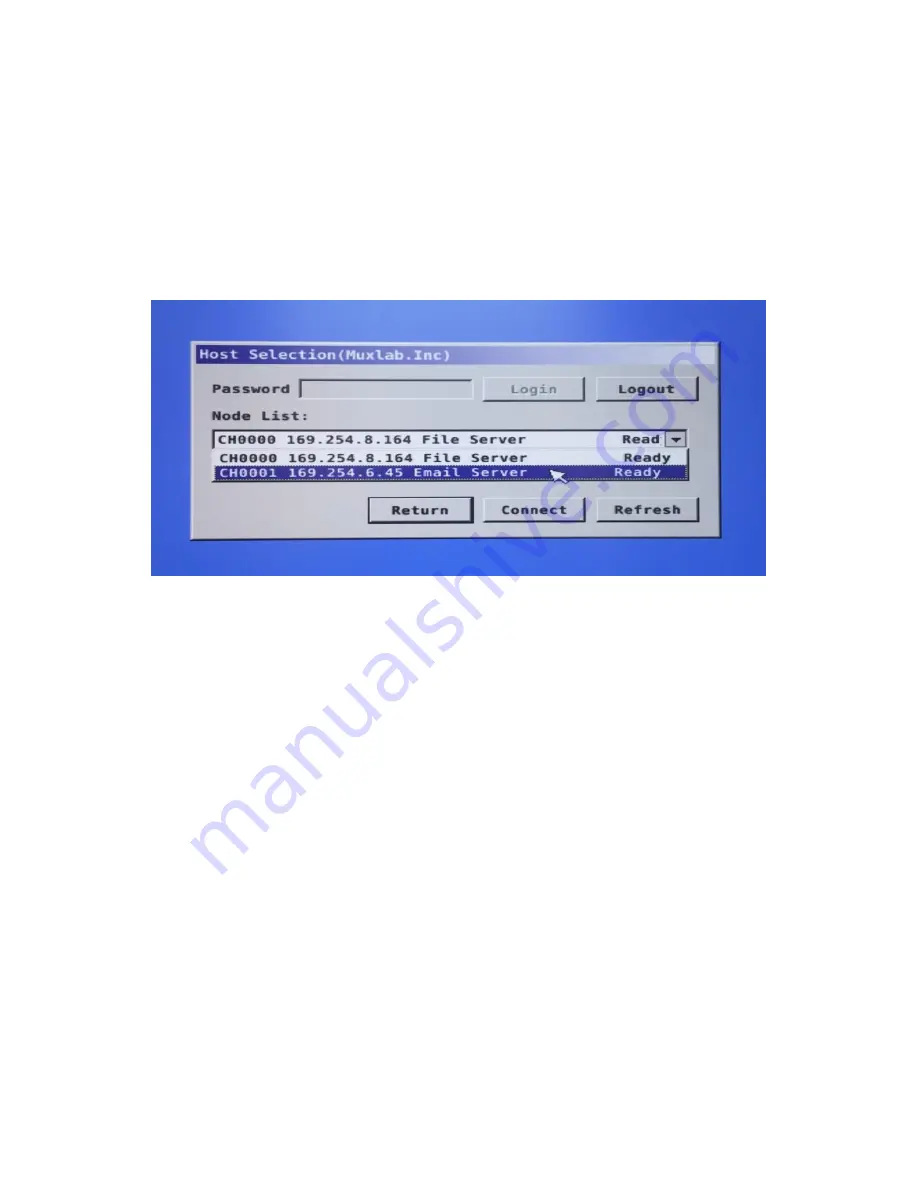
To actually select a workstation to control, use the mouse to click on the desired workstation from the
provided “Node List”. Workstations that indicate a status of “Ready” are available for control, while
workstations that have a status of “Busy” are already being controlled by another client and are not
available to you at this time. Click on a free workstation to highlight it and then click on “Connect” to
connect with that workstation.
Once connected, the workstation screen will be displayed and the mouse and keyboard will function
normally, just as if you were directly connected and located next to the workstation.
Note: If you accidently try to connect to a workstation with a “Busy” status (meaning that it is already
connected to another client), then the KVM OSD Menu will return within a few seconds, rather than
presenting the operator with the workstation screen.
3.5 Returning
Clicking on “Return”, will return you to the previous workstation you were controlling. Note that if
another client connected to your previous workstation, while your OSD KVM Menu was active, then you
will not have access to this workstation until it is free, or instead you can simply connect with another
workstation that is currently free (in “Ready” state). Note that when you active the OSD, you lose
control of the workstation you were controlling.
3.6 Refresh
Pressing “Refresh” updates the Node List of available workstations. Note that during power up, a refresh
is automatically performed by the system.


