3
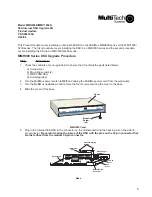
10 If the Voice/Fax board is in the chassis, remove the ribbon cable between the Aggregate board and the
Voice/Fax board.
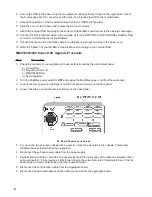
PC Board Removal
11 Remove the Aggregate board from the chassis.
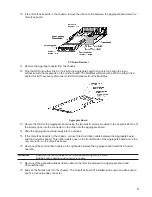
12 Plug the DSU into either link A or link B on the Aggregate board being careful to align the 4-pin
connector with the receptacle on the mother board. The MultiMux will work with a DSU in either link A
and/or link B. If necessary, disconnect old DSUs/modems from the MultiMux.
Aggregate Board
13. Secure the DSU to the Aggregate board using the two plastic screws provided in the upgrade kit. One of
the screws goes into the connector on the other into the Aggregate board.
14 Slide the Aggregate board part way into the chassis.
15 If the Voice/Fax board is in the chassis, connect the short ribbon cable between the Aggregate board
and the Voice/Fax board. This ribbon cable goes on the front left side of the Aggregate board and is the
only connector on the Voice/Fax board.
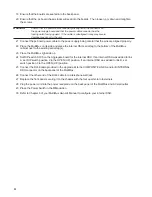
16 Reconnect the control ribbon cable on the right side between the Aggregate board and the Channel
board(s).
WARNING:
Make sure the ribbon cables are not crimped and are tight or the entire
MultiMux will be damaged when power is applied.
17 Reconnect the data and address ribbon cable on the left side between the Aggregate board and
Channel Board(s).
18 Slide all the boards fully into the chassis. The Voice/Fax board (if installed) will require an extra push to
seat it in its board edge connector.


