Visit
for new product releases!
INST
ALL
ATION
Cop
yrigh
t © 2019 Multilink I
nc
. A
ll righ
ts r
eser
ved • Sp
ecific
ations subjec
t t
o change without notic
e • Re
v. 11/20/2019 •
Page 11
Do
cu
men
t N
o.
O
pti
ma
16
Ins
tal
la
tio
n G
ui
de
4.20 Attach Splice Tray
With the splice tray cover still removed,
using the supplied screws secure the splice tray
to the appropriate holes located in the Optima 16
base.
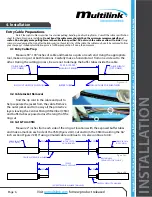
4.23 Fiber Management & Tie-Wraps
Insert the included fiber management clips
into the slots of the Optima 16 hinged shell in the
orientation shown. Ensure each clip is fully pushed
in to prevent it from falling out in later steps. Then
using the supplied tie-wraps insert into each fiber
management clip on the shell to hold the fiber
pigtail.
4.21 Attach Splice Tray Cover
Before finalizing the splicing section of
the Optima 16 attach the splice tray cover on the
hinges of the splice tray base. The cover ensures
that the fiber is secured from the internal buffer
tubes from damaging the fiber itself or causing any
service disruption.
4.22 Pigtail & Branch Buffer Tube Routing
Once everything has been successfully
spliced and secured into place make sure the
pigtail fibers (spiral wrap shown) and the branched
off buffer tube are routed following the buffer
tubes below it. Using the inserted tie-wraps on
each fiber management clip on the upper side of
the base tighten down enough to hold in place but
not directly damage the fiber.
Installation (Cont.)
Optima 16 Hinged Shell Installation


