background image

17

S

ection

 4 — P

roduct

 c

are

Parking Brake

 WARNING

Never attempt to adjust the brakes while the engine is running. 
Always disengage PTO, move shift lever into neutral position, 
stop engine and remove key to prevent unintended starting.

If the riding mower does not come to a complete 

stop when the brake pedal is completely 

depressed, or if the riding mower’s rear wheels can 

roll with the parking brake applied, the brake is 

in need of adjustment. See an authorized service 

dealer to have your brakes properly adjusted.

Deck

Note: Check the riding mower’s tire pressure before 

performing any deck leveling adjustments. Refer 

to Tires, in the Assembly & Set-Up section for more 

information regarding tire pressure.

Front-to-Rear Levelling

It is possible to adjust the pitch of the cutting deck. 

The front of the deck should be between 0” (level) 

and 1/4” lower than the rear of the deck. Adjust if 

necessary as follows:
1. 

With the riding mower parked on a firm, 

level surface, place the deck lift lever in the 

middle position and rotate the blade so that 

it is aligned with the front and rear of the 

riding mower.

2. 

Measure the distance from the front of 

the blade tip to the ground and the rear 

of the blade tip to the ground. The first 

measurement taken should be between 

0” (level) and 1/4” less than the second 

measurement. Determine the approximate 

distance necessary for proper adjustment 

and proceed, if necessary, to the next step.

3. 

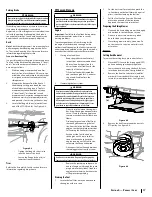
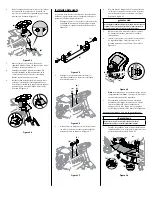
Locate the flange lock nut (a) on the front 

end of the PTO lift rod (b). See Figure 4-4.

(a)

(b)

Figure 4-4

• 

Tighten the flange lock nut (a) to 

raise the front of the deck.

• 

Loosen the flange lock nut (a) to 

lower the front of the deck.

Tires

Refer to the Assembly & Set-Up section for more 

information regarding tire pressure.

Off Season Storage

 WARNING

Never store riding mower with fuel in tank indoors or in poorly 
ventilated areas where fuel fumes may reach an open flame, 
spark, or pilot light as on a furnace, water heater, clothes dryer, 
or gas appliance.

Engine

Important: Fuel left in the fuel tank during warm 

weather deteriorates and will cause serious 

starting problems.
To prevent gum deposits from forming inside 

the engine’s carburetor and causing possible 

malfunction of the engine, the fuel system must be 

either completely emptied, or the gasoline must be 

treated with a stabilizer to prevent deterioration.
1. 

If using a fuel stabilizer:

• 

Read the product manufacturer’s 

instructions and recommendations.

• 

Add to clean, fresh gasoline the 

correct amount of stabilizer for the 

capacity of the fuel system.

• 

Fill the fuel tank with treated fuel 

and run the engine for 2-3 minutes 

to get stabilized fuel into the 

carburetor.

2. 

If emptying the fuel system:

 WARNING

Gasoline is extremely flammable and can be explosive 
under certain conditions. Drain gasoline before storing the 
equipment for extended periods. Drain fuel only into an 
approved container outdoors, away from an open flame. 
Allow engine to cool. Extinguish cigarettes, cigars, pipes, 
and other sources of ignition prior to draining fuel. Store 
gasoline in an approved container in safe location.

• 

Do not drain fuel when the engine is 

hot. Allow the engine adequate time 

to cool. Drain fuel into an approved 

container outdoors, away from open 

flame.

• 

Drain any large volume of fuel from 

the tank by disconnecting the fuel 

line from the in-line fuel filter near the 

engine. See the complete instructions 

for Draining the Fuel in this section.

• 

Reconnect the fuel line and run 

the engine until it starts to falter, 

then use the choke to keep the 

engine running until all fuel in the 

carburetor has been exhausted.

• 

Disconnect the fuel line and drain any 

remaining gasoline from the system.

 WARNING

Gasoline is a toxic substance. Dispose of gasoline properly. 
Contact your local authorities for approved disposal methods.

• 

Remove the spark plug and pour one 

ounce of engine oil through the spark 

plug hole into the cylinder. Crank the 

engine several times to distribute the 

oil. Replace the spark plug.

Draining the Fuel

1. 

Locate the fuel filter, it may be attached to 

the engine with a tie strap. 

2. 

Cut the tie strap, if present, then pinch the 

in-line clamp on the fuel filter with a pair of 

pliers, slide the clamp up the fuel line. 

3. 

Pull the fuel line free from the filter and 

place the open end of the line into an 

approved container to drain the fuel.

Preparing the Riding Mower

1. 

Clean and lubricate riding mower thoroughly 

as described in the Lubrication section.

2. 

Do not use a pressure washer or garden 

hose to clean your riding mower.

3. 

Store riding mower in a dry, clean area. Do 

not store next to corrosive materials, such 

as fertilizer.

Service

Cutting Deck Removal

To remove the cutting deck, proceed as follows:
1. 

Place the PTO lever in the disengaged (OFF) 

position and engage the parking brake.

2. 

Lower the deck by moving the deck lift lever 

into the bottom notch on the right fender.

3. 

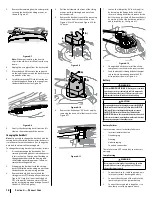
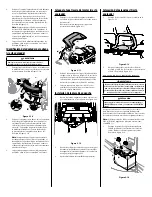
Remove the bow-tie cotter pin (a) and flat 

washer (b) from the deck lift assembly, and 

retain for reinstallation later.  See Figure 4-5.

(a)

(b)

Figure 4-5

4. 

Remove the belt from around the tractor’s 

PTO pulley. See Figure 4-6.

Figure 4-6

Содержание 769-11837A

Страница 1: ...CTIONS MAY RESULT IN PERSONAL INJURY Operator s Manual Form No 769 11837A December 7 2016 Important Safe Operation Practices 2 Assembly Set Up 7 Controls Operation 10 Product Care 14 Parts Warranty See Separate Supplement Table of Contents NOTE This Operator s Manual covers several models Features may vary by model Not all features in this manual are applicable to all models and the model depicted...

Страница 2: ...lace transmission in neutral set parking brake stop engine and remove key before dismounting 22 Use extra care when loading or unloading the machine into a trailer or truck This machine should not be driven up or down ramp s because the machine could tip over causing serious personal injury The machine must be pushed manually on ramp s to load or unload properly WARNING Thissymbolpointsoutimportan...

Страница 3: ...nder 14 years of age to operate this machine Children 14 and over should read and understand the instructions and safe operation practices in this manual and on the machine and should be trained and supervised by an adult Towing 1 Tow only with a machine that has a hitch designed for towing Do not attach towed equipment except at the hitch point 2 Follow the manufacturers recommendation for weight...

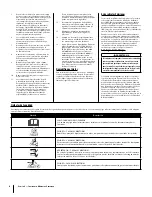
Страница 4: ...y Tampering with the governor setting can lead to a runaway engine and cause it to operate at unsafe speeds Never tamper with factory setting of engine governor Notice Regarding Emissions Engines which are certified to comply with California and federal EPA emission regulations for SORE Small Off Road Equipment are certified to operate on regular unleaded gasoline and may include the following emi...

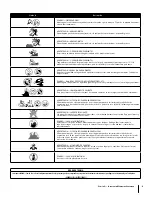
Страница 5: ...this equipment may create sparks that can start fires around dry vegetation Do not drive through piles of dry leaves or tall dry grass Max 10 Keep the machine free of debris WARNING HOT SURFACE Engine parts especially the muffler become extremely hot during operation Allow engine and muffler to cool before touching DANGER ROTATING BLADES To reduce the risk of injury keep hands and feet away Do not...

Страница 6: ...t gauge up or down until the left corner touches the slope See Figure 1 and Figure 2 5 If there is a gap below the gauge the slope is too steep for safe operation See Figure 2 above 1 2 d a s h e d l i n e Slope Gauge Figure 2 Figure 1 12 Slope 12 Slope WARNING Slopes are a major factor related to tip over and roll over accidents which can result in severe injury or death Do not operate machine on...

Страница 7: ...e sure everything is present Hardware is listed below Hitch Plate Seat Mounting Bracket w two shoulder bolts lock nuts installed Recommended Tools for Assembly 3 8 wrench and or socket 1 2 wrench and or socket 7 16 wrench and or socket 9 16 wrench and or socket Phillips screw driver 1 4 drive ratchet Manually Moving the Tractor On 6 Speed units shift the shift lever into NEUTRAL On Hydro units use...

Страница 8: ...n the seat bracket a in place over the holes from where the self tapping bolts b were removed as shown in Figure 2 7 a b b Figure 2 7 4 Using a 1 4 drive ratchet with a 3 8 socket secure the seat bracket a with the self tapping bolts b removed in step 2 See Figure 2 7 CAUTION Do not use any type of power tool e g impact gun or electric drill with nut driver attached when tightening the self tappin...

Страница 9: ...ver Ifequipped 1 Remove the two factory installed hex screws a located on the rear engine cover b Retain the hex screws a for later instructions See Figure 2 11 a a b Figure 2 11 2 Install the rear engine cover b by positioning it in place as shown in Figure 2 11 Tip the rear engine cover b forward to fit it into the slots provided then rotate it backwards to align the mounting holes 3 Secure the ...

Страница 10: ...tires Important Refer to the tire sidewall for exact tire manufacturer s recommended or maximum psi Do not overinflate Uneven tire pressure could cause the cutting deck to mow unevenly Gas Oil Fill up The gasoline tank is located under the left side of the seat on 30 deck models and on the engine on 24 deck models Do not overfill WARNING Useextremecarewhenhandlinggasoline Gasolineisextremely flamm...

Страница 11: ...t unintended starting The ignition module is located on the left fender of the riding mower seated in the operator s position adjacent to the throttle choke control or throttle control Ignition Module w Reverse Caution Mode If equipped To start the engine insert the key into the ignition switch and turn clockwise to the START position Release the key into the NORMAL MOWING MODE position once the e...

Страница 12: ...on the left hand side from the operator s position in the controls panel Use this window to identify the riding mower s fuel needs See Figure 4 3 Fuel Fill Cap M The fuel fill cap is located below the right side of the seat on 30 deck models and on the engine to the rear of the riding mower on 24 deck models Refer to the Assembly Set up section in this manual for instructions for 30 deck models an...

Страница 13: ...acingthePTO BladeEngage leverinthedisengaged OFF position depressingtheclutch brakepedalandengagingthe parkingbrake Ifleavingtheridingmowerunattended also turntheignitionkeyOFFandremovethekey WARNING Always look down and behind before and while backing up to avoid a back over accident 1 Move the throttle choke control if equipped or throttle control if equipped into the FAST position 2 Place the s...

Страница 14: ...ge the blade proceed as follows 1 Move the throttle choke control if equipped or throttle control if equipped into the FAST position 2 Grasp the PTO lever and pivot it all the way forward into the engaged ON position Note Keep the throttle choke control if equipped or throttle control if equipped in the FAST rabbit position for the most efficient use of the cutting deck Important The PTO Blade Eng...

Страница 15: ... will not mulch grass 1 Engine speed too low Place throttle in FAST rabbit position 2 Wet grass Do not mulch when grass is wet 3 Excessively high grass Mow once at a high cutting height then mow again at desired height or make a narrower cutting swath 4 Dull blade Sharpen or replace blade Maintenance WARNING Beforeperforminganymaintenanceorrepairs disengage PTO moveshiftlever ifequipped intoneutra...

Страница 16: ...d 150 F 65 C Avoidcontactwiththeseareas Inspect muffler periodically and replace if necessary Replacement parts for the muffler must be the same and installed in the same position as the original parts Battery Clean the battery by removing it from the riding mower and washing with a baking soda and water solution If necessary scrape the battery terminals with a wire brush to remove deposits Coat t...

Страница 17: ...rect amount of stabilizer for the capacity of the fuel system Fill the fuel tank with treated fuel and run the engine for 2 3 minutes to get stabilized fuel into the carburetor 2 If emptying the fuel system WARNING Gasoline is extremely flammable and can be explosive under certain conditions Drain gasoline before storing the equipment for extended periods Drain fuel only into an approved container...

Страница 18: ...ts b that secure it See Figure 4 9 for 30 decks and Figure 4 10 for 24 decks a b b b Figure 4 9 a b b b Figure 4 10 6 Remove the belt keeper 30 decks only by removing the hex bolt a that secures it See Figure 4 11 a Figure 4 11 7 Loosen the idler pulley 24 decks only a by loosening the flange lock nut b that secures it enough to allow clearance for the belt to move past it and off Remove the belt ...

Страница 19: ...Protect yourhandsbyusingheavygloveswhengraspingtheblade WARNING Periodically inspect the blade and or spindle for cracks or damage especially after you ve struck a foreign object Do not operate the machine until damaged components are replaced CAUTION If the cutting edge of the blade has previously been sharpened or if any metal separation is present replace the blades with new ones The blade may ...

Страница 20: ...Notes 4 ...

Страница 21: ... del Operador Formulario N 769 11837A 7 de deciembre de 2016 Importantes medidas de seguridad 2 Armado y montaje 7 Controles y Funcionamiento 10 Cuidado del producto 14 Piezas Garantía Consulte el suplemento que se adjunta por separado Índice NOTA Este manual del operador abarca varios modelos Las características técnicas pueden variar según el modelo No todas las características que se incluyen e...

Страница 22: ...ga el freno de mano detenga el motor y retire la llave antes de desmontar 22 Tenga mucho cuidado al cargar o descargar la máquina en un remolque o camión Esta máquina no debe conducirse subiendo o bajando rampas ya que la máquina podría ADVERTENCIA Este símbolo indica instrucciones de seguridad importantes que de no cumplirse pueden poner en peligro su seguridad personal y o material y la de otras...

Страница 23: ...e deben leer y entender las instrucciones de funcionamiento y las normas de seguridad contenidas en este manual y en la máquina y deben estar capacitados y supervisados por un adulto Remolque 1 Remolque únicamente con una máquina que tenga un enganche diseñado para remolcar No acople equipo remolcado excepto en el punto de enganche 2 Siga las recomendaciones del fabricante en lo que respecta a los...

Страница 24: ...gulador el motor se puede desbocar y funcionar a velocidades inseguras Nunca altere los ajustes de fábrica del regulador del motor Aviso sobre las Emisiones Los motores certificados que cumplen con las normas sobre emisiones federales de la EPA y de California para SORE Equipos pequeños todo terreno pueden funcionar con gasolina sin plomo común y pueden incluir los siguientes sistemas de control d...

Страница 25: ... CHISPAS El funcionamiento de este equipo puede crear chispas que pueden iniciar incendios alrededor de vegetación seca No conduzca sobre pilas de hojas secas o pasto alto seco Máx 10 Mantenga la máquina libre de residuos ADVERTENCIA SUPERFICIE CALIENTE Las piezas del motor especialmente el silenciador se recalientan durante la operación Deje que el motor y el silenciador se enfríen antes de tocar...

Страница 26: ...bajo hasta los toques esquina izquierda el pendiente consultar Figura 1 and Figura 2 5 Si hay un espacio por debajo de la pendiente de calibre el pendiente es demasiado escarpa por operación segura consultar Figura 2 above 1 2 l í n e a d i s c o n t i n u a Pendiente de Calibre Figura 2 Figura 1 12 Pendiente 12 Pendiente ADVERTENCIA Las pendientes son uno de los principales factores asociados a l...

Страница 27: ...lan a continuación Placa de enganche Soporte de montaje del asiento con dos pernos con reborde y tuercas de sujeción instalados Herramientas recomendadas para el montaje Llave y o llave de cubo de 3 8 Llave y o llave de cubo de 1 2 Llave y o llave de cubo de 7 16 Llave y o llave de cubo de 9 16 Destornillador Phillips Llave de trinquete de 1 4 Movimiento manual del tractor En unidades de 6 velocid...

Страница 28: ... los orificios de los pernos autorroscantes b que extrajeron como se indica en la Figura 2 7 a b b Figura 2 7 4 Con una llave de trinquete de 1 4 con una llave de 3 8 sujete el soporte del asiento a con los pernos autorroscantes b que se extrajeron en el paso 2 Consulte la Figura 2 7 PRECAUCIÓN No use ninguna herramienta eléctrica por ejemplo pistola de impacto o taladro eléctrico con el extractor...

Страница 29: ...motor b Guarde los tornillos hexagonales a para uso posterior Consulte la Figura 2 11 a a b Figura 2 11 2 Coloque la tapa trasera del motor b ubicándola en su lugar como se indica en la Figura 2 11 Incline la tapa trasera del motor b hacia adelante para que calce dentro de las ranuras provistas luego rótela hacia atrás para alinear los orificios de montaje 3 Sujete la tapa trasera del motor b con ...

Страница 30: ...tud la presión máxima en psi recomendada por el fabricante No los infle en exceso Una presión de neumáticos despareja podría hacer que la plataforma no corte el césped parejo Llenado de gasolina y aceite El depósito de gasolina está debajo del lado izquierdo del asiento en los modelos con plataforma de 30 y en el motor en los modelos con plataforma de 24 No lo llene en exceso ADVERTENCIA Tenga muc...

Страница 31: ... fuerza PTO ponga el freno de mano pare el motor y retire la llave para evitar que el motor arranque accidentalmente El módulo de encendido está ubicado en el guardabarros izquierdo del tractor cortacésped si se sienta en la posición del operador adyacente al control del acelerador cebador o el control del cebador Módulo de encendido c Modo de precaución en marcha atrás Si está equipado Para arran...

Страница 32: ...a 4 3 Tapón de llenado de combustible M El tapón de llenado de combustible está debajo del lado derecho del asiento en los modelos con plataforma de 30 y en el motor en la parte posterior de los modelos de tractor cortacésped con plataforma de 24 Consulte la sección Montaje y Configuración del presente manual para obtener instrucciones para los modelos con plataforma de 30 y el manual del operador...

Страница 33: ... de mano Si deja el tractor cortacésped sin vigilancia también gire la llave de encendido hasta la posición OFF apagado y retire la llave ADVERTENCIA Siempre mire hacia abajo y hacia atrás antes y mientras se desplaza marcha atrás para evitar un accidente 1 Coloque el control del acelerador cebador Si está equipado o el control del acelerador Si está equipado cerca de la posición FAST rápido 2 En ...

Страница 34: ...dor si está equipado o el control del acelerador si está equipado cerca de la posición FAST rápido 2 Tome la palanca de la PTO y gírela totalmente hacia adelante hasta la posición ON activada Nota Mantenga el control del acelerador cebador si está equipado o el control del acelerador si está equipado en la posición FAST velocidad rápida representada por una liebre para el uso más eficaz de la plat...

Страница 35: ...no con los recortes de césped 1 La velocidad del motor es demasiado lenta Coloque el control del acelerador en la posición RÁPIDO liebre 2 El césped está mojado No realice el abono con los recortes de césped cuando el césped esté mojado 3 El césped está demasiado alto Corte una vez con altura de corte elevada y luego vuelva a cortar el césped a la altura deseada o haga una pasada de corte más ango...

Страница 36: ...uede superar los 150 F 65 C Evite el contacto con estas áreas Inspeccione periódicamente el silenciador y reemplácelo de ser necesario Los repuestos del silenciador deben ser los mismos y se deben instalar en la misma posición que las piezas originales Batería Limpie la batería retirándola del tractor cortacésped y lavándola con bicarbonato de sodio y una solución de agua Si es necesario raspe los...

Страница 37: ...acidad del sistema de combustible a gasolina limpia y nueva Llene el depósito de combustible con combustible tratado y haga funcionar el motor 2 3 minutos para estabilizar el combustible dentro del carburador 2 Cuando vacíe el sistema de combustible ADVERTENCIA La gasolina es sumamente inflamable y puede ser explosiva en ciertas condiciones Vacíe la antes de almacenar el equipo durante períodos pr...

Страница 38: ...á retirar los tres pernos hexagonales b que la sujetan Consulte la Figura 4 9 para plataformas de 30 y la Figura 4 10 para plataformas de 24 a b b b Figura 4 9 a b b b Figura 4 10 6 Extraiga el guardacorrea plataformas de 30 solamente extrayendo el perno hexagonal a que la sujeta Consulte la Figura 4 11 a Figura 4 11 7 Afloje la polea loca plataformas de 24 solamente a para lo cual debe aflojar la...

Страница 39: ...illo en busca de rajaduras o daños especialmente después de golpear un objeto extraño No opere la máquina hasta después de haber reemplazado los componentes dañados PRECAUCIÓN Si el borde cortante de la cuchilla ha sido afilado previamente o si existe una separación de metal reemplace las cuchillas por otras nuevas La cuchilla se puede sacar de la siguiente manera Nota Puede resultar más fácil cam...

Страница 40: ...Notas 20 ...

Отзывы: