background image

3

4

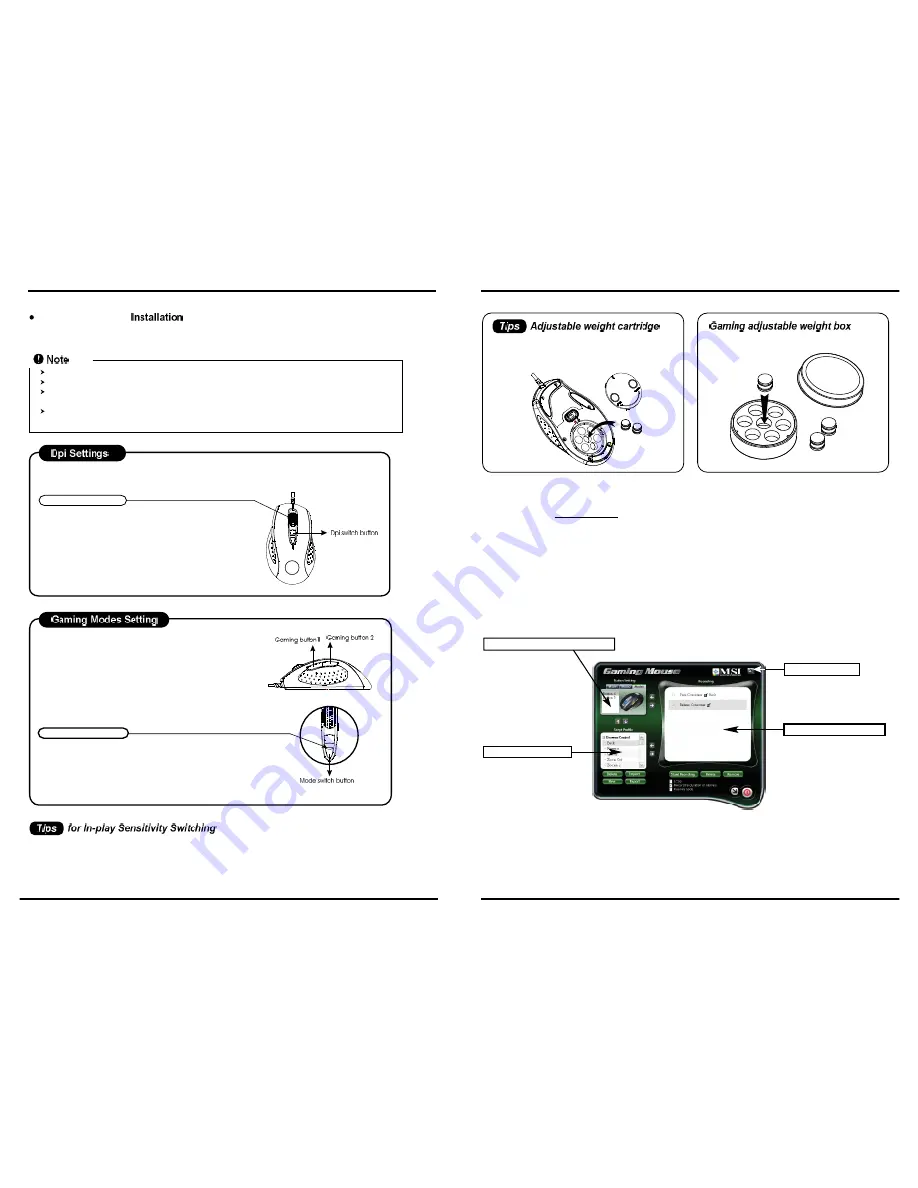
About the Softwate Interface

The gaming software includes three windows. 

Script Command Window

 Gaming Button Memory Window

Script Library Window

Dpi Setting Button

3. Uninstall  the Gaming Mouse Software

Please find the

Gaming Mouse

 from the windows program list, and click the "uninstall" to 

     uninsatll the gaming software from the PC.

Adjust the weight and balance (up to 40 grams) 
to achieve the best feeling of handling.

For storage your weight units.

I. Script  Command Windows:

This is the capture area where the user can create and edit macro scripts. Completed instructions can be 

transferred to the mouse memory or recorded to your script library on your hard drive.

While executing the gaming software, please close the relate 

Language Input Method

.

Not to cause conflict, we suggest you had better uninstall other mouse drivers when executing the gaming software.

The gaming software will auto-detect if the gaming mouse is plugged into the PC. After connecting to the PC, the 

mouse photo will display on the upper right corner of the software.

After successful installation, there is a gaming mouse software icon will appear on the lower right corner of the windows 

screen.  

Wheel light indicator

*

400 dpi

 : Light off

*

800 dpi 

: Green light on

*

1600 dpi

 : Blue light on (factory default) 

*

2400 dpi

 : Red light on

Mode light indicator

*

Red light on - Mode 1

*

Green light on - Mode 2

*

Blue light on - Mode 3

The default setting of the gaming buttons

 ( 

Gaming button 1:

 Internet Forward, 

Gaming button 2:

 Internet Backward)

1. Try the default settings in practice games first before changing these settings.

2. Practice using the In-game dpi Increase/Decrease buttons on the mouse before engaging in serious combat.

3. In first-person shooter games, programming the mouse to use only two tracking sensitivities may work better than using three or more. 

    Use a smaller dpi tracking sensitivity (e.g., 400 dpi) for sniping and shooting, and a higher setting  (e.g.,2400 dpi) for quicker movements.

4. Customize each game according to your specific sensitivity switching needs.

1. Press the dpi switch button to change the different resolution.
2. The default dpi setting :

3.Uers can change default dpi settings from 
   400~3200 dpi with the gaming software tool 
   included.

   Gaming Software Tool

To use the powerful gaming function, users need to install and execute the gaming software tool. Just 

   insert the CD, then run the Gaming Mouse.exe

Users 

can record a macro or get a built-in function from script 

  library. Then save and assign it to one of the modes available 
  at each gaming button. 

1. There are 2 programming gaming buttons available. 
2. There are 3 modes of each gaming button for users 
    to assign a macro function.
3. The mode switch button is on the top of the 
    mouse.

Содержание Star Mouse GS-501

Страница 1: ...ch zur gebrachten Produkte am Ende seines Baruchbarkeitsdauer zurückzunehmen Français Au sujet de la directive européenne EU relative aux déchets des équipement électriques et électroniques directive 2002 96 EC prenant effet le 13 août 2005 que les produits électriques et électroniques ne peuvent être déposés dans les décharges ou tout simplement mis à la poubelle Les fabricants de ces équipements...

Страница 2: ...asznos élettartama végén Italiano In base alla Direttiva dell Unione Europea EU sullo Smaltimento dei Materiali Elettrici ed Elettronici Direttiva 2002 96 EC in vigore dal 13 Agosto 2005 prodotti appartenenti alla categoria dei Materiali Elettrici ed Elettronici non possono più essere eliminati come rifiuti municipali i produttori di detti materiali saranno obbligati a ritirare ogni prodotto alla ...

Страница 3: ...l play the game according to the instruction Recorded Scripts It will help gamers getting rid of repeated practice reducing burdens and having more funs Tilt Wheel button Gaming button1 Gaming button 2 Mode switch button Dpi switch button 1 Hardware Installation Connect the Mouse to the USB port Users need to wait around 10 15 senceds for moving the cursor at the first time usage 2 Software Instal...

Страница 4: ... on factory default 2400 dpi Red light on Mode light indicator Red light on Mode 1 Green light on Mode 2 Blue light on Mode 3 The default setting of the gaming buttons Gaming button 1 Internet Forward Gaming button 2 Internet Backward 1 Try the default settings in practice games first before changing these settings 2 Practice using the In game dpi Increase Decrease buttons on the mouse before enga...

Страница 5: ... on the keyboard Delete You can delete the selected unnecessary commands after recording Remove You can remove all the script commands after recording Loop If this function is marked to be active the recorded script will be executed repeatedly when pressing the assigned gaming button The default is NOT active Duration This is to allow you to record the duration of a command or intervals between tw...

Страница 6: ... gaming function 7 IV Dpi Setting There are four levels you can assign different dpi you demand X and Y ratio is 1 1 When you move X Y will be moved at the same time automatically Click here dpi setting will be back to original default setting Click here eprom will remember your dpi setting Recording a Macro 1 Plug the Gaming Mouse to your PC 2 Execute the Gaming Mouse Software GamingMouse exe 3 C...

Страница 7: ...batérie a snímte kryt na hornej strane skrinky 2 Vložte batérie 3 Pripojte prijímač k USB portu na PC Inštalácia hardvéru myš s káblom 1 Zapnite počítač 2 Zasuňte USB koncovku do USB portu na PC Instalación de hardware para ratón inalámbrico 1 Extraiga el receptor de la funda inferior pulse el botón de la batería y extraiga la cubierta de la funda superior 2 Coloque las baterías 3 Conecte el recep...

Страница 8: ...SB ポートに接続します ハードウ ェア インス トール ワイヤーマウス 1 コンピュータの電源を入れます 2 USB ケーブルを PC の USB ポートに接続します Installation matérielle pour la souris sans fil 1 Sortez le récepteur du boîtier inférieur appuyez sur le bouton de batterie et enlevez le couvercle du boîtier supérieur 2 Installez les batteries 3 Connectez le récepteur à l USB du PC Installation matérielle pour la souris filaire 1 Allumez l ordinateur 2 Insérez ...

Отзывы: