


Polymotion Player Quick Start Guide
37
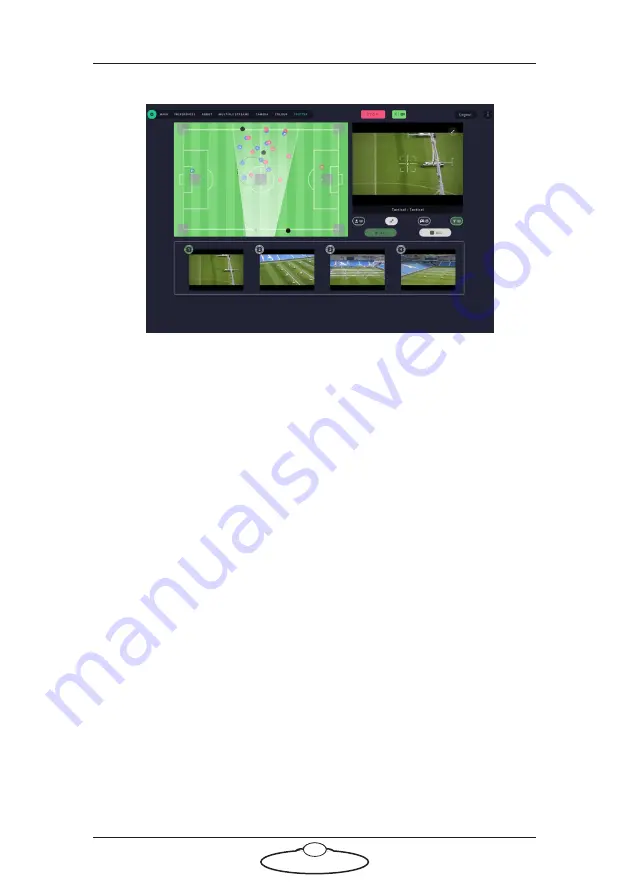
Split view layout
The split view layout allows you to use basic spotter screen features as
well as view video feeds from all cameras.
The Spotter screen features that are available in Split view layout are:
Football field (with player icons, ball, gotos & FOV triangle of the
selected camera):
Start/stop tracking buttons
Fix all button
Player layer button
FOV on/off button
Emergency stop button
The main video feed shows on the right from the football pitch and
contains the stream for the selected camera.
Video grid contains videos for all available cameras. Video grid resizes the
video windows depending on the number of available robots (available
options are: 2/4/6/8/10/12). You can select the camera by clicking one of
the feeds in the grid.
Содержание MRMC-1998-01
Страница 6: ...Polymotion Player Quick Start Guide vi...
Страница 12: ...Polymotion Player Quick Start Guide 6 Notes...
Страница 45: ...Polymotion Player Quick Start Guide 39 Notes...
Страница 46: ...Polymotion Player Quick Start Guide 40 Notes...
Страница 49: ...Polymotion Player Quick Start Guide 43...