9
6
ICED TEA MAKER FEATURES AND BENEFITS
Your new MR. COFFEE
®
Iced Tea Maker has the following features:
• 3-Quart Iced Tea Brewing Capacity
• Adjustable Tea Steeping Control – Adjusts the brewing time to create a more
full-flavored tea.
• Water Window – Shows amount of water in the reservoir for accurate filling.
• 3-Quart Pitcher – Keeps iced tea cold.
• Removable Brew Basket – The brew basket lifts out of the iced tea maker
housing for fast and easy cleaning and filling.
• On/Off Button and Indicator Light – Lets you know when your iced tea maker
is “on”.
• Water Filtration System – Great tasting tea begins with great water! Improves
the taste of your tea by removing 97% of the chlorine from the water you
use for brewing.
• Automatic Shut-Off – Turns off your iced tea maker when steeping/brewing
cycle is complete.
• Water and Ice Markings on Pitcher – Show amount of water to measure for
pouring into iced tea maker reservoir and ice needed in the pitcher for a
perfect glass of iced tea.
• Uses Teabags or Loose Tea.
CLEAN YOUR ICED TEA MAKER BEFORE USING THE FIRST TIME
Make sure your first glass of iced tea is as good as can be by cleaning your
MR. COFFEE
®
Iced Tea Maker before using it for the first time. Just follow
these simple steps:
WARNING! To prevent injuries from steam, do not plug in the appliance
until you have poured water in the reservoir, the lid is closed
and the pitcher is in its place.
1. Remove brew basket by moving the rotating shower head.
2. Wash the pitcher, pitcher lid and brew basket in a mixture of mild detergent
and water. Rinse each thoroughly.
3. Fill the pitcher with water to the top water level mark. Lift the reservoir lid
on the iced tea maker and pour the water into the water reservoir. Do not
overfill. Insert the brew basket in its place.
BREWING ICED TEA
1. Fill the pitcher with fresh, cold water to the
desired water level capacity (1, 2 or 3 quarts). Do
not overfill.
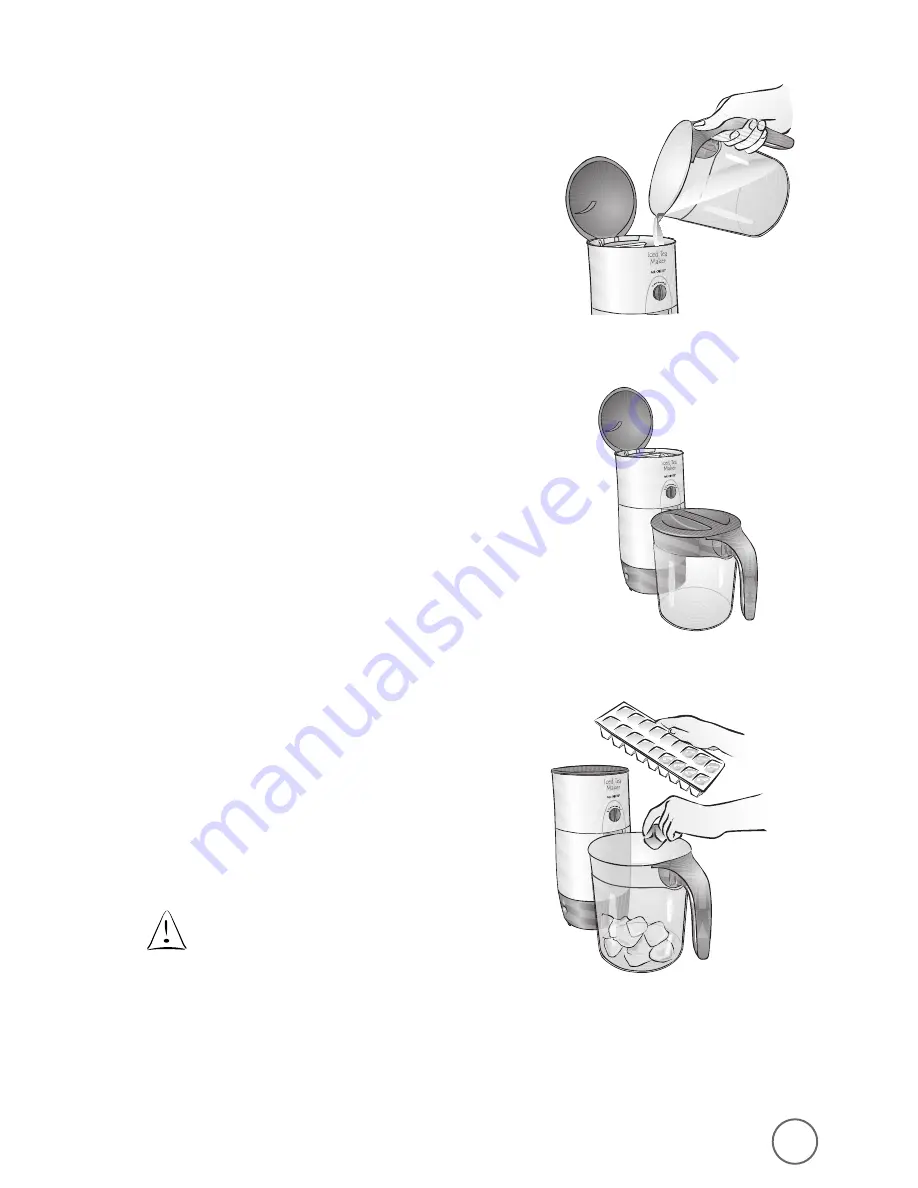
2. Lift the water reservoir lid, rotate the shower head
out of the way and remove the brew basket. Pour
water into the water reservoir (Figure 1).
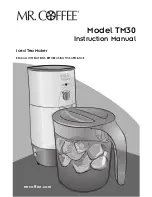
3. Place the brew basket back in its place, inserting a
4 cup MR. COFFEE
®
paper filter into the brew
basket. Add the desired amount of tea (see the
Measurement Chart). You may now add sugar,
lemon or other flavorings to the brew basket to
suit your taste (Figure 2).
4. Rotate the shower head back into position so that
it is now over the brew basket. Close the water
reservoir lid.
5. Adjust the steeping lever to your desired brewing
strength. The farther the lever is to the left, the
stronger the tea.
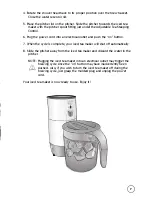
6. Fill the pitcher with ice cubes to the desired ice
level marked on the pitcher (Figure 3). Replace
the pitcher lid with the pitcher spout cover in the
open position. If you are low on ice, you may
substitute cold water, refilling the pitcher to the
desired 1, 2 or 3 quart WATER level – DO NOT
fill to the ICE level as this will cause an overflow
when the tea brews.
7. Slide the pitcher towards the iced tea maker
with the pitcher spout open and fitting just
under the Steep Control, flush against the
appliance.
NOTE: If the pitcher and its lid are not pushed
snugly against the iced tea maker, hot water
and hot steam could escape and cause
injury.
8. Turn the iced tea maker on by plugging the power
cord into an electrical outlet and pushing the “on”
button firmly until the ON indicator light is
illuminated.
Mild
Strong
Figure 1
Figure 2
Figure 3
Содержание TM30
Страница 4: ...11 he ts t y the ess any he voir d ...
Страница 6: ...9 ...
Страница 8: ...7 t a ng ly the he e ...
Страница 10: ...5 g ...
Страница 12: ...3 ape st d n he lug ...
Страница 14: ...30 ual ...


