PAGE 30 — DCA-180SSJU — OPERATION AND PARTS MANUAL — REV. #3 (02/01/10)
3.
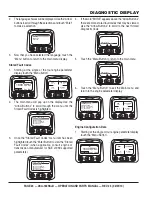
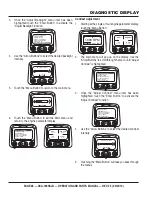
Once the “Setup 1-up Display” menu icon has been
highlighted touch the “Enter Button” to access the “Setup
1-up display” function.
4.
Three options are available for modification of the 1-Up
display.
a).
Use defaults-
This option contains a set of engine
parameters: Engine Hours, Engine RPM. System
Voltage, Battery Voltage, % Engine Load at Current
RPM, Coolant Temperature, Oil Pressure.
b).
Custom Setup-
This option allows for the
modification of what parameter, the number of
parameters, and the order in which the parameters
are being displayed.
c).
Automatic scan -
Selecting the scan function will
cause the 1-Up Display to scroll through the
selected set of parameters one at a time,
momentarily pausing at each.
5.
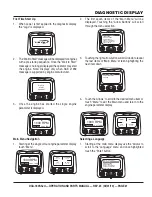
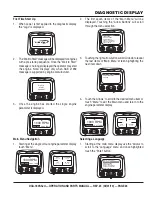
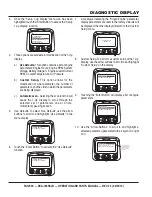
Use Defaults- To select “Use Defaults” use the arrow
buttons to scroll to and highlight “Use Defaults” in the
menu display.
6.
Touch the “Enter Button” to activate the “Use Defaults”
function.
GO TO 1-UP DISPLAY
STORED CODES
G
ADJUST BACKLIGHT
ENGINE CONF
SETUP-4-UP DISPLAY
SELECT UNITS
SETUP 1-UP DISPLAY
USE DEFAULTS
CUSTOM SETUP
AUTOMATIC SCAN OFF
USE DEFAULTS
CUSTOM SETUP
AUTOMATIC SCAN OFF
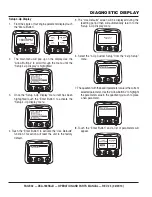
7.
A message indicating the “Single Engine” parameter
display parameters are reset to the factory defaults will
be displayed, then the display will return to the “Custom
Setup” menu.
8.
Custom Setup- To perform a custom setup of the 1-Up
Display, use the arrow buttons to scroll to and highlight
“Custom Setup” on the display.
9.
Touching the “Enter Button” will display a list of engine
parameters.
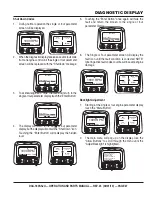
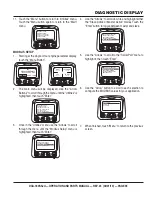
10. Use the “Arrow Buttons” to scroll to and highlight a
selected parameter (parameter with a # symbol to right
of it).
RESTORED TO
DEFAULTS
USE DEFAULTS
AUTOMATIC SCAN OFF
CUSTOM SETUP
USE DEFAULTS
AUTOMATIC SCAN OFF
CUSTOM SETUP
ENGINE SPEED
PERCENT LOAD AT CURRENT RPM
ENGINE OIL PRESSURE
ENGINE COOLANT TEMPERATURE
1
3
2
This number indicates
the order of display for the
parameters and that the
parameter is selected
for display.
DIAGNOSTIC DISPLAY
Содержание DCA180SSJU WHISPERWATT SERIES
Страница 2: ...PAGE 2 DCA 180SSJU OPERATION AND PARTS MANUAL REV 3 02 01 10 PROPOSITION 65 WARNING ...
Страница 69: ...DCA 180SSJU OPERATION AND PARTS MANUAL REV 3 02 01 10 PAGE 69 1 NOTES ...
Страница 72: ...PAGE 72 DCA 180SSJU OPERATION AND PARTS MANUAL REV 3 02 01 10 GENERATOR ASSY GENERATOR ASSY ...
Страница 74: ...PAGE 74 DCA 180SSJU OPERATION AND PARTS MANUAL REV 3 02 01 10 CONTROL PANEL ASSY CONTROL PANEL ASSY ...
Страница 76: ...PAGE 76 DCA 180SSJU OPERATION AND PARTS MANUAL REV 3 02 01 10 CONTROL BOX ASSY CONTROL BOX ASSY ...
Страница 78: ...PAGE 78 DCA 180SSJU OPERATION AND PARTS MANUAL REV 3 02 01 10 CONTROL BOX ASSY CONTROL BOX ASSY ...
Страница 88: ...PAGE 88 DCA 180SSJU OPERATION AND PARTS MANUAL REV 3 02 01 10 BATTERY ASSY BATTERY ASSY ...
Страница 90: ...PAGE 90 DCA 180SSJU OPERATION AND PARTS MANUAL REV 3 02 01 10 MUFFLER ASSY MUFFLER ASSY ...
Страница 92: ...PAGE 92 DCA 180SSJU OPERATION AND PARTS MANUAL REV 3 02 01 10 FUEL TANK ASSY FUEL TANK ASSY ...
Страница 100: ...PAGE 100 DCA 180SSJU OPERATION AND PARTS MANUAL REV 3 02 01 10 RUBBER SEALS ASSY RUBBER SEALS ASSY ...
Страница 102: ...PAGE 102 DCA 180SSJU OPERATION AND PARTS MANUAL REV 3 02 01 10 NAMEPLATE AND DECALS ASSY NAMEPLATE AND DECALS ASSY ...
Страница 105: ...DCA 180SSJU OPERATION AND PARTS MANUAL REV 3 02 01 10 PAGE 105 1 NOTES ...

