background image

PAGE 30 — DCA1100SSC 60 HZ GENERATOR • OPERATION  MANUAL — REV. #1 (01/17/18) 

COOLANT (ANTIFREEZE/SUMMER COOLANT/

WATER)

Cummins recommends antifreeze/summer coolant for use in 

their engines, which can be purchased in concentrate (and 

mixed with 50% demineralized water) or prediluted. See the


Cummins Engine Owner’s Manual for further details.

Day to day addition of coolant is done from the recovery 

tank. When adding coolant to the radiator, 

DO NOT remove 

the radiator cap until the unit has completely cooled. See 

Table 10 for engine, radiator, and recovery tank coolant 

capacities. Make sure the coolant level in the recovery tank 

is always between the “H” and the “L” markings.

Operation in Freezing Weather

When operating in freezing weather, be certain the proper 

amount of antifreeze (Table 10) has been added.

  WARNING

If adding coolant/antifreeze mix to the 

radiator, 

DO NOT remove the radiator cap 

until the unit has completely cooled. The 

possibility of 

hot! coolant exists which can 

cause severe burns.

Table 9. Coolant Capacity

Engine and Radiator

55.7 gal (211 liters)

Reserve Tank

N/A

Table 10. AntiFreeze  

Operating Temperatures

Vol % 

AntiFreeze

Freezing Point

°C

°F

50

37

34

NOTICE

When the antifreeze is mixed with water, the antifreeze 

mixing ratio 

must be less than 50%.

CLEANING THE RADIATOR

The engine may overheat if the radiator fins become 

overloaded with dust or debris. Periodically clean the 

radiator fins with compressed air. Cleaning inside the 

generatoris dangerous, so clean only with the engine turned 

off and the 

negative battery terminal disconnected.

AIR CLEANER

Periodic cleaning/replacement is necessary. Inspect it in 

accordance with the 

Cummins Engine Owner’s Manual 

and the maintenance section of this manual.

FAN BELT TENSION

A slack fan belt may contribute to overheating, or to 

insufficient charging of the battery. Inspect the fan belt for 

damage and wear and adjust it in accordance with the 

Cummins Engine Owner’s Manual.
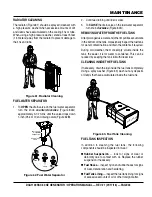
The fan belt (Figure 22) tension is proper if the fan belt 

bends  0.4~0.6 in. (10~15 mm) when pressed.

Figure 22. Fan Belt Tension 

0.4~0.6 IN.

(10~15MM)

DEFLECTION

  CAUTION

NEVER place hands near the belts or fan 

while the generator set is running.

INSPECTION/SETUP

Содержание DCA1100SSC

Страница 1: ...HE EQUIPMENT AT ALL TIMES To find the latest revision of this publication visit our website at www mqpower com WHISPERWATT SERIES MODEL DCA1100SSC 60HZ GENERATOR CUMMINS QST30 G5 DIESEL ENGINE Revision 1 01 17 18 OPERATION MANUAL ...

Страница 2: ...PAGE 2 DCA1100SSC 60 HZ GENERATOR OPERATION MANUAL REV 1 01 17 18 PROPOSITION 65 WARNING Diesel engine exhaust and some of ...

Страница 3: ... open an investigation and if it finds that a safety defect exists in a group of vehicles it may order a recall and remedy campaign However NHTSA cannot become involved in individual problems between you your dealer or Multiquip To contact NHTSA you may either call the Vehicle Safety Hotline tollfree at 18883274236 TTY 18004249153 go to http www nhtsa dot gov or write to Administrator NHTSA 1200 N...

Страница 4: ...el Familiarization 23 24 Load Application 25 Generator Outputs 26 Output Terminal Panel Connections 27 Inspection Setup 28 31 Generator Startup Procedure Manual 32 34 Generator Startup Procedure Auto Mode 35 Generator Shutdown Procedures 36 Maintenance Engine 37 45 Generator Wiring Diagram 46 Generator Wiring Diagram Main Breaker 47 Engine Wiring Diagram 48 Battery Charger Wiring Diagram Option 49...

Страница 5: ...ty messages specifically address the level of exposure to the operator and are preceded by one of four words DANGER WARNING CAUTION or NOTICE SAFETY SYMBOLS DANGER Indicates a hazardous situation which if not avoided WILL result in DEATH or SERIOUS INJURY WARNING Indicates a hazardous situation which if not avoided COULD result in DEATH or SERIOUS INJURY CAUTION Indicates a hazardous situation whi...

Страница 6: ...commended by MQ Power for this generator Damage to the generator and or injury to user may result ALWAYS know the location of the nearest fire extinguisher ALWAYS know the location of the nearest first aid kit ALWAYS know the location of the nearest phone or keep a phone on the job site Also know the phone numbers of the nearest ambulance doctor and fire department This information will be invalua...

Страница 7: ...NEVER tamper with the factory settings of the engine or engine governor Damage to the engine or generator can result if operating in speed ranges above the maximum allowable Wet stacking is a common problem with diesel engines which are operated for extended periods with light or no load applied When a diesel engine operates without sufficient load less than 40 of the rated output it will not oper...

Страница 8: ...t breakers OFF before performing maintenance on the generator or making contact with output terminals NEVER insert any objects into the output receptacles during operation This is extremely dangerous The possibility exists of electrical shock electrocution or death Backfeed to a utility system can cause electrocution and or property damage NEVER connect the generator to a building s electrical sys...

Страница 9: ...se the battery to open flames sparks cigarettes etc The battery contains combustible gases and liquids If these gases and liquids come into contact with a flame or spark an explosion could occur WARNING ALWAYS wear safety glasses when handling the battery to avoid eye irritation The battery contains acids that can cause injury to the eyes and skin Use well insulated gloves when picking up the batt...

Страница 10: ...me and all other metal parts be sent to a recycling center Metal recycling involves the collection of metal from discarded products and its transformation into raw materials to use in manufacturing a new product Recyclers and manufacturers alike promote the process of recycling metal Using a metal recycling center promotes energy cost savings EMISSIONS INFORMATION NOTICE The diesel engine used in ...

Страница 11: ...s machine stops and starts automatically and without notice CAUTION C92210000 B90400040 WARNING MOVING PARTS can cause severe injury DO NOT operate with doors open Stop engine before servicing SIDE VIEW REAR VIEW 1100 0 200 600 400 800 LITERS FAN SHROUD B90410010 WARNING HOT COOLANT can cause severe burns Do not remove cap if radiator is hot B91110020 CAUTION HOT PARTS can burn skin DO NOT get on ...

Страница 12: ...COURANT PRINCIPAL NEUTRAL BONDED TO FRAME NEUTRE MIS A LA MASSE A LA CARCASSE DU MOTEUR 211052 120 V OFF GAC 2 2H POWERED by Honda Engines 120V 15A GR PRISE DE TERRE AC CIRCUIT BREAKER INTERRUPTEUR DE COURANT PRINCIPAL NEUTRAL BONDED TO FRAME NEUTRE MIS A LA MASSE A LA CARCASSE DU MOTEUR 211052 120 V OFF GAC 2 2H POWERED by Honda Engines 120V 15A GR PRISE DE TERRE AC CIRCUIT BREAKER INTERRUPTEUR D...

Страница 13: ... 880 lbs 13 100 kg Wet Weight 35 000 lbs 15 873 kg Table 2 Engine Specifications Model CUMMINS QST30 G5 Tier 2 Certified Type 4 cycle watercooled direct injection turbocharged charged air cooled No of Cylinders 12 cylinders Bore x Stroke 5 51 in x 6 49 in 140 mm x 165 mm Displacement 1 860 cu in 30 480 cc Rated Output 1350 HP 180 rpm Starting Electric Coolant Capacity 55 7 gal 211 liters Lube Oil ...

Страница 14: ...F E D C A B Denyo N O Figure 3 Dimensions Table 3 Dimensions Reference Letter Dimension in mm Reference Letter Dimension in mm A 43 50 1 105 I 44 49 1 130 B 44 49 1 130 J 43 50 1 105 C 43 50 1 105 K 32 09 815 D 30 12 765 L 41 14 1 045 E 39 37 1 005 M 272 6 910 F 40 94 1 040 N 114 1 2 900 G 30 12 765 O 86 61 2 200 H 43 50 1 105 ...

Страница 15: ...DCA1100SSC 60 HZ GENERATOR OPERATION MANUAL REV 1 01 17 18 PAGE 15 NOTES ...

Страница 16: ...h local Electrical and Safety Codes for proper connection based on condition of use EXAMPLEofhowtogroundtheunitifthecondition of use requires such a device The ground terminal on the generator should always be used to connect the generator to a suitable ground when required The ground cable should be 8 size wire aluminum minimum If copper wire is used 10 size wire minimum should be used Connect on...

Страница 17: ... They are to resist damage to the bottom of the generator and to maintain alignment CAUTION Pay close attention to ventilation when operating the generator inside tunnels and caves The engine exhaust contains noxious elements Engine exhaust must be routed to a ventilated area GENERATOR GROUNDING If applicable to guard against electrical shock and possible damage to the generator it is important to...

Страница 18: ...of the open delta A B C and D During steady state loads the power from the voltage regulator is supplied from the parallel connections of A to B A to D and C to D These three phases of the voltage input to the voltage regulator are then rectified and are the excitation current for the exciter section When a heavy load such as a motor starting or a short circuit occurs the automatic voltage regulat...

Страница 19: ...ENCY STOP BUTTON FUEL METER CHECK BUTTON ON OFF PANEL LIGHT SWITCH VOLTAGE REGULATOR DECREASE INCREASE OFF ON CIRCUIT BREAKER CIRCUIT BREAKER Denyo OFF ON OFF ON 11 8 9 10 Figure 5 Major Components Table 4 Generator Major Components ITEM NO DESCRIPTION 1 Air Filter Assembly 2 Muffler Assembly 3 Fuel Tank Assembly 4 Generator Assembly 5 Output Terminal Assembly 6 Battery Assembly 7 Engine And Radia...

Страница 20: ...e output frequency in hertz Hz Normally 60 Hz 6 AC Ammeter Indicates the amount of current the load is drawing from the generator per leg selected by the ammeter phase selector switch 7 AC Voltmeter Indicates the output voltage present at the U V and W OutputTerminal Lugs 8 Ammeter Change Over Switch This switch allows theACammetertoindicatethecurrentflowingtotheload connected to any phase of the ...

Страница 21: ...n mode Also the engine controller will shut down the engine in the event of low oil pressure high coolant temperature low coolant level and loss of magnetic pickup These conditions can be observed by monitoring the LED status indicators on the front of the controller module Low Oil Pressure LED This LED will light when the engine oil pressure drops to 14 2 psi 98 kPa This condition will cause the ...

Страница 22: ...splayed on the Gauge Unit Assembly Figure 7 items C and D 8 ECUControlSwitch ECU750 Thisswitchcontrols the running of the unit If this switch is set to the OFF RESET position the unit will not run When this switch is set to the MANUAL position the generator will start immediately after the pre heat cycle has been completed If the generator is to be connected to a building s AC power source via a t...

Страница 23: ...terminal lugs load wires NOTICE Terminal legs lugs O and Ground are considered bonded grounds OUTPUTTERMINAL FAMILIARIZATION The Output Terminal Panel is provided with the following Four Bus Bars with terminal lugs U V W and O Ground lug Figure 8 Output Terminal Panel Bus Bars VOLTAGE OUTPUT TERMINAL PANEL GROUND TERMINAL U V W O BLACK RED BLUE WHITE GREEN 3Ø 480 VAC BUS BAR OUTPUT TERMINALS DEDIC...

Страница 24: ...to connect a load to the generator To protect the output terminals from overload a 3 pole 1600A main circuit breaker is provided Make sure to switch this circuit breaker to the OFF position prior to starting the engine Figure 10 Connecting Loads U V W GND BLACK RED BLUE O WHITE GREEN GROUND CONNECTION BE USED MUST AT ALL TIMES LOAD NEUTRAL BUS BAR 4 Over Current Relay An over current relay Figure ...

Страница 25: ...ally listed on the nameplate The generator output cables load must be chosen with these requirements in mind When connecting resistance loads such as incandescent lamps or electric heaters aload of up to the generator s rated output kW can be connected THREE PHASE LOAD When calculating the power requirements for 3 phase power use the following equation Aninadequatesizeconnectingcablewhichcannotcar...

Страница 26: ... Change Over Switch U V V W W U OFF A B V U W OFF A B NOTICE The ammeter gauge will only show a reading when the bus bar output terminal lugs are connected to a load and is in use GENERATOR OUTPUT VOLTAGES Generator Amperage Table 7 shows the maximum amps the generator can provide DO NOT exceed the maximum amps as listed HOW TO READ THE AC AMMETER AND AC VOLTAGE GAUGES The AC ammeter and AC voltme...

Страница 27: ...e voltage output turn counterclockwise to decrease voltage output Use voltage regulator adjustment knob whenever fine tuning of the output voltage is required Figure 15 Voltage Regulator Knob U V W GND BLACK RED BLUE O WHITE GREEN GROUND CONNECTION BE USED MUST AT ALL TIMES THREE PHASE 480 VAC LOAD CONNECTIONS NOTICE ALWAYS make sure that the connections to the UVWO bus bar terminals are secure an...

Страница 28: ...ed if they meet the following requirements API Service Classification CC SC API Service Classification CC SD API Service Classification CC SE API Service Classification CC SF Table 8 Recommended Motor Oil FUEL CHECK Refilling the Fuel System This generator has an internal fuel tank Figure 17 located inside the generator and may also be equipped with an external fuel tank ALWAYS fill the fuel tanks...

Страница 29: ... CAUTION ALWAYS place generator on firm level ground before refueling to prevent spilling and maximize the amount of fuel that can be pumped into the tank NOTICE ONLY use 2 diesel fuel when refueling 2 Read the fuel guage Figure 19 and determine if the fuel level is low Figure 19 Fuel Guage 3 If the fuel level is low remove fuel cap and fill tank as shown in Figure 20 Figure 20 Fueling the Generat...

Страница 30: ...ble 9 Coolant Capacity Engine and Radiator 55 7 gal 211 liters Reserve Tank N A Table 10 AntiFreeze OperatingTemperatures Vol AntiFreeze Freezing Point C F 50 37 34 NOTICE When the antifreeze is mixed with water the antifreeze mixing ratio must be less than 50 CLEANINGTHE RADIATOR The engine may overheat if the radiator fins become overloaded with dust or debris Periodically clean the radiator fin...

Страница 31: ...negative terminal LAST POSITIVE NEGATIVE When connecting battery do the following 1 NEVER connect the battery cables to the battery terminals when the ECU Control Switch is in either the AUTO or MANUAL position ALWAYS make sure that the ECU Control Switch is in the OFF RESET position when connecting the battery 2 Place a small amount of battery terminal treatment compound around both battery termi...

Страница 32: ...aker OFF lamp Figure 25 is lit ON Figure 25 Main Circuit Breaker OFF Lamp CAUTION The engine s exhaust contains harmful emissions ALWAYS have adequate ventilationwhen operating Direct exhaust away from nearby personnel WARNING NEVER manually start the engine with the main or auxiliary circuit breakers in the ON closed position OFF OFF 3 Connect the load to the UVWO bus bar terminals as shown in Fi...

Страница 33: ...for 3 5 minutes Listen for any abnormal noises If any abnormalities exist shut down the engine and correct the problem 6 If the engine is running smoothly place the engine speed switch Figure 32 in the HIGH up position PREHEAT LAMP PREHEAT LAMP Figure 32 Engine Speed Switch High 7 The generator s frequency meter Figure 33 should be displaying the 60 cycle output frequency in HERTZ Figure 33 Freque...

Страница 34: ...ad applied When a load is applied the ammeter will indicate the amount of current that the load is drawing from the generator Figure 37 Ammeter No Load 12 The engine oil pressure gauge Figure 38 will indicate the oil pressure of the engine Under normal operating conditions the oil pressure is approximately 14 psi 96 kPa Figure 38 Oil Pressure Gauge 13 The coolant temperature gauge Figure 39 will i...

Страница 35: ...torcanstartupatanytimewithout warning NEVER attempt to perform any maintenance when the generator is in the auto mode CAUTION The engine speed switch must be set to the High position when running in the autostart mode Failing to set the switch in the proper position can result in damage to your generator when it turns on NOTICE When the ECU control switch is placed in the AUTO position the engine ...

Страница 36: ...4 Place the ECU Control Switch Figure 47 to the OFF RESET position Figure 47 ECU Control Switch Off Reset 5 Verify that all the status LEDs on the ECU 750 display are OFF not lit 6 Set the battery ON OFF switch Figure 48 to the OFF position Figure 48 Battery Switch OFF 7 Remove all loads from the generator 8 Inspect entire generator for any damage or loosening of components that may have occurred ...

Страница 37: ...and Adjust EngineValve Clearance X Test Glow Plugs X Flush and Refill Cooling System 2 2yrs or2000hrs Clean Inside of Fuel Tank 1000hrs Check Crankcase Ventilation Filter 1500hrs Replace Air Cleaner Elements 3 As Required 1 During initial operation of a new engine change oil and filter between a minimum of 100 hrs and a maximum of 250 hrs Service interval depends on type of oil 2 Add Supplemental ...

Страница 38: ... in the combustion chamber and high fuel consumption Change air cleaner more frequently if these conditions exist MAINTENANCE This Cummins diesel engine is equipped with a replaceable high density paper air cleaner element Figure 51 This air cleaner is also equipped with an inner element secondary that is used as a backup filter should the primary element becomes damaged Remove air cleaner element...

Страница 39: ... air pressure or the paper air filter element will be damaged and will need to be replaced If air filters are excessively dirty oily Replace air filters DO NOT clean NOTICE DO NOT run the engine with the air cleaner removed or without an element H UPPER LIMIT L LOWER LIMIT DO NOT OVERFILL MAINTENANCE 4 If oil level is low add correct amount of engine oil to bringoilleveltoanormalsafelevel SeeRecom...

Страница 40: ...R SEAL WITH THIN LAYER OF OIL A B NOTICE The lubricating oil filter should be full of oil at engine start up to prevent engine damage 5 Install new oil filter Figure 56 first by hand until it makes contacts with the filter head surface Tighten it another 3 4 turn using the filter wrench Figure 56 Installing Oil Filters 6 Fill engine crankcase with high quality detergent oil classified For Service ...

Страница 41: ...f the radiator and drain coolant into a suitable container 3 If equipped remove the overflow tank Drain and clean overflow tank 4 Replace the overflow tank if necessary 5 Check hoses for softening and kinks Check clamps for signs of leakage 6 Flush the radiator by running clean tap water through radiator until signs of rust and dirt are removed DO NOT clean radiator core with any objects such as a...

Страница 42: ...Filters Removal 3 Coat the rubber seal gasket surface of each coolant filter Figure 60 with clean 15W 40 engine oil Table 13 Anti Freeze OperatingTemperatures Vol Anti Freeze Freezing Point Boiling Point C F C F 50 37 34 108 226 REMOVE AND DISCARD BOTH COOLANT FILTERS 2 FILTER WRENCH TURN COOLANT VALVE TO OFF POSITION BEFORE REMOVING FILTERS 4 Install new coolant filter Figure 60 first by hand unt...

Страница 43: ...C REMOVING WATER FROMTHE FUELTANK After prolonged use water and other impurities accumulate in the bottom of the tank Occasionally inspect the fuel tank for water contamination and drain the contents if required During cold weather the more empty volume inside the tank the easier it is for water to condense This can be reduced by keeping the tank full with diesel fuel CLEANING INSIDETHE FUELTANK I...

Страница 44: ...tal across the belt cracks are acceptable Vertical direction of belt ribs cracks that intersect with horizontal cracks are not acceptable Figure 64 Drive Belt Inspection 2 If the drive belt is frayed punctured or material is missing DO NOT use drive belt NO NO MAINTENANCE GENERATOR STORAGE For long term storage of the generator the following is recommended Drain the fuel tank completely Treat with...

Страница 45: ...o jacket water heater However if the generator will be used in cold climates it is always a good idea to apply power to the jacket water heater at all times To apply power to the jacket water heater simply apply power to the jacket water heater receptacle via commercial power using an power cord of adequate size If the generator will be used daily the battery should normally not require charging I...

Страница 46: ...COLOR 5 5 5 5 mm 2 8 8 mm 2 NO MARK WIRE SIZE 1 25 CONNECTOR ARRANGEMENT WIRING VIEW 3 2 1 V1 U1 W1 U2 V2 CN1 CN2 B4 B E E 1 2 3 V1 W1 U1 B4 E U2 B V2 E R S T 1 2 3 CN3 T S R 3 2 1 CN4 CN6 B4 2 E CN5 B4 1 E 2 1 AVR VR VS CB SW1 CT 1 2 F AUTOMATIC VOLTAGE REGULATOR VOLTAGE REGULATOR RHEOSTAT CURRENT TRANSFORMER CHANGE OVER SWITCH VOLTMETER AC VOLTMETER FREQUENCY METER CIRCUIT BREAKER 3P 1600A PANEL...

Страница 47: ...K BLUE BROWN GREEN GRAY VIOLET PINK R W Y LB LG O RED WHITE YELLOW LIGHT BLUE LIGHT GREEN ORANGE WIRE SIZE COLOR CODE 5 5 5 5 mm 2 8 8 mm 2 NO MARK WIRE SIZE 1 25 PB5 SYMBOL DESIGNATION CIRCUIT BREAKER ON SWITCH PB4 PL5 PL6 CIRCUIT BREAKER OFF SWITCH CIRCUIT BREAKER ON LAMP CIRCUIT BREAKER OFF LAMP TO ENGINE WIRING DIAGRAM TB3 PC CONTROL BOX SIDE CONTROL PANEL SIDE CONNECTOR VIEW FROM INSERTING WI...

Страница 48: ...HZ GENERATOR OPERATION MANUAL REV 1 01 17 18 ENGINE WIRING DIAGRAM B L G V P R W Y O BR GR LB LG WIRE COLOR BLACK BLUE BROWN GREEN GRAY VIOLET PINK ORANGE LIGHT GREEN LIGHT BLUE YELLOW WHITE RED SYM SYM WIRE COLOR COLOR CODE ...

Страница 49: ... NEMA 5 15 15A 120 VAC P N EE6176 HBL5278C HUBBLE RECEPTACLE NOTES 1 2 RECEPTACLE IS MOUNTED ON OUTPUT TERMINAL PANEL ASSY 20 AMP 5 20R RECEPTACLE P N EE6131 HBL5369C HUBBLE RECEPTACLE 3 4 CORD CAROL 3 C 14 AWG P N EE56557 120 VAC INPUT INSERT EXTERNAL POWER CORD HERE 3 1 2 4 BLACK 14 AWG LINE L 120VAC INPUT WHITE 14 AWG NEUTRAL N GREEN 14 AWG GROUND G 1 2 3 4 A B A B ...

Страница 50: ...278C HUBBLE RECEPTACLE BLACK 14 AWG LINE L 120VAC INPUT WHITE 14 AWG NEUTRAL N GREEN 14 AWG GROUND G NOTES 1 2 RECEPTACLE IS MOUNTED ON OUTPUT TERMINAL PANEL ASSY 20 AMP 5 20R RECEPTACLE P N EE6131 HBL5369C HUBBLE RECEPTACLE 3 4 CORD CAROL 3 C 14 AWG P N EE56557 120 VAC INPUT INSERT EXTERNAL POWER CORD HERE 3 1 2 4 BLACK 14 AWG LINE L 120VAC INPUT WHITE 14 AWG NEUTRAL N GREEN 14 AWG GROUND G 1 2 3...

Страница 51: ...Is wiring connection loose Check wiring and repair Is AVR defective Replace if necessary Defective Rotating Rectifier Check and replace Defective Exciter Field Check for approximately 17 3 ohms across J K on CN1 Low Voltage Output Is engine speed correct Turn engine throttle lever to High Is wiring connections loose Check wiring and repair Defective AVR Replace if necessary High Voltage Output Is ...

Страница 52: ...nit failure Replace sending unit Low battery voltage Replace charge battery High coolant temperature light is on Fan belt tension incorrect Tighten replace fan belt Air flow is not circulating through radiator Clean repair radiator grill Doors open Close doors Exhaust leaking Replace repair gaskets or faulty part Generator being overloaded Check reduce load Thermostat failure Replace thermostat Ai...

Страница 53: ...ton Press this button to select the parameter that is highlighted on the screen 4 Right Arrow Button Press this button to scroll through the screen either moving the parameter selection toward the right or downward 2 1 6 5 3 4 7 8 NOTICE Reference the Cummins Operator s Manual for a complete listing of active fault codes and countermeasures 5 Left Arrow Button Press this button to scroll through t...

Страница 54: ...Speed Engine Started ECU Intergrated Gauge Control R ECU CONTROLLER AUTO MANUAL OFF RESET FUEL LEVEL PRE ALARM SHUTDOWN ENGINE SPEED HIGH LOW PREHEAT LAMP PREHEAT BUTTON EMERGENCY STOP BUTTON FUEL METER CHECK BUTTON REMOVE REMOVE DIAGNOSTIC GAUGE IS LOCATED BEHIND ENGINE CONTROL PANEL DOOR Figure 69 High Temperature Code Example 8 After performing the diagnostic test place the ECU Auto Start Stop ...

Страница 55: ...DCA1100SSC 60 HZ GENERATOR OPERATION MANUAL REV 1 01 17 18 PAGE 55 NOTES ...

Страница 56: ...co uk Tel 0161 339 2223 Fax 0161 339 3226 COPYRIGHT 2018 MULTIQUIP INC Multiquip Inc the MQ logo and the MQ Power logo are registered trademarks of Multiquip Inc and may not be used reproduced or altered without written permission All other trademarks are the property of their respective owners and used with permission This manual MUST accompany the equipment at all times This manual is considered...

Отзывы: