English
29
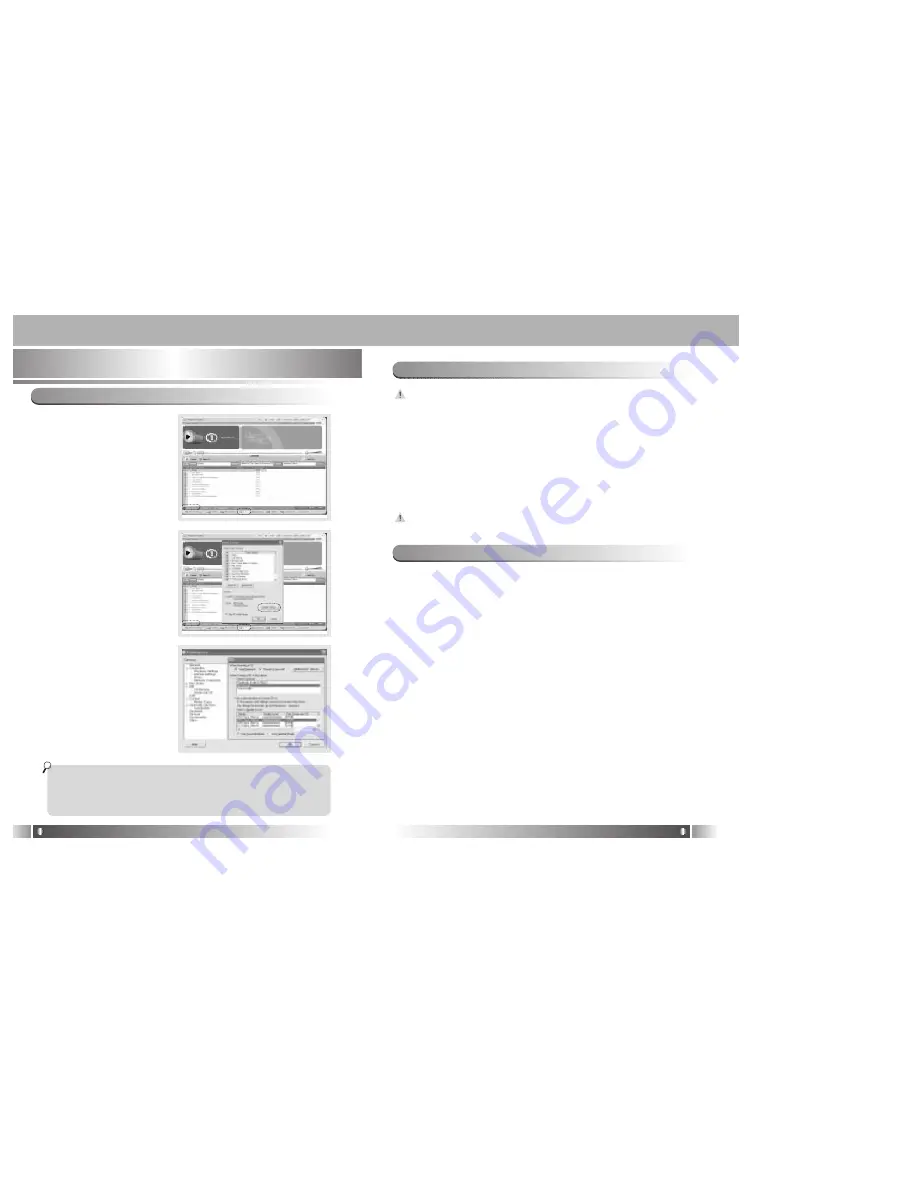
1. MP3 File Creation(Ripping) From Audio CD
English
28
1. Select a Real Networks item
from the MENU of the Install
CD, and install the down-
loaded RealOne Player on
the computer.
2. Insert the audio CD into the
CD-ROM driver.
3. Run RealOne Player.
4. Click on the CD item.
5. If you click on the 'Save
Tracks' Item, Select Tracks
Window will appear.
6. Assign a track to be stored
on the computer, in the
Select Tracks Window.
7. Click on the Change Settings
button in the 'Save to' Item.
8. If the Preferences Window
appears, select MP3 Audio in
the 'Select a Format' Item.
9. Select a bit rate of MP3 file to
be generated from the 'Select
a Quality level' Item and click
on the 'OK' button.
* MP3 file is stored in the My
Music folder on your C: dri-
ver. Select 'General' Item in
the Preferences Window
and choose a folder by click-
ing on the Browser button
on the recorded music file
item.
10. Click on the 'OK' button on
the Select Tracks Window.
* The RealOne Player the company provides is the special edi-
tion that MP3 Encoding Function (56~320Kbps) is added to the
Basic ver. Of RealOne Player. Please make sure that the com-
pany will not pay additional expenses if you add another func-
tion supplied by the RealOne Player Plus.
• Other Information
2. Macintosh iTunes Plug-In Installation
iTunes Plug-In is not usable in the Mac OS version 9 and below.
1. Turn the power of Macintosh and insert the MPIO Install CD
into CD-ROM Driver.
2. Double-click the CD-ROM Icon and the iTunes Plug-In Installer
icon in the folder.
3. When iTunes Plug-In for MPIO Read Me Window appears, click
on the [CONTINUE] button.
4. When iTunes Plug-In Installer Window appears, click on the
[Install] button.
5. When the message, Installation was successful appears, click
on the [Quit] Button.
iTunes 2 Plug-In is scheduled to be supplied on the MPIO Web
Site later.
3. Troubleshooting
Q1. I connected the MPIO to the PC, however the message, "USB
CONNECTED" does not appear on the MPIO LCD.
A1. Check if the power of MPIO is on and the USB cable is
inserted into the MPIO.
Q2. Music file stored in the MPIO is not uploaded to the PC.
A2. Due to the copyright restrictions on Music File
(MP3/WMA/ASF), you cannot upload it to the PC except for
the data file, WAV file etc.
Q3. I opened the music folder in the MPIO Manager 2, however no
music file was seen.
A3. Check the File Type on top of the right of MPIO Manager 2.
Q4. After the power is turned off, the values (volume, backlight etc.)
setup in the Menu are not stored and switched to the data ini-
tially setup.
A4. Format the internal memory from the Memory Menu of the
MPIO Manager 2.
* Please note that the files stored in the internal memory will
be deleted after the internal memory is Format.
Q5. Where can I find the MPIO Manager 2 version?
A5. You will find Manager2 version from Help/About MPIO
Manager2.
Содержание DMK PLUS
Страница 16: ...English 30 Memo...


