V2401/2402 HW User's Manual
BIOS Setup
4-13
ATTENTION
We suggest you use a USB drive with under 2 GB in disk space, as larger USB drives may not support the FAT
file format and consequently fail to boot.
Step 2: Prepare the Upgrade Tool and BIOS Binary File.
You must use the BIOS upgrade installation file to upgrade the BIOS. You can send your request to Moxa's
technical support team at [email protected] to get an updated version of the BIOS.
1.
Get the BIOS upgrade installation file. The file name should have following format: 240010.s00.
2.
Copy the file to the Bootable USB Disk.
3.
Double click to extract the BIOS update installation file. The file includes a binary file in the form
s210010.s00 and the upgrade utility named awdflash.exe.
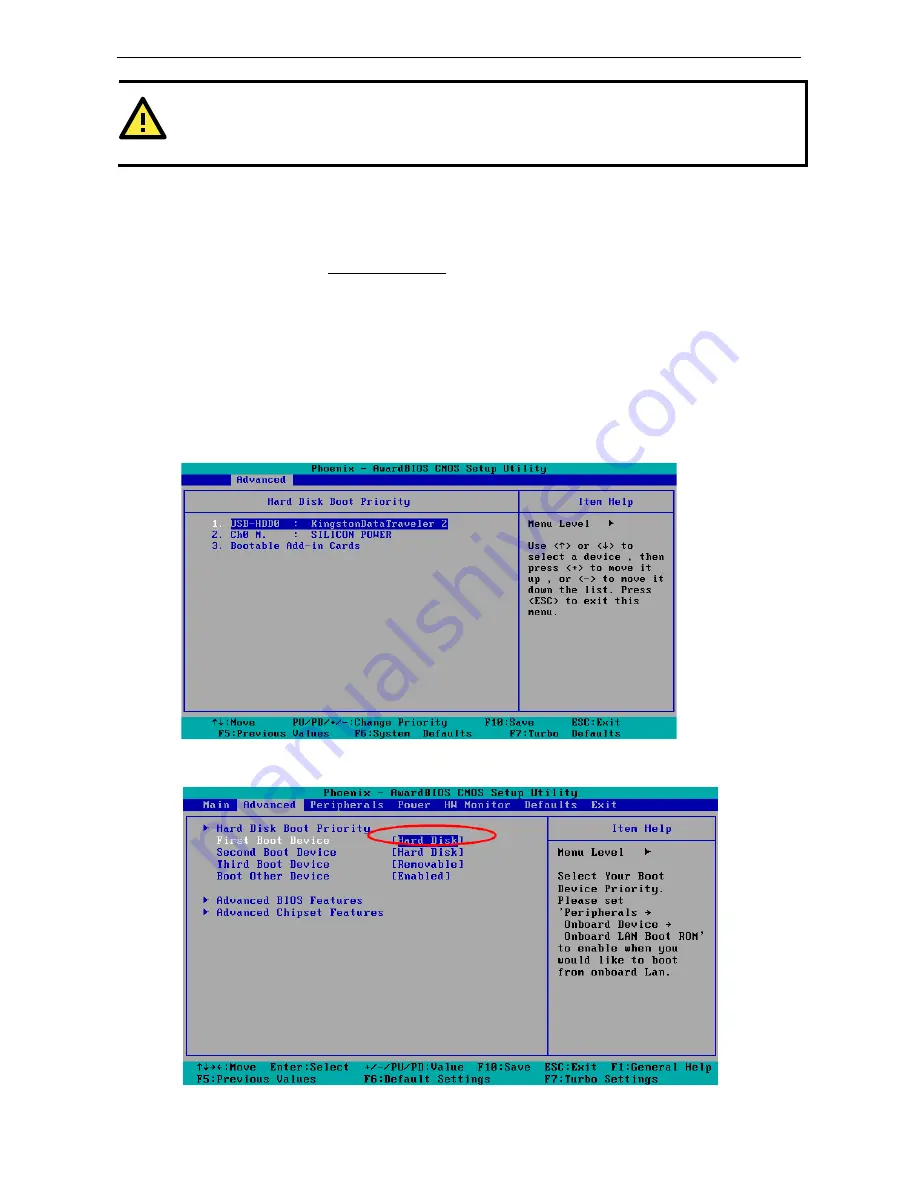
Step 3: Set up the BIOS to Boot from the USB Disk.
1.
Insert the USB disk.
2.
Power on and press DEL to enter the BIOS Setup menu.
3.
Select Advanced
Hard Disk Boot Priority and then press Enter.
4.
From the Setup menu, use “
↑
” or “
↓
” to select the USB device.
5.
Press “+” to move it up to the first priority, and press “Esc” to exit the setup menu.
6.
Make sure the first boot device is Hard Disk. If it isn’t, press Enter to change it.


