background image

6

5

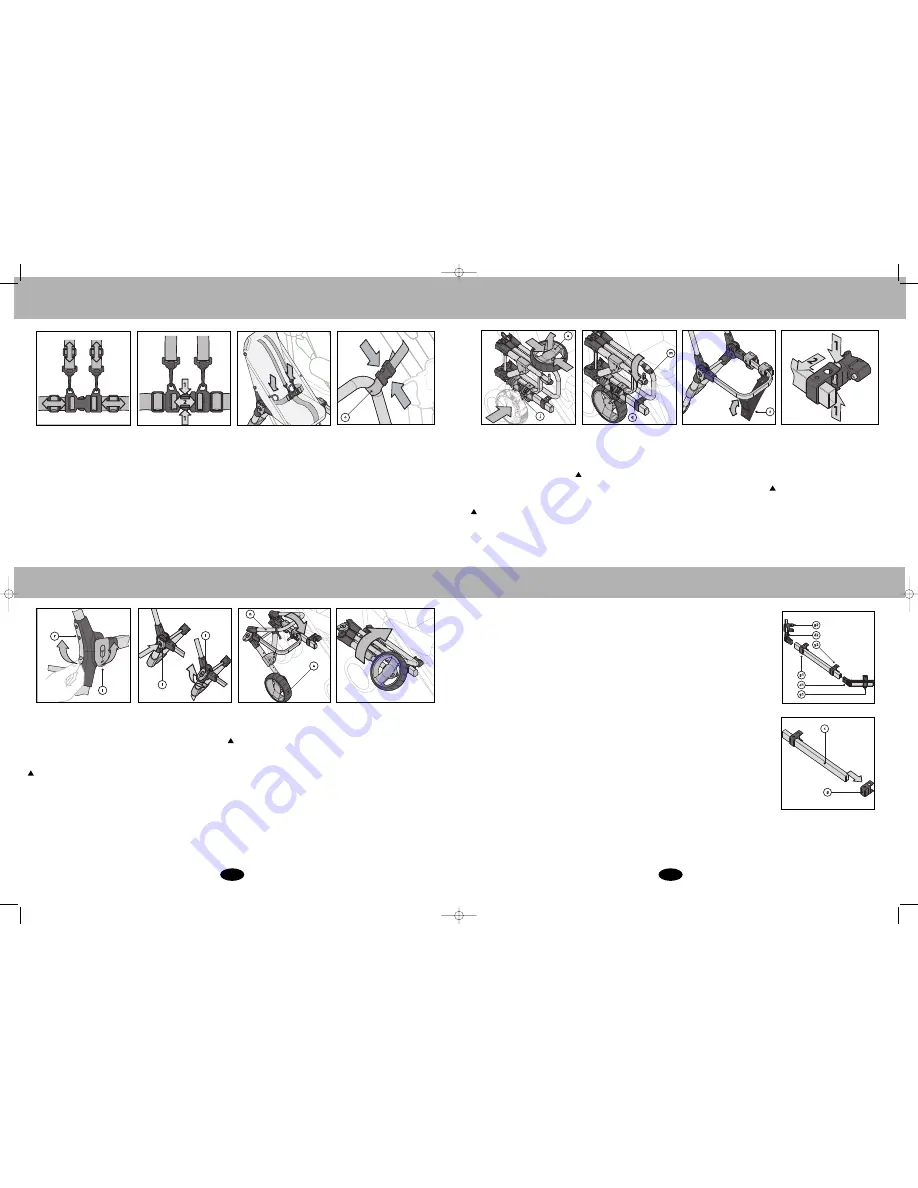
Adjust the length of the waist and
shoulder straps by moving the clasps
until a comfortable but secure fit is
achieved.

Squeeze the two tabs to release the
two  buckle halves.

D-rings are provided if you wish to
use a standard safety harness in
addition to the 5-point harness
supplied.

Unclip the leash (o) by squeezing the
two tabs together to release the two
buckle halves.

1) open the safety latch (l)
2) lift the securing clip (r) 
carefully off the stud. Pulling the
backrest back helps align the hole
with the stud.

Push the button in the centre of the
safety latch (l) before lifting it
upwards...

Fold the Buggypod up on itself...

…before folding it up against the
pushchair.

Step 11. Folding up 

your Buggypod®

If the safety latch is stiff, spray inside
with a non-silicone lubricant e.g.
furniture polish. See p7 for all
maintenance tips.

Make sure you fold it fully, otherwise it
may not fold up against the pushchair
properly.

Remove the wheel (a) from the upper
axle (q)  by squeezing the two red
tabs and lifting the wheel off. Push
the wheel onto the secondary axle (j)
as shown. Make sure it clicks into
place. The hinges should rest on top
of the wheel.

Push the holding strap (m) over the
wheel axle

fold up the footrest (s) by closing
the popper buttons on both sides.

The folded Buggypod® can now be
removed from the side of the pushchair
when folding and transporting the
pushchair and Buggypod®.

By clipping the wheel onto the
secondary axle, you are supporting 
the Buggypod® in the upright position

Tip: you can remove holding strap from
your Buggypod by undoing the popper
on the seat cover. You can then loop
the holding strap around your
pushchair bar to create a tighter hold.

Step 12. Detaching the 
folded Buggypod®

a) Follow steps 1 and 2

b) Remove the end plug (i) from that end of the connector 

bar (c) to which you intend to attach the adaptor (d).

Note: the adaptor must be positioned correctly so as to compensate for the lack 

of width at the narrowest part of the host pushchair (see Fitting Check List).

Parts labelled

1. refer to a host pushchair that narrows towards the front,

parts labelled 2. refer to a pushchair that narrows towards the rear.

Make any necessary adjustments to the location of the mounting brackets.

c) Slide the nearest mounting boss (g) off the connector bar (c),

then attach the adaptor to the connector bar adaptor

d) Slide the mounting boss onto the adaptor (do not tighten it) 

and place end plug onto end of connector bar.

e) Follow Step 3 onwards

c

b

Assembly instructions using connector bar adaptor 

(e.g. for some 3 wheeler pushchairs)

You must remove the Buggypod from the
brackets if you want to fold the pushchair.

BuggyPodSmorph_May10  5/5/10  20:44  Page 6

Содержание buggypod Smorph2

Страница 1: ...pod from Revelo Ltd Granted European Patent No 1747137 Patent Pending U S A Application No 11 578594 Revelo Limited offers customer support via telephone and email Please contact us on 0870 850 3463 UK only Mon Fri or visit www buggypod com 05 10 BuggyPodSmorph_May10 5 5 10 20 44 Page 1 ...

Страница 2: ... seat and enjoy a safe and comfortable ride alongside the younger child in the buggy When not in use Buggypod folds up flush against the side of the pushchair Complies with EN1888 2003 BS7409 1996 AS NZS 2088 2000 ASTM F833 07a Suitable for children from 6 months to 3 years max weight 40lb Not suitable for a child under 6 months We hope you and your toddler enjoy your Buggypod UK US Contents Page ...

Страница 3: ...ypod can be attached to most buggies and pushchairs including twin pushchairs and 3 wheelers The mounting bracket strap can be tightened easily around most buggy and pushchair frames The frames can be oval square round thick or thin Looking at the pushchair from the rear or the front the bars to which you intend to attach the brackets must be vertical otherwise the Buggypod will not sit vertically...

Страница 4: ...f the mounting bracket loosen the band screw with a screwdriver as shown Reposition the mounting bracket and re tighten You will need to reposition the mounting brackets if they interfere with the braking system or folding mechanism of your pushchair See www buggypod com for photos of fittings to particular pushchair models Then turn the red button head so that it is vertical or perpendicular to t...

Страница 5: ...tach the long section of the leash o to the upper bar on the right hand side of pushchair Loop the webbing around the bar and thread through the buckle as shown Make sure it is anchored at a point where it can not slip down Attach the shorter leash section to the top left corner of the Buggypod backrest The leash is designed to be left attached to your pushchair and used everytime the Buggypod is ...

Страница 6: ...r buttons on both sides The folded Buggypod can now be removed from the side of the pushchair when folding and transporting the pushchair and Buggypod By clipping the wheel onto the secondary axle you are supporting the Buggypod in the upright position Tip you can remove holding strap from your Buggypod by undoing the popper on the seat cover You can then loop the holding strap around your pushcha...

Страница 7: ...hould it prove faulty within 12 months of purchase under normal use and in compliance with the user instructions please return it to the point of purchase and we shall repair it If a repair is not possible we shall replace it Proof of purchase will be required and we recommend that you retain your receipt and attach it to this User Guide It may be unsafe to use replacement parts other than those s...

Страница 8: ... 2 Open zip 3 Open poppers on top of frame 4 Recline backrest Note The recline may also be adjusted by positioning the front mounting bracket up to 8 cm higher than the rear bracket Using with Comfort Liner available separately attach Comfort Liner fastener to fastener at top of backrest ...

Отзывы: