Before You Begin
First Time Operation
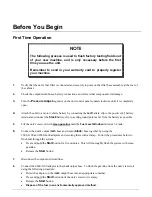
NOTE
The following process is used to flush factory testing fluids out
of your new machine, and is only necessary before the first
time you use the unit.
Remember to send in your warranty card to properly register
your machine.
1.
Verify that the unit’s
fuel filter is connected and securely in place on the filter base assembly at the rear of
the cabinet
.
2.
Check the output/return hoses, battery connections, and all external components for damage
.
3.
Turn
the
Pressure Adjust
regulator on the unit
control panel counterclockwise until it is completely
open
.
4.
Attach the unit
to a motor vehicle battery by connecting the
red
battery clip to the positive
(
+
)
battery
terminal and connect the
black
battery clip to a solid ground point as far from the battery as possible.
5.
Fill the unit’s reservoir with
clean gasoline
until the
Fuel Level Window
indicates 1/4 tank
.
6.
Connect the unit’s output (
red
) hose and return (
black
) hose together by using the
#060-1100 and #060-1400 adaptors and securing them with a clamp. Follow the procedures below to
flush fuel through the system:
•
Press and hold the
Start
button for five minutes. This will thoroughly flush the system with clean
gasoline.
•
Release the
Start
button.
7.
Disconnect the output and return lines.
8.
Connect the #060-1100 adaptor to the (
red
) output hose. To flush the gasoline from the unit’s
reservoir
using the following procedure:
•
Direct the adaptor on the (
red
) output hose into an appropriate container.
•
Press and hold the
Start
button until the unit’s reservoir is empty.
•
Release the
Start
button.
•
Dispose of the fuel in an environmentally approved method.


