


Addresses
31
To change the group’s membership:
1. On the menu wheel, select
.
2. Press
up or down to highlight the name of the group to which
you are adding or deleting members, then select
.
3. From the Choose Members screen, select the entries from the
Address Book to add to or remove from the group’s membership.
4. Select
to accept the changes and return to the Address
Book Entries screen.
Deleting Addresses
A well maintained Address Book provides quick access to the
addresses you need. Delete addresses for individuals that you no
longer contact or for groups that no longer exist.
Ä
The deletion of addresses cannot be undone.
To delete an address:
1. On the menu wheel, select
.
2. Press
up or down to highlight the Address Book entry, then
select .
3. Select
at the confirmation screen to delete the address
and return to the Address Book Entries screen.
TIP
Press
up or down to highlight an address entry, then
press
to select the entry.
appears next to each entry
selected. Press
again to de-select an entry, as required.
When you are finished selecting group members, press
to access the button field.
TIP
Remember! Deleting a member from a group will not delete
the individual member’s address from the Address Book.
After deleting a member from a group address, delete the
individual address, as needed. Addresses that are deleted
are automatically removed from groups.
TIP
Remember! Deleting group addresses will not delete the
individual member addresses. After deleting a group
address, delete the individual addresses, as needed.
32
Timeport P930 User’s Guide
Write
The Write application enables you to compose messages using the
QWERTY keyboard, insert Quick Text, and append your signature.
You can also choose to send your messages at a later time, file the
messages in inboxes prior to sending, and even place reminder
alerts on messages. When you send a new message, you return to
the Home screen and the status of the message is displayed there.
Messages can be sent to other Two-Way Pagers, two-way pagers,
one-way pagers, email addresses, and fax numbers by selecting the
appropriate address. See “ Entering Addresses” on page 28 for more
information on creating address entries.
Writing Messages
The QWERTY keyboard provides a familiar key layout, enabling
you to quickly type and send your message. For information on Alt-
mode keys and Symbols, see “ Alt-mode Functions” on page 11.
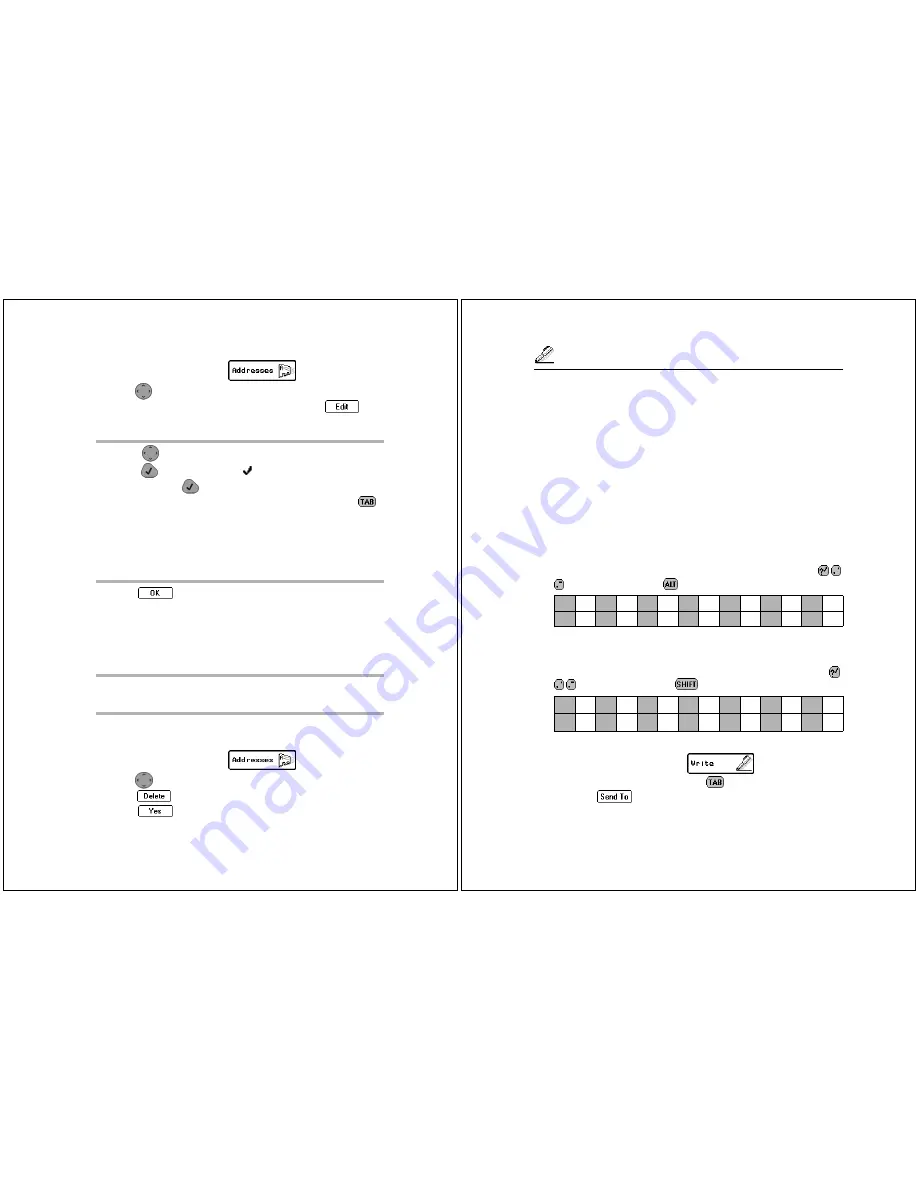
Thirteen symbols (colored blue on the keyboard) are available
using the Alt mode. The number keys plus three other keys(
) are used by pressing
, then the corresponding key.
For information on Shift-mode keys, see “ Shift-mode Functions” on
page 12.
Thirteen symbols (colored white on the keyboard) are available
using the Shift mode. The number keys plus three other keys (
) are used by pressing
, then the corresponding key.
To write a message:
1. On the menu wheel, select
.
2. Type your message, then press
to access the button field.
3. Select .
1
+
2
_
3
=
4
“
5
<
6
>
7
[
8
]
9
{
0
}
?
\
,
;
.
:
1
!
2
@
3
#
4
$
5
%
6
^
7
&
8
*
9
(
0
)
?
/
,
≤
.
-
Содержание Timeport P930 Series
Страница 50: ... 6881034B65 6881034B65 O ...


