20
2. Press HOME to save the new zone name and
return to the "NAME" display. If you wish to change
other zone names, press Mode to scroll through the
selections to "EXIT." Press HOME to go to the next
zone selection. Repeat the procedures to edit the
rest of the zone names.
VI. EDIT SCAN LISTS
The "SCAN" menu is used for zone-slaved scan
lists. Radio service software can also be used to edit
these lists. Operator-selectable zone scan lists can also
be modified via the Scan button. Operation of this fea-
ture is covered in the operator's manual. Please refer to
paragraph X. Edit Scan Lists for the Mode menu and
instructions on modifying zone-slaved scan lists.
VII. CHANGE PARAMETERS ASSOCIATED WITH
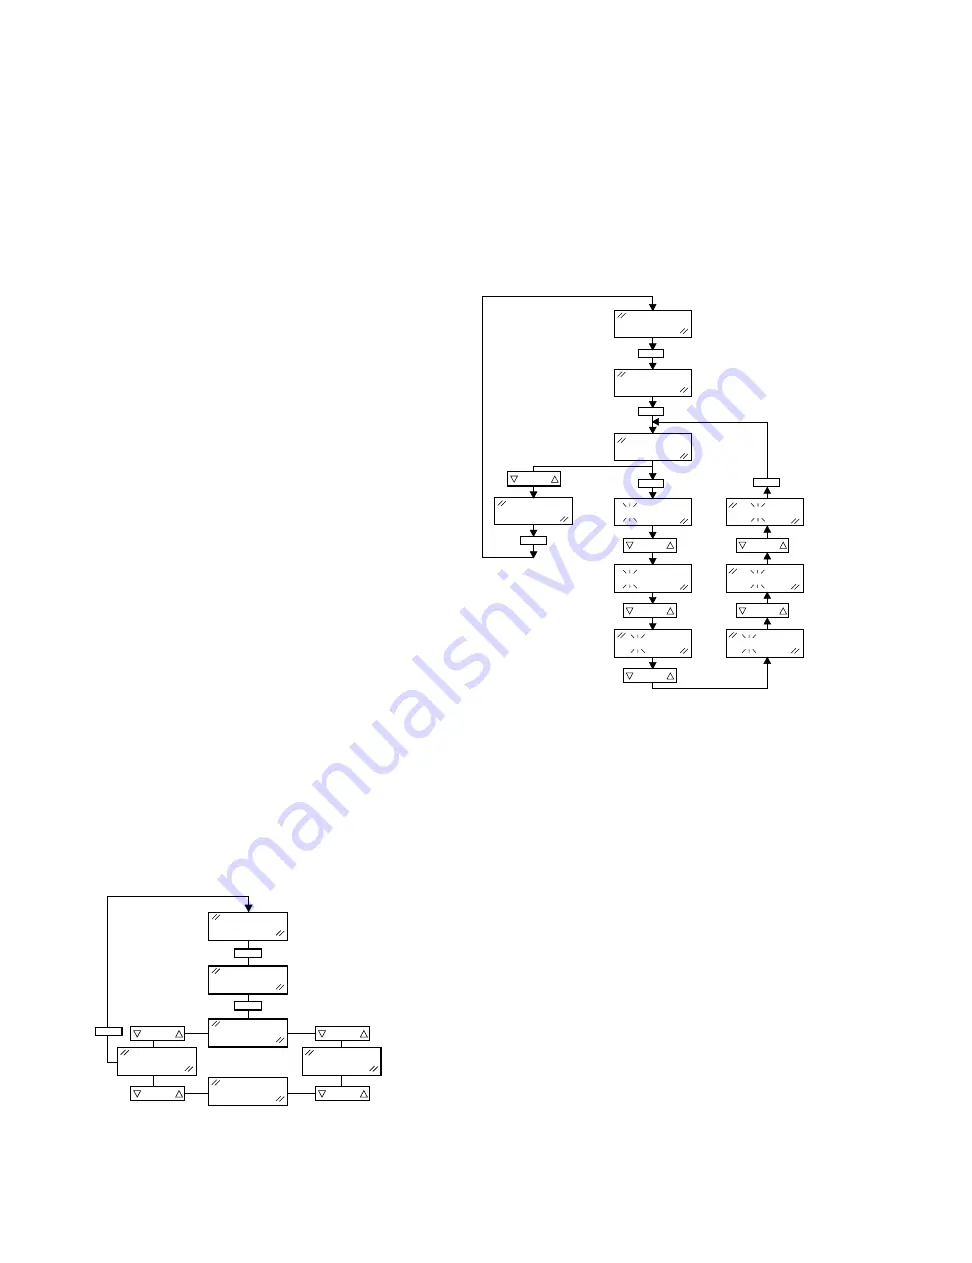
A MODE (See Figure 9.)
1.
After selecting "MODE" from the top level menu,
press HOME. The display changes to a mode num-
ber/name (for example, "MODE 1"). The mode
name will be flashing to indicate that a selection is
expected. Press Mode up or down to scroll through
all the modes in your radio and the "EXIT” display.
NOTE
At the "EXIT" display, press Mode to repeat the cycle
or press HOME to return to the top-level menu.
Press Mode down to cycle through all the modes in
reverse order.
2.
Scroll through the modes until you find the one you
wish to modify. With that mode displayed, press
HOME to select the mode for modifications. At this
point, the display changes to "NAME."
NOTE
By pressing Mode, you can cycle the display to
"CALL," "SCAN," "EXIT," and back to "NAME."
Use this menu when you want to edit the mode
names, selective-call, or mode-slaved scan
lists.
VIII.
CHANGE MODE NAMES (See Figure 10.)
NOTE
Radio service software can be used to disable mode
names. This will result in all modes being shown as
"MODE XX," where XX represents the mode number.
Attempting to change the mode name in front panel
programming will result in a bad-key tone.
1.
With "NAME" displayed, press HOME. The mode
selected is displayed with the first character flash-
ing. If you wish to change the flashing character,
press VOL up or down until the desired character is
flashing in that position.
NOTE
When you press VOL, you will scroll through, and
you may select from: the characters of the alphabet,
numbers 0 through 9, *, #, _, -, or /. A plus sign (+)
will also flash in the cycle, but it is not an allowed
character. Press the + sign to program a blank
space into the mode name. The letter "S" and the
number "5" will be shown identically on the display.
Press the radio keypad (if present) to enter numbers
directly.
2.
Press Mode to advance the cursor to the next char-
acter, and press VOL to select the character
desired.
3.
Repeat step (2) until the display shows the name
desired.
Figure 9. Mode Parameters Menu
MODE
HOME
MODE
MODE XX
HOME
NAME
SCAN
NAME
MODE
MODE
EXIT
MODE
HOME
MGXW-4317-O
MODE
MODE XX
NAME
MODE XX
BODE XX
EXIT
BODE XX
BASE XX
BADE XX
BADE XX
HOME
HOME
HOME
HOME
HOME
MODE
VOLUME
VOLUME
VOLUME
MODE
MODE
NOTE:
Use Mode Button to s
different mode.
Use VOLUME to scro
character set.
*
**
**
*
Figure 10. Changing Mode Names
MGXW-4288-O
Содержание Spectra
Страница 6: ...v PERFORMANCE SPECIFICATIONS FOR SPECTRA PRIVACY PLUS TRUNKED CONVENTIONAL 900 MHz RADIO ...
Страница 7: ...vi PERFORMANCE SPECIFICATIONS FOR SPECTRA SMARTNET TRUNKED CONVENTIONAL 900 MHz RADIO ...
Страница 8: ...vii PERFORMANCE SPECIFICATIONS FOR SPECTRA 9000 RADIOS 900 MHz 30 WATTS ...
Страница 25: ...1 GENERAL INFORMATION 1 ...
Страница 73: ...53 INSERT GPW 7221 B Figure 22 Front Panel Diagnostics Key Closure Displays ...
Страница 75: ...INSERT GXW 4278 O PICKUP FROM PW 4320 O 55 CONTROL STATION WIRING DIAGRAM ...
Страница 79: ...PUSHBUTTON SPECTRA 900 MHz RADIO MECHANICAL EXPLODED VIEW 59 INSERT GXW 6225 B ...
Страница 96: ...82 MECHANICAL EXPLODED VIEW PARTS LIST FOR SPECTRA 900 MHz RADIO ...


