background image

RADIO OVERVIEW

                                                                                                                                                           9

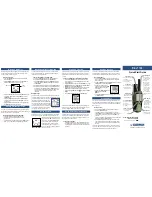
Selecting a Channel

For CLP multi-channel models only:  

1.

When powered ON, press the Menu button, you 
can hear the voice prompt:

[Color] “Channel” – [Channel#] – “To change” – 
“press +/-”

2.

Select the channel you want. The LED reflects 
the color of the new channel. Press PTT button 
to confirm or it is activated after 3 second hang 
time.  

Default Channel Settings for CPS

CLP1010 Single-Channel Models

CLP1040 Multi-Channel Models

CLP1060 Multi-

Channel Models

Channel

LED Status

 Color

Channel


 LED   

Status

 Color

Channel


LED 

Status


Color

 1

  Red


1


Red

1  

Red


 2

 Green

2

Green


3

 Yellow

3

Yellow

 4

Blue

  4

Blue

  5

Purple

6

White

Содержание CLP1010

Страница 1: ...User Guide CLP SeriesTwo Way RadioTM ...

Страница 2: ......

Страница 3: ...ety and RF Exposure Compliance iv FCC Licensing Information v Interference Information v Turning the Radio On and Off 6 Adjusting the Volume 6 Installing and Removing the Swivel Belt Clip Holster 6 Transmitting and Receiving 7 Operation with Menu Settings 8 Selecting a Channel 9 Monitoring a Channel 10 ...

Страница 4: ...ecking Battery Status 19 Batteries and Chargers Safety Information 20 Operational Safety Guidelines 21 Programming The Radio Through Advanced Radio Configuration 29 Entering Advanced Radio Configuration Mode 29 Troubleshooting 30 Use and Care 34 Radio Frequency and Code Charts 35 ...

Страница 5: ...ia Laws in the United States and other countries preserve for Furthermore the purchase of Motorola products shall not be deemed to grant either directly or by implication estoppels or otherwise any license under the copyrights patents or patent applications of Motorola except for the normal non exclusive license to use that arises by operation of law in the sale of a product ...

Страница 6: ...RE SAFETY STANDARDS Product Safety and RF Exposure Compliance For a list of Motorola approved antennas batteries and other accessories visit the following website www motorolasolutions com CLP Before using this product read the ...

Страница 7: ... CLP Series radio operates on radio frequencies that are regulated by the Federal Communications Commission FCC To transmit on these frequencies you are required to have a license issued by the FCC Application is made available on FCC Form 601 and Schedules D H and Remittance Form 159 To obtain these FCC forms request document 000601 which includes all forms and instructions If you wish to have th...

Страница 8: ...proved by Motorola may void the user s authority granted by the FCC to operate this radio and should not be made To comply with FCC requirements transmitter adjustments should be made only by or under the Replacement of any transmitter component crystal semiconductor etc not authorized by the FCC equipment authorization for this radio could violate FCC rules Use of this radio outside the country w...

Страница 9: ...he CLP Series radios provide cost effective efficient communications for businesses such as retail stores restaurants hotels PACKAGE CONTENTS Your product package contains the following products and manuals CLP Series Two way Radio Swivel Belt Clip Holster Lithium Ion Battery and Battery Door Drop In Tray Charger with Transformer Audio Accessory User Quick Reference Chargers Instructions Leaflet R...

Страница 10: ...RADIO OVERVIEW RADIO CONTROLS Accessory Connector Power Battery Button Menu Button ...

Страница 11: ...battery door and lift the battery door off the radio 2 Align the battery contacts with tabs in the battery compartment Insert the contact side of the battery first then press the battery down to secure in place 3 Put the battery door back on the radio Push down the latch to lock ...

Страница 12: ...Accessory Connect the wired audio accessory 3 Plug the audio accessory straight into the accessory connector on the radio Screw the audio accessory plug into the connector until it is tight and fully engaged with the connector ...

Страница 13: ...nstructions leaflet 3 Press and hold the PTT button and power button simultaneously until radio shows the blue Note The Bluetooth feature is disabled when the wired audio accessory is plugged into the accessory connector on the CLP radio Reconnect to Last Connected Bluetooth Headset 1 Turn the radio OFF 2 Press the power button to turn the radio ON Make sure the Bluetooth headset is turned ON ...

Страница 14: ...rt tone and the Smart Status Glow lights up To turn it OFF press and hold the button until you hear a short tone and the Smart Status Glow red indicator blinks once Adjusting the Volume U shaped groove Pull tight to lock the cord in place 5 Turn the belt clip to the position as needed Cord Guide U Shaped Groove ...

Страница 15: ...ront of the radio or on select wired audio accessories with an inline PTT Speak clearly into the microphone on the audio accessory When finished talking release the PTT to listen 2 To receive listen through the earpiece at the volume level you have set Press the PTT to respond ...

Страница 16: ...ttings Voice Assisted Operation feature may not be available on certain previous shipping radios At any time in Menu mode short press PTT or wait 3 seconds to exit the menu HOW TO STEP 1 STEP 2 Change Channel Press Menu button to navigate to Channel Press button to change channel ...

Страница 17: ...the voice prompt Color Channel Channel To change press 2 Select the channel you want The LED reflects the color of the new channel Press PTT button to confirm or it is activated after 3 second hang time Default Channel Settings for CPS CLP1010 Single Channel Models CLP1040 Multi Channel Models CLP1060 Multi ...

Страница 18: ... activate the Monitor press either button again to deactivate Note When Monitor is ON you can hear static if no 1 Press the Menu button to navigate to Scan mode 2 When Scan is OFF you can hear the voice prompt Scan To activate press 3 Press either button to activate the Scan press either button again to deactivate 4 When Scan is on you can hear the voice prompt Scan To deactivate press ...

Страница 19: ...c Talkaround Scan gives the radio the ability to scan both the transmit and receive frequencies of a Mute Feature You can quickly lower the headset volume using the Mute feature 1 Press and hold or button while receiving audio to quickly lower the headset volume to Mute Headset Volume setting configurable via CPS You can hear the voice prompt Mute 2 To switch back to the previous headset volume se...

Страница 20: ...ically to be used with a Motorola charger and vice versa Charging in non Motorola equipment may lead to battery damage and void the battery warranty The battery should be at about 77 F 25 C room temperature whenever possible Charging a cold battery below 50 F 10 C may result in leakage of electrolyte and ultimately in failure of the battery Charging a hot battery above 95 F 35 C results in reduced...

Страница 21: ...tors Contact your local waste management agency for specific requirements and information in your area Motorola fully endorses and encourages the recycling Many retailers and dealers participate in this program For the location of the drop off facility closest to you access RBRC s Internet web site at http www call2recycle org or call 1 877 723 1297 This internet site and telephone number also pro...

Страница 22: ...AND CHARGER EATURES Removing the Lithium Ion Li Ion Battery Power Supply Adapter and Drop in Tray Charger ...

Страница 23: ...ower supplies make sure you have similar drop in tray chargers and power supplies sets For part number details refer to Chargers Section on page 45 2 Connect the CLP power supply to a proper AC outlet 3 Insert the battery into the tray with the inside surface of the battery facing the front of the charger as shown 4 Ensure the slots in the battery correctly engage in the charger Estimated Charging...

Страница 24: ...AND CHARGER EATURES Charging the Radio with the Drop in Tray Single Unit Charger SUC Charging with the Drop In Tray Multi Unit Charger Optional Accessory ...

Страница 25: ...ket making sure the radio contacts are aligned with the MUC contacts Note The battery can be charged by itself using the slot on the flat surface of the charging pocket Charging Status LEDs For part number details refer to the Accessories Section on page 44 Charger LED Indicator Status LED Status Comments Charging Steady Red Indication The charger is currently charging ...

Страница 26: ...rop In Tray Multi Unit Charger and Cloning Cable Optional Accessory You can also charge your Bluetooth headset with CLP Series Multi Unit Charger MUC P N HKPN4007 optional accessory and Cloning Plug the other end of the cloning cable to the USB port of the Bluetooth headset for charging Note Refer to the charging status light on your Bluetooth headset leaflet ...

Страница 27: ... the Smart Status Glow and Voice Assisted Operation features gives you the battery status of the radio After the Smart Status Glow and Voice Assisted Operation features indicate the BATTERY STATUS it returns to the current channel color Note May not be available on certain previous shipping radios Battery Status ...

Страница 28: ...ore using the battery charger read all the 3 To reduce risk of damage to the electric plug and cord pull by the plug rather than the cord when disconnecting the charger 4 An extension cord should not be used unless absolutely necessary Use of an improper extension cord could result in risk of fire and electric shock If an extension cord must be used make sure that the cord size is 18 AWG ...

Страница 29: ...S Turn the radio OFF when charging battery The charger is not suitable for outdoor use Use only in dry locations conditions Connect charger only to an appropriately fused and wired supply of the correct voltage as specified on the product ...

Страница 30: ...ading the Customer Programming Software CPS You can program or change features on your CLP Programming the Radio To program the radio 1 Connect the radio via the Drop in Charger Tray or the Charging Pocket with PROG label on the Multi Unit Charger and CPS Programming Cable ...

Страница 31: ...nels Scan List Customized PL DPL Bluetooth as well as select frequencies PL DPL codes on each channel 4 After you change the settings press Write on the toolbar to save the settings Factory Default Settings Your radio is programmed at the factory to the following settings CLP1010 1W UHF 1 CH Radios Default Settings BRUS Channel Frequency Frequency Setting Code Value Hz Band width kHz 1 2 464 5500 ...

Страница 32: ...CLP1060 1W UHF 6 CH Bluetooth Radios Default Settings BRUS Channel Frequency Frequency Settings Code Value Hz Band width kHz 1 2 464 5500 67 0 12 5 2 8 467 9250 67 0 12 5 3 5 467 8500 67 0 12 5 ...

Страница 33: ... from one radio the source to a second radio using the CLP Series Single Unit Charger SUC Kit P N HKPN4008 and CLP Series Cloning Cable Kit P N HKKN4026 optional accessory or CLP Series CLONING INSTRUCTIONS Cloning Radios using the CLP Series Cloning Cable Kit P N HKKN4026 optional accessory ...

Страница 34: ...it Charger The batteries cannot be charged A data communication is being established between the two radios 6 After cloning is completed the Source Radio sounds either a pass tone cloning was successful or a fail tone cloning process has failed The pass tone sounds like a good key chirp whereas the fail tone sounds similar to a bonk tone A tone is heard in no more than 5 seconds 7 Once you have co...

Страница 35: ...he following before trying to start the cloning process again 1 Make sure that the radio batteries on both Note This cloning cable is designed to operate only with compatible Motorola Drop in Tray Single Unit Charger When ordering the cloning cable please refer to CLP Series Cloning Cable Kit P N HKKN4026 For details about accessories refer to Accessories Section on page 44 ...

Страница 36: ... accessory 3 Turn the target radio ON and place it in the pairing charging pocket that has the CLONE label and start the cloning process 4 Press the Menu button on the source radio to start the cloning process The source radio generates the start clone tone 5 Once the cloning is completed turn the ...

Страница 37: ...the following settings from a pre programmed list without the need to use a computer Note For Bluetooth models make sure the wired accessory is connected or the Bluetooth headset is paired before entering Advanced Radio Configuration Mode 1 Press the PTT button and Power button at the same time and hold for 3 to 5 seconds until you hear a chirp sound and the voice prompt Programming Mode ...

Страница 38: ...TROUBLESHOOTING Symptom Try this No Power Recharge or replace Li Ion battery Extreme operating temperatures affect battery life Refer to About the Li Ion Battery Section on page 12 ...

Страница 39: ...uildings or vehicles decrease range Check for clear line of sight to improve transmission Change location of radio To increase range and coverage you can either reduce obstructions or increase power UHF radios provide greater coverage in industrial and Symptom Try this ...

Страница 40: ...re too close they must be at least five feet apart Radios are too far apart or obstacles are interfering with transmission Low batteries Recharge or replace Li Ion battery Extreme operating temperatures affect battery life Symptom Try this ...

Страница 41: ...to ensure that the VOX Sensitivity Level is not set to 0 Accessory not working or not compatible Battery doesn t charge although it has been placed in the drop in Check drop in charger is connected and correspond to a compatible power supply Symptom Try this ...

Страница 42: ...USE AND CARE USE AND CARE ...

Страница 43: ...requency information and are useful when using Motorola CLP Series Two Way Radios with other business radios Most of the frequency positions are the same as Spirit M GT S XTN RDX and CLS Series frequency positions where applicable the bandwidths are different ...

Страница 44: ... 72 452 3125 12 5 82 468 2625 12 5 51 467 8875 12 5 62 467 4625 12 5 73 452 5375 12 5 83 468 3125 12 5 52 467 9125 12 5 63 467 4875 12 5 74 452 4125 12 5 84 468 3625 12 5 CLP UHF Frequencies Freq Freq MHz Band width kHz Freq Freq MHz Band width kHz Freq Freq MHz Band width kHz Freq Freq MHz Band width kHz ...

Страница 45: ... Codes CTCSS Code CTCSS DPL Code DPL Code DPL Code DPL Code 0 Disabled 24 151 4 47 54 71 243 95 445 1 67 25 156 7 48 65 72 244 96 464 2 71 9 26 162 2 49 71 73 245 97 465 3 74 4 27 167 9 50 72 74 251 98 466 4 77 28 173 8 51 73 75 261 99 503 ...

Страница 46: ...ed DPL 80 195 Inverted DPL 104 121 754 147 Inverted DPL 56 172 Inverted DPL 81 196 Inverted DPL 105 123 645 148 Inverted DPL 57 173 Inverted DPL 82 197 Inverted DPL 106 124 Customized PL 149 Inverted DPL 58 174 Inverted DPL 83 198 Inverted DPL 107 125 Customized PL 150 Inverted DPL 59 175 Inverted DPL 84 199 Inverted DPL 108 ...

Страница 47: ...ntained below Motorola Solutions Inc warrants its telephones Products and Accessories Products Covered Length of Coverage Products and Accessories as defined above unless otherwise provided for below One 1 year from the date of purchase by the first consumer purchaser of the product unless otherwise provided for below ...

Страница 48: ...red by this limited warranty Abuse Misuse Defects or damage that result Use of Non Motorola Products and Accessories Defects or damage that result from the use of Non Motorola branded or certified Products Accessories Software or other peripheral equipment are excluded from coverage Unauthorized Service or Modification Defects or damages resulting from service testing adjustment installation maint...

Страница 49: ...ies or Software is excluded from coverage Software Software NOT Embodied in Physical Media Software that is not embodied in physical media e g software that is downloaded from the internet is provided as is and without warranty WHO IS COVERED This warranty extends only to the first consumer purchaser and is not transferable WHAT WE WILL DO TO CORRECT Products Covered Length of Coverage ...

Страница 50: ... problem c the name of your service provider if this Product requires subscription service SOFTWARE COPYRIGHT NOTICE The Motorola products described in this manual may include copyrighted Motorola and third party software stored in semiconductor memories or other media Laws in the United States and other countries preserve for Motorola and third party software providers certain exclusive rights fo...

Страница 51: ... D395882 D383745 D389827 D389139 5929825 5926514 5953640 6071640 D413022 D416252 D416893 D433001 EXPORT LAW ASSURANCES This product is controlled under the export regulations of the United States of America The Governments of the United States of America may restrict the exportation or re exportation of this product to certain destinations For further information contact the U S Department of Comm...

Страница 52: ...scription HKLN4435_ CLP Series Single Pin Adjustable Cord Earpiece CLP Series Single Pin Part No Description HKNN4013_ CLP Series High Capacity Li Ion Battery Kit HKNN4014_ CLP Series Standard Li Ion Battery Kit HKLN4440_ CLP High Capacity Li Ion Battery Door Kit ...

Страница 53: ...ACCESSORIES CHARGERS PROGRAMMING CABLES Part No Description HKPN4007_ CLP Series Multi Unit Charger MUC Kit HKPN4008_ CLP Series Single Unit Charger SUC Kit ...

Страница 54: ...ACCESSORIES Notes ...

Страница 55: ......

Страница 56: ...M Motorola Solutions Inc 1303 E Algonquin Rd Schaumburg IL 60196 U S A ...

Отзывы: