background image

12

model no. 011-2064-0  |  contact us:  1-888-942-6686

13

OPERATION

OPERATION

00

50

Psi

OK

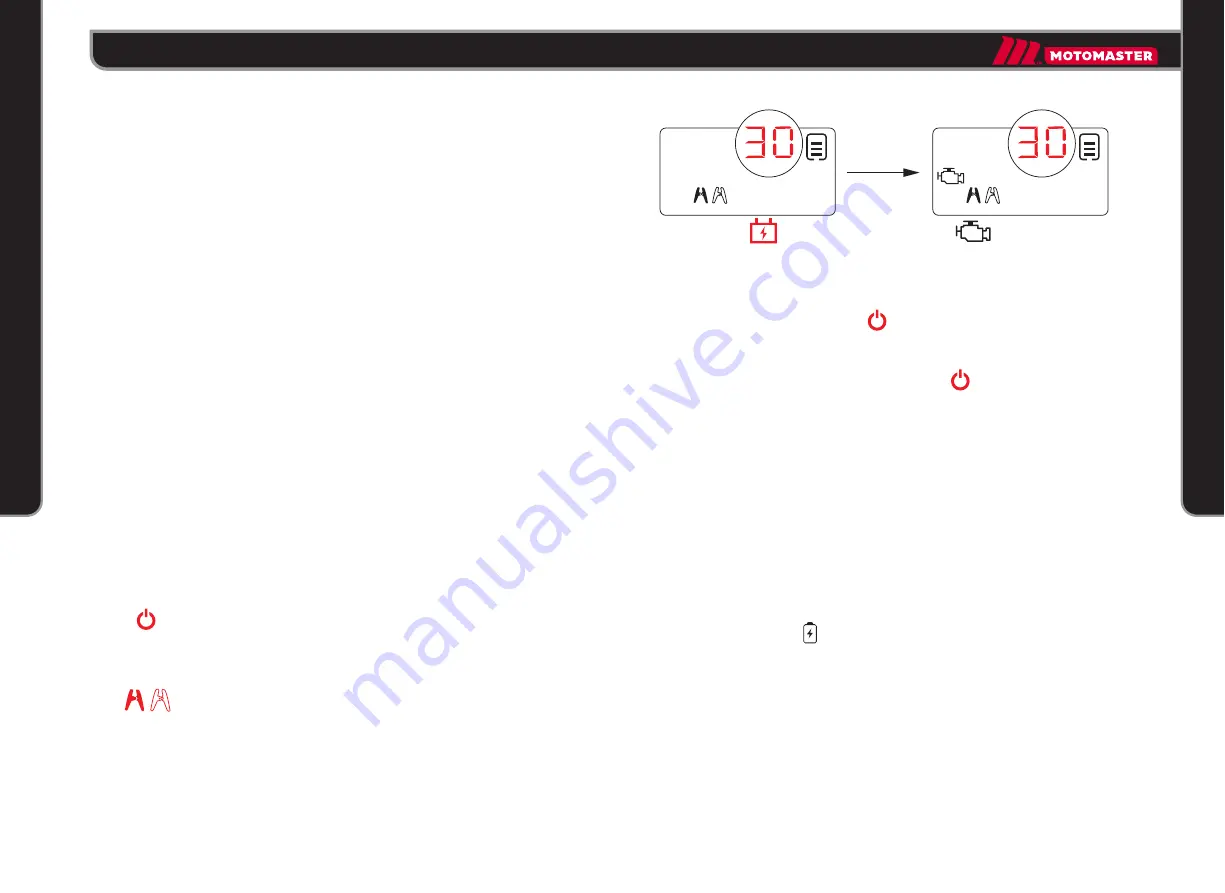
The           icon appears and a 
countdown begins. You have 

30 

seconds to jump start your vehicle.

Low Voltage Batteries & Manual Override

The unit is designed to jump start 12 Volt lead-acid batteries down to 2 volts. 
If your battery is below 2 volts, the display will be off. This is an indicator that 
the unit can not detect a battery. If you need to jump start a battery below 2 
volts, this unit has an OVERRIDE feature, which allows you to force 'ON' the 
jump start function.

CAUTION: 

Use this mode with extreme care. This mode is for 12 volt 

lead-acid batteries only. Both the spark-proof and reverse polarity protection 
feature are disabled. Pay very close attention to the polarity of the battery 
before using this mode. DO NOT allow the positive and negative battery 
clamps to touch or connect to each other as the product will generate 
sparks. This mode uses very high current (up to 1000 Amps) that can cause 
sparks and high heat if not used properly. If you are unsure about using this 
mode, do not attempt and seek professional help.

WARNING! 

Before using the OVERRIDE mode, ensure the clamps are 

connected to the correct polarity (red clamps to POS + terminal of the 
battery and black clamp to the NEG – terminal of the battery). 

RECHARGING

IMPORTANT! 

•  Improper charging may result in damage to the unit.

•  Ensure that there are no 12 V DC appliances connected to the unit while 

    being recharged.

•  Do not operate any of this unit’s functions while charging is in progress.

•  Do not recharge the unit while connected to an external battery.

•  Recharge battery after each use or at least every 6 months when in storage 

    to prolong battery life and keep the unit ready for use. 

1. Open protective flap        to expose USB charging port.

2. Connect micro USB cable to the unit’s USB charging port. 

3. Connect the other end of the micro USB cable to any powered USB power 

port  such as a laptop, 12 V DC adaptor (included) or AC charging cube (not 

included).

The USB port is rated at 2.4 Amps to ensure safe and efficient charging of the 

internal lithium-ion battery. We recommend that you do not charge and 

discharge the unit at same time.

6. Try starting the vehicle by cranking the key.

7. Once your vehicle starts, press         to turn the unit off. Disconnect the 

battery clamps. 

OPERATION

1. Firmly insert the booster clamps into boosting clamps connection port.

2. Press        to turn the unit on.

3. Connect red clamp to the POS(+) terminal of the vehicle battery. 

4. Connect black clamp to the NEG(-) terminal of the vehicle battery. 

    Icon             will not appears.

OK

00

50

Psi

OK

5. Long Press            until the  
    number 30 appears.
    It will flicker three times.

IMPORTANT

    The unit must be manual turned off by press          , after manual override. 

Otherwise it may leads to dangerous situation.

Содержание 011-2064-0

Страница 1: ...MP STARTER WITH AIR COMPRESSOR IMPORTANT Please read this manual carefully before using this jump starter and save it for reference DO NOT RETURN THIS PRODUCT TO THE STORE QUESTIONS CALL CUSTOMER SERVICE HOTLINE 1 888 942 6686 00 126 Psi V 12V ...

Страница 2: ...hose published by the battery manufacturer and manu facturer of any equipment intended to be used in the vicinity of battery Review cautionary markings on these products and on engine Electrical Shock Product is an electrical device that can shock and cause serious injury Do not cut power cords Do not submerge in water or get wet Explosion Unmonitored incompatible or damaged batteries can explode ...

Страница 3: ...sition cable leads to avoid accidental damage by moving vehicle parts including hoods and doors moving engine parts including fan blades belts and pulleys or what could become a hazard that may cause injury or death Operation Temperature This product is designed to work in ambient tempera tures between 30 C to 60 C 22 F to 140 F Do not operate outside of tempera ture range Do not jump start a froz...

Страница 4: ... for the user s safety when using accessories that are not approved by MotoMaster When using a AC plug not included to charge the product make sure that the end of charging cable is fully inserted into the AC plug before you plug it into a power outlet It may become warm during normal use and prolonged skin contact may cause bodily injury Always allow adequate ventilation around power adaptors whe...

Страница 5: ...n 7 Air Compressor Power Button 8 LED Light Button 9 Boosting Power Button 10 USB Ports x2 under protective cover 11 Air Compressor Nozzle Connector 12 Boosting Clamps 13 USB Charging Port under protective cover 14 Boosting Clamps Connection Port under protective cover 15 USB Charging Cable 16 USB 12 V Car Charger Adaptor 17 Ball Balloon Adaptors 00 Psi USB 5 V 126V OK Internal Battery Voltage Com...

Страница 6: ...starts up Make sure that cables are routed away from motor fan or belts GETTING STARTED This product comes partially charged and needs to be fully charged prior to use Carefully read and understand the vehicle owner s manual on specific precau tions and recommended methods for jump starting the vehicle Make sure to determine the voltage and chemistry of the battery by referring to your battery own...

Страница 7: ...s between attempts CAUTION Do not attempt more than 5 consecutive jump starts within a 15 minute period Allow the product to rest for 15 minutes before attempting to jump start the vehicle again 8 Once your vehicle starts press to turn the unit off Disconnect the battery clamps OPERATION JUMP STARTING Warning Instructions are for negative ground systems only most common for vehicles today If your ...

Страница 8: ...e battery RECHARGING IMPORTANT Improper charging may result in damage to the unit Ensure that there are no 12 V DC appliances connected to the unit while being recharged Do not operate any of this unit s functions while charging is in progress Do not recharge the unit while connected to an external battery Recharge battery after each use or at least every 6 months when in storage to prolong batter...

Страница 9: ...r than 10 minutes Allow compressor to cool down for every 10 minutes of continuous use DO NOT use this product for other than its intended use CAUTION BURST HAZARD AND INJURY Carefully follow instructions and recommended pressure of products being inflated DO NOT OVER INFLATE Always wear eye protection when operating the air compressor DO NOT leave the compressor unattended during use IMPORTANT Th...

Страница 10: ... once desired pre set pressure is reached 7 Once unit has finished inflating press to turn the unit off 8 Unscrew the nozzle connector from the valve stem of the object being inflated If using an adaptor disconnect from object being inflated and remove adaptor from nozzle connector 9 Store air hose and ball balloon adaptors in the appropriate storage compart ments LED LIGHT IMPORTANT Make sure LED...

Страница 11: ... instructions Check if unit has at least 75 charge Recharge if necessary Reconnect clamps and ensure proper contact and polarity has been established Replace vehicle battery Have the vehicle serviced Replace unit Press to turn unit ON refer to OPERATING AIR COMPRESSOR instructions Check if unit has at least 75 charge Recharge if necessary Make sure nozzle connector is securely screwed on to the va...

Страница 12: ...conds for complete the jumping The unit can t jump vehicle after 50 seconds The program only allow 30 seconds for override vehicle The unit can t override vehicle after 30 seconds Good connected ready for next step Operation Sequence Error Battery Clamps reverse connected and they are connected before unit powered on Operation Sequence Error The battery clamp is connected before unit powered on Fo...

Страница 13: ...ife cycle hand it over at a collection point for the recycling of electrical and electronic appliances The symbols on the product the instructions for use or the packing will inform about the methods for disposal This MotoMaster product carries a one 1 year warranty against defects in workmanship and materials This product is not guaranteed against wear break age or misuse Should this product beco...

Отзывы: