background image


33 

© 2017 Maka Technologies Group. All Rights Reserved.


Getting


Started


Operation of your TX1 FHD Digital Roadcorder

TM


6  Press on 

OK

 to confirm your entry and exit to setting


7  Press on 

 button once t

o exit Setting and back recording mode


8  Start recording by pressing 

OK

 button


9  Stop recording by pressing 

OK

 button again


Alternatively, you can choose using the hot keys for shortcuts 

Hot


Keys


during


recording


mode:


•

Press on 

  button 

– Press to manual turn off  / turn back on when off 

mode during recording time.


Exposure


Adjust exposure according to your preference. Default setting is set as +0.0 and 
recommended not to change unless changes made on your preference liking.


1  Press 

OK to stop recording. 

2.   Press 

 once to enter into video setting


3  Press on 

Up

 or 

Down

 button to navigate to the function that shows 

Exposure


4  Press on 

OK to enter and show 

+0.0/ +1/3 or -1/3 etc


5  Press on the 

Up

 or 

Down

 button to make your selection  

6  Press on 

OK

 to confirm your entry and exit to setting


7  Press on 

 button once t

o exit Setting and back recording mode


8  Start recording by pressing 

OK

 button


9  Stop recording by pressing 

OK

 button again


Содержание TX1

Страница 1: ... registered trademarks of Maka GPS Technologies Group In association with Maka GPS Technologies Private Limited Singapore Maka GPS Technologies Sdn Bhd Malaysia Maka Technologies Group H K Limited and Maka Corporation USA Inc The information in this manual is subject to change without notice www makagps com 2 2018 R1 2 ...

Страница 2: ...lugs or loose electrical sockets Unsecured connections can cause electric shock or fire Do not touch the car charger with wet hands or disconnect the charger by pulling the cord Doing so may result in electrocution Do not bend or damage the car charger Doing so may cause electric shock or fire Do not use your device while it is charging or touch your device with wet hands Doing so may cause electr...

Страница 3: ...afety when using accessories or supplies that are not approved by Maka GPS Technologies Group Do not drop or cause an impact to the charger or the device Handle and dispose of the device and charger with care Never dispose of the battery or device in a fire Never place the battery or device on or in heating devices such as microwave ovens stoves or radiators The device may explode when overheated ...

Страница 4: ...ls of your battery and lead to temporary or permanent battery damage Never use a damaged charger or battery Do not bite or suck the device or the battery Doing so may damage the device or result in an explosion or fire Children or animals can choke on small parts If children use the device make sure that they use the device properly Do not handle a damaged or leaking Lithium Ion Li Ion battery For...

Страница 5: ...ay cause your device to malfunction If you notice strange smells or sounds coming from your device or the battery or if you see smoke or liquids leaking from the device or battery stop using the device immediately and take it to a Maka Service Centre Failure to do so may result in fire or explosion For your own safety do not operate the controls of the product while driving Two window mounts are n...

Страница 6: ... devices and equipment with caution Ensure that any mobile devices or related equipment installed in your vehicle are securely mounted Avoid placing your device and accessories near or in an airbag deployment area Improperly installed wired equipment can cause serious injury when airbags inflate rapidly Do not drop your device or cause impacts to your device Your device may be damaged or may malfu...

Страница 7: ...evice to a Maka Service Centre Do not disassemble or puncture the battery as this can cause explosion or fire Turn off the device before removing the battery If you remove the battery with the device turned on it may cause the device to malfunction When cleaning your device mind the following Wipe your device or charger with a towel or an eraser Do not use chemicals or detergents Doing so may disc...

Страница 8: ...ronment or human health from uncontrolled waste disposal please separate these items from other types of waste and recycle them responsibly to promote the sustainable reuse of material resources Household users should contact either the retailer where they purchased this product or their local government office for details of where and how they can take these items for environmentally safe recycli...

Страница 9: ...A GPS TECHNOLOGIES GROUP DOES NOT WARRANT CONTENT OR SERVICES SO PROVIDED EITHER EXPRESSLY OR IMPLIEDLY FOR ANY PURPOSE MAKA EXPRESSLY DISCLAIMS ANY IMPLIED WARRANTIES INCLUDING BUT NOT LIMITED TO WARRANTIES OF MERCHANTABILITY OR FITNESS FOR A PARTICULAR PURPOSE MAKA GPS TECHNOLOGIES GROUP DOES NOT GUARANTEE THE ACCURACY VALIDITY TIMELINESS LEGALITY OR COMPLETENESS OF ANY CONTENT OR SERVICE MADE A...

Страница 10: ... limiting the generality of this disclaimer Maka GPS Technologies Group expressly disclaims any responsibility or liability for any interruption or suspension of any content or service made available through this device Maka GPS Technologies Group is neither responsible nor liable for customer service related to the content and services Any question or request for service relating to the content o...

Страница 11: ...ebsite at www makagps com Available features and additional services may vary by device software Applications and their functions may vary by country region or hardware specifications Maka is not liable for performance issues caused by applications from any provider other than Maka Maka is not liable for performance issues or incompatibilities caused by not installing the device as stated in this ...

Страница 12: ...andard Packaging of your TX1 FHD Digital RoadcorderTM Package Contents 18 Installation for your TX1 FHD Digital RoadcorderTM Installation 19 Charging the Battery 20 Inserting Memory Card 21 Removing Formatting Memory Card 22 Operation of your TX1 FHD Digital RoadcorderTM Video System Setting Turning the device on and off 23 Resolution 24 Loop Recording 24 25 HDR 25 26 Motion Detector 26 Record Aud...

Страница 13: ...1 Language 31 Frequency 32 LCD Time Out 32 33 Exposure 33 Anti Shaking 34 Delay Shutdown 34 35 Format 35 Default Setting 36 Version 36 PHOTO SETTING Capture Mode 37 Resolution 37 38 Sequence 38 Quality 38 39 Sharpness 39 White Balance 39 40 Color 40 ISO 41 Date Stamp 41 Playback Mode Video Photo 42 Delete ProtectFiles 43 General Troubleshooting 44 45 ...

Страница 14: ...G Gravity sensor Sensitivity low medium high OFF LCD 3 0 inch 16 9 TFT LCD Audio Built in high sensitivity microphone speaker Motion detect ON OFF Shutter Electronic shutter White balance Auto Exposure Auto ISO Language English Traditional Chinese Simplified Chinese Russian Battery optional 200mAh 3 7V rechargeable lithium battery Video format MOV Video resolution 1920x1080P30 1280x720P30 Loop rec...

Страница 15: ...of your TX1 FHD Digital RoadcorderTM Device Layout Button Function 1 Micro Sd Card Slot 07 Right Arrow Scroll 2 UP Arrow Scroll 08 Manual Lock Button 3 Menu Button 09 Mode Change Button 4 Down Arrow Scroll 10 Ok Button Stop Rec Enter 5 Mic 11 DC Power input 6 Reset 12 HDMI Slot ...

Страница 16: ...election in setting mode MENU Press to enter and exit Setting mode Press to navigate to the preferred functions required during Setting Hot Keys during recording mode Up Press to mute unmute the microphone during recording MODE M Press M for to toggle between Recording Photo Playback mode RESET Press and hold for more than 3 seconds to reset the device if it has fatal errors or hang ups or freezes...

Страница 17: ...17 2017 Maka Technologies Group All Rights Reserved Getting Started Understanding your TX1 FHD Digital RoadcorderTM and Buttons Status Icons ...

Страница 18: ...vice and any available accessories may vary depending on the region The supplied items are designed only for this device and may not be compatible with other devices Appearances and specifications are subject to change without prior notice Malfunctions caused by using unapproved accessories are not covered by the warranty service Availability of all accessories is subject to change depending entir...

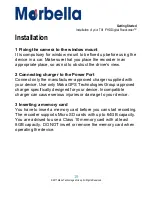
Страница 19: ...necting charger to the Power Port Connect only the manufacturer approved charger supplied with your device Use only Maka GPS Technologies Group approved charger specifically designed for your device Incompatible charger can cause serious injuries or damage to your device 3 Inserting a memory card You have to insert a memory card before you can start recording The recorder supports Micro SD cards w...

Страница 20: ...ly switch off in 5 seconds time To turn on the device again you will need to press on the on off button to manually switch it on If the battery is completely discharged the device cannot be turned on immediately when the charger is connected Allow a depleted battery to charge for a few minutes before turning on the device Connecting the charger improperly may cause serious damage to the device Any...

Страница 21: ...evice or the memory card or corrupt the data stored in it Use caution to insert the memory card right side up as shown in the image below Insert a memory card with the gold coloured contacts facing downwards Push the memory card into the slot until it locks in place It is recommended to reformat a memory card every time images are transferred from it to a computer or at least once every 2 weeks Re...

Страница 22: ...from the slot Do not remove the memory card while the device is transferring or accessing information Doing so can cause data to be lost or corrupted or damage to the memory card or device Maka GPS Technologies Group is not responsible for losses that result from the misuse of damaged memory cards including the loss of data Formatting the memory card You may choose to format your memory card on a ...

Страница 23: ... turn on the device A welcome message will be displayed on screen as shown in the image below To turn off the device press and hold the Power button for a few seconds again to turn off the device A goodbye message will be displayed on screen as shown in the image below Note TX1 FHD Digital RoadcorderTM will be switch on and off automatically if you have permanently connected it to the car charger ...

Страница 24: ...920x1080 30P or 1280x720 30P etc 5 Press on the Up or Down button to make your selection 6 Press on OK to confirm your entry and exit to setting 7 Press on button twice to exit Setting and back recording mode 8 Start recording by pressing OK button 9 Stop recording by pressing OK button again Loop Recording The device will continue to record by erasing the previously recorded oldest video All old ...
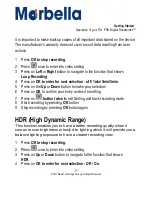
Страница 25: ... 3min 5min 5 Press on the Up or Down button to make your selection 6 Press on OK to confirm your entry and exit to setting 7 Press on button twice to exit Setting and back recording mode 8 Start recording by pressing OK button 9 Stop recording by pressing OK button again HDR High Dynamic Range This function enables you to have a better recording quality when it comes to over brightness or lowly di...
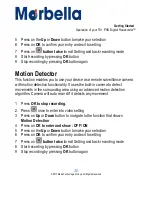
Страница 26: ...amera with motion detection functionality It uses the built in camera to detect movements in the surrounding area using an advanced motion detection algorithm Camera will auto record If it detects any movement 1 Press OK to stop recording 2 Press once to enter into video setting 3 Press on Up or Down button to navigate to the function that shows Motion Detection 4 Press on OK to enter and show OFF...

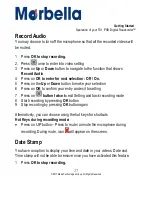
Страница 27: ...r Down button to make your selection 6 Press on OK to confirm your entry and exit to setting 7 Press on button twice to exit Setting and back recording mode 8 Start recording by pressing OK button 9 Stop recording by pressing OK button again Alternatively you can choose using the hot keys for shortcuts Hot Keys during recording mode Press on UP button Press to mute unmute the microphone during rec...
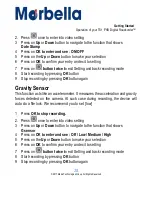
Страница 28: ... by pressing OK button again Gravity Sensor Thisfunction acts like an accelerometer It measures the acceleration and gravity forces detected on the camera At such case during recording the device will auto do a file lock We recommend you to set low 1 Press OK to stop recording 2 Press once to enter into video setting 3 Press on Up or Down button to navigate to the function that shows Gsensor 4 Pre...

Страница 29: ... 4 Press on OK to enter and see in YY MM DD 5 Press on the Up or Down button to make your selection 6 Press on OK to confirm and next entry made follow by exit setting and back to recording mode 7 Start recording by pressing OK button 8 Stop recording by pressing OK button again Car No Stamp This function enable you to enter car plate number of your own vehicle for video recording information 1 Pr...

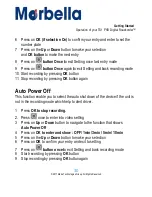
Страница 30: ...11 Stop recording by pressing OK button again Auto Power Off This function enable you to select the auto shut down of the device if the unit is not in the recording mode which help to alert driver 1 Press OK to stop recording 2 Press once to enter into video setting 3 Press on Up or Down button to navigate to the function that shows Auto Power Off 4 Press on OK to enter and show OFF 1min 3min 5min...

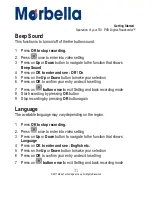
Страница 31: ...ress on OK to confirm your entry and exit to setting 7 Press on button once to exit Setting and back recording mode 8 Start recording by pressing OK button 9 Stop recording by pressing OK button again Language The available language may vary depending on the region 1 Press OK to stop recording 2 Press once to enter into video setting 3 Press on Up or Down button to navigate to the function that sh...

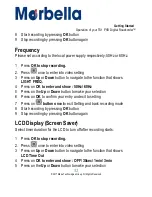
Страница 32: ... OK to enter and show 50Hz 60Hz 5 Press on the Up or Down button to make your selection 6 Press on OK to confirm your entry and exit to setting 7 Press on button once to exit Setting and back recording mode 8 Start recording by pressing OK button 9 Stop recording by pressing OK button again LCD Display Screen Saver Select timer duration for the LCD to turn off after recording starts 1 Press OK to ...
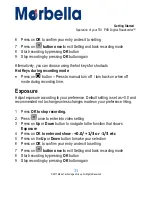
Страница 33: ...ack on when off mode during recording time Exposure Adjust exposure according to your preference Default setting is set as 0 0 and recommended not to change unless changes made on your preference liking 1 Press OK to stop recording 2 Press once to enter into video setting 3 Press on Up or Down button to navigate to the function that shows Exposure 4 Press on OK to enter and show 0 0 1 3 or 1 3 etc...

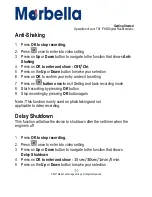
Страница 34: ...it to setting 7 Press on button once to exit Setting and back recording mode 8 Start recording by pressing OK button 9 Stop recording by pressing OK button again Note This function is only used on photo taking and not applicable to video recording Delay Shutdown This function will allow the device to shut down after the set timer when the engine is off 1 Press OK to stop recording 2 Press once to ...
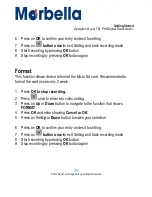
Страница 35: ...n allows device to format the Micro Sd card Recommended to format the card once every 2 week 1 Press OK to stop recording 2 Press once to enter into video setting 3 Press on Up or Down button to navigate to the function that shows FORMAT 4 Press OK and enter showing Cancel or OK 5 Press on the Up or Down button to make your selection 6 Press on OK to confirm your entry and exit to setting 7 Press ...

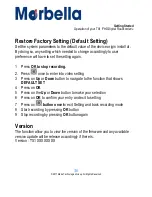
Страница 36: ... recording 2 Press once to enter into video setting 3 Press on Up or Down button to navigate to the function that shows DEFAULT SET 4 Press on OK 5 Press on the Up or Down button to make your selection 6 Press on OK to confirm your entry and exit to setting 7 Press on button once to exit Setting and back recording mode 8 Start recording by pressing OK button 9 Stop recording by pressing OK button ...

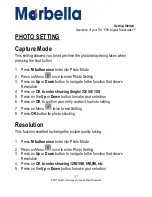
Страница 37: ...ws Resolution 4 Press on OK to enter showing Single 2S 5S 10S 5 Press on the Up or Down button to make your selection 6 Press on OK to confirm your entry and exit to photo setting 7 Press on Menu twice to exit Setting 8 Press OK button for photo shooting Resolution This function enabled to change the picture quality taking 1 Press M button once enter into Photo Mode 2 Press on Menu once to enter P...

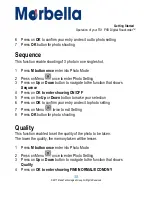
Страница 38: ...ate to the function that shows Sequence 4 Press on OK to enter showing ON OFF 5 Press on the Up or Down button to make your selection 6 Press on OK to confirm your entry and exit to photo setting 7 Press on Menu twice to exit Setting 8 Press OK button for photo shooting Quality This function enabled to set the quality of the photo to be taken The lower the quality the memory taken will be lesser 1...

Страница 39: ... M button once enter into Photo Mode 2 Press on Menu once to enter Photo Setting 3 Press on Up or Down button to navigate to the function that shows Sharpness 4 Press on OK to enter showing STRONG NORMAL SOFT 5 Press on the Up or Down button to make your selection 6 Press on OK to confirm your entry and exit to photo setting 7 Press on Menu twice to exit Setting 8 Press OK button for photo shootin...

Страница 40: ...nd exit to photo setting 7 Press on M twice to exit Setting 8 Press OK button for photo shooting Color This function enable to set the effect of the photo taken 1 Press M button once enter into Photo Mode 2 Press on Menu once to enter Photo Setting 3 Press on Up or Down button to navigate to the function that shows Color 4 Press on OK to enter showing Color Black White Sepia 5 Press on the Up or D...

Страница 41: ...0 AUTO 5 Press on the Up or Down button to make your selection 6 Press on OK to confirm your entry and exit to photo setting 7 Press on Menu twice to exit Setting 8 Press OK button for photo shooting Date Stamp 1 Press M button once enter into Photo Mode 2 Press on Menu once to enter Photo Setting 3 Press on Up or Down button to navigate to the function that shows Date Stamp 4 Press on OK to enter...

Страница 42: ...RT playing 6 Press on OK again to PAUSE playing 8 FAST FORWARD Press and hold the UP button to forward your video to 2X 4X 8X speed mode 9 REWIND Press the Down button to slow forward your video to 2 X 4 X 8 X speed mode 10 Press M button to return back to recording mode Playback Mode Photo 1 Stop recording by pressing on the OK button 2 Press M button twice to enter into playback Mode 3 Press on ...

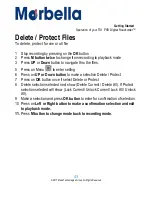
Страница 43: ...files 5 Press on Menu to enter setting 6 Press on UP or Down button to make a selection Delete Protect 7 Press on OK button once if select Delete or Protect 8 Delete selection selected next show Delete Current Delete All If Protect selection selected will show Lock Current Unlock Current Lock All Unlock All 9 Make a selection and press OK button to enter for confirmation of selection 10 Press on L...

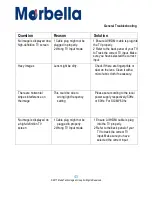
Страница 44: ...ht be low in battery Charge the Battery Screen Auto power off 1 Screen Saver function is enabled 2 Low Battery 1 Press on UP button disable the screen saver mode 2 Charge the battery Unable to record videos 1 Memory card might be full 2 If loop recording has been enabled memory card might be corrupted 1 Check your memory card s space Delete files if required 2 Reformat your Memory card if issue st...

Страница 45: ... Lens might be dirty Check if there are fingerprints or dust on the lens Clean it with a micro fabric cloth if necessary There are horizontal stripes interference on the image This could be due to wrong light frequency setting Please set according to the local power supply respectively 50Hz or 60Hz For SG MY 50hz No image is displayed on a high definition TV screen 1 Cable plug might not be plugge...

Отзывы: