The Interface Solution Experts 33
SPA
2
Programmable Current/Voltage
Limit Alarm Trips
11.
Analog Output Tab–
Configuration of the analog
output (if your instrument is equipped with the -AO
option) is performed here. Refer to the
Analog Output
section for a complete description.
12.
Scaling Tab–
If you choose to enable the scaling
feature, the parameter would be configured at this
window. Refer to the
Scaling section for a complete
description.
13.
Custom Curve Tab–
The SPA
2
has two modes
of operation: linear mode and custom mode. In linear
mode, the scaled output is proportional to the scaled
input. In custom mode, reached by selecting the
Custom Curve tab, you define a special linearization
function. Refer to the
Custom Curve section for a
complete description.
Note:
You may not use the front panel push buttons for
Custom Curve configuration. The Custom Curve
parameter can ONLY be configured using your PC
and PC Configuration Software Program.
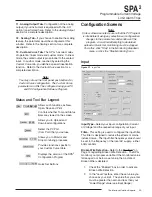
Status and Tool Bar Legend
Configuration Screens
Note:
Unless otherwise noted, ensure that the PC Program
is idle before making any selections or configuration
changes to the parameters and windows of the
program. Also, when attempting to download,
upload or Quick Set, monitoring must be stopped.
To do this, click “Stop” in the Monitoring dropdown
menu, or click the “Stop Monitoring” icon.
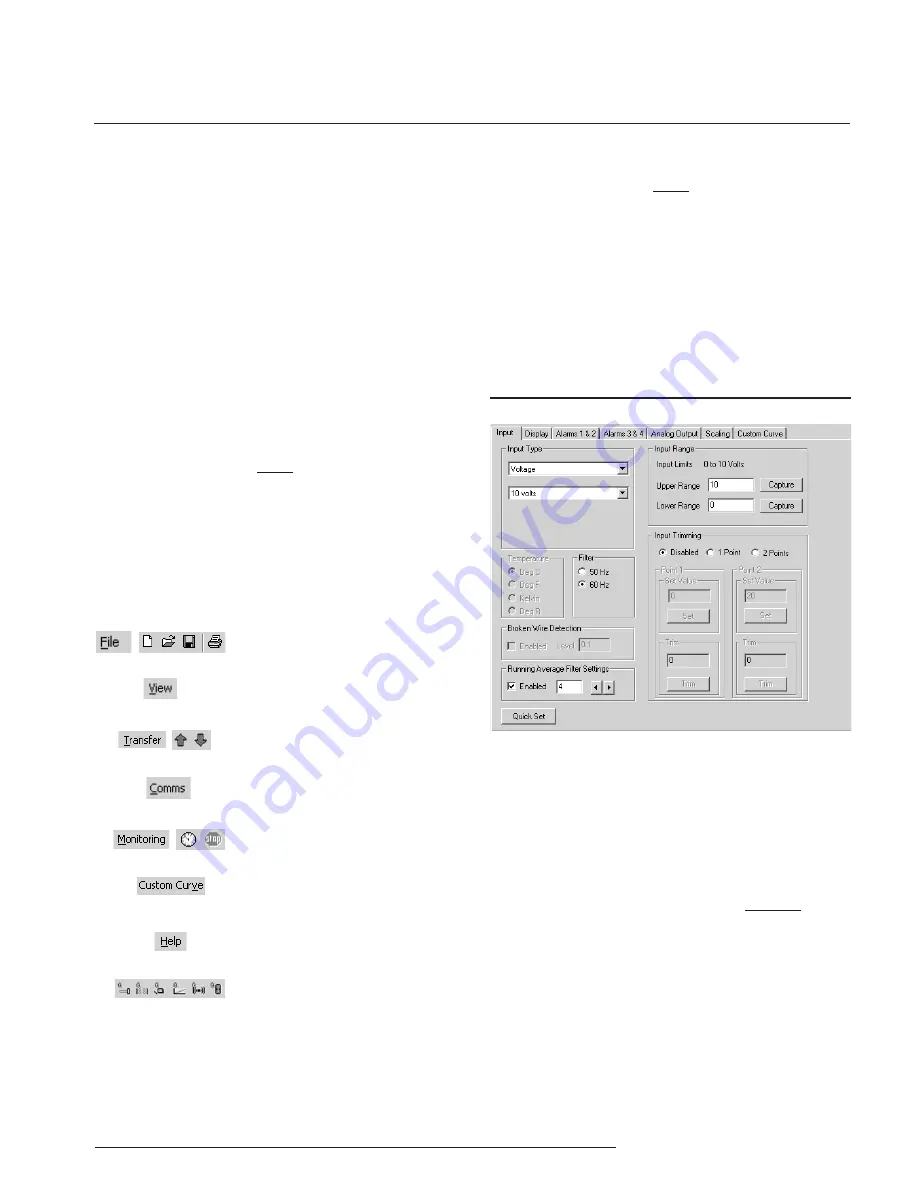
Input
Input Type–
Select your input configuration (Current
or Voltage) and the respective range of your input.
Filter–
This setting is used to configure the input filter.
This filter is designed to reduce the effects of mains-
induced noise. The input filter frequency value should
be set to the frequency of the local AC supply– either
50Hz or 60Hz.
Broken Wire Detection–
Refer to the “
Caution”
on
Page 14 regarding Broken Wire Detection. The SPA
2
monitors your process variable. If the monitored value
falls equal to or below a set value, then a state of
Broken Wire is declared.
1.
Check the “Enabled” box in order to activate
Broken Wire Detection.
2.
In the “Level” textbox, enter the set value you
choose as your limit. The value that you enter
must be greater than zero and less than your
“Lower Range” value (see
Input Range).
Allows such functions as New,
Open, Save and Print
Allows you to Upload and
Download configurations
Select the PC Port
(Com Port) that you will use
Allows you to Monitor and
Stop monitoring processes
Provides functions specific to
your Custom Curve table
Controls whether Tool and Status
Bars are viewed on the screen
Displays the version of the SPA
Configuration Program
Quick Set Buttons
2
Figure 21.
Input Tab


