background image

Installation Verification

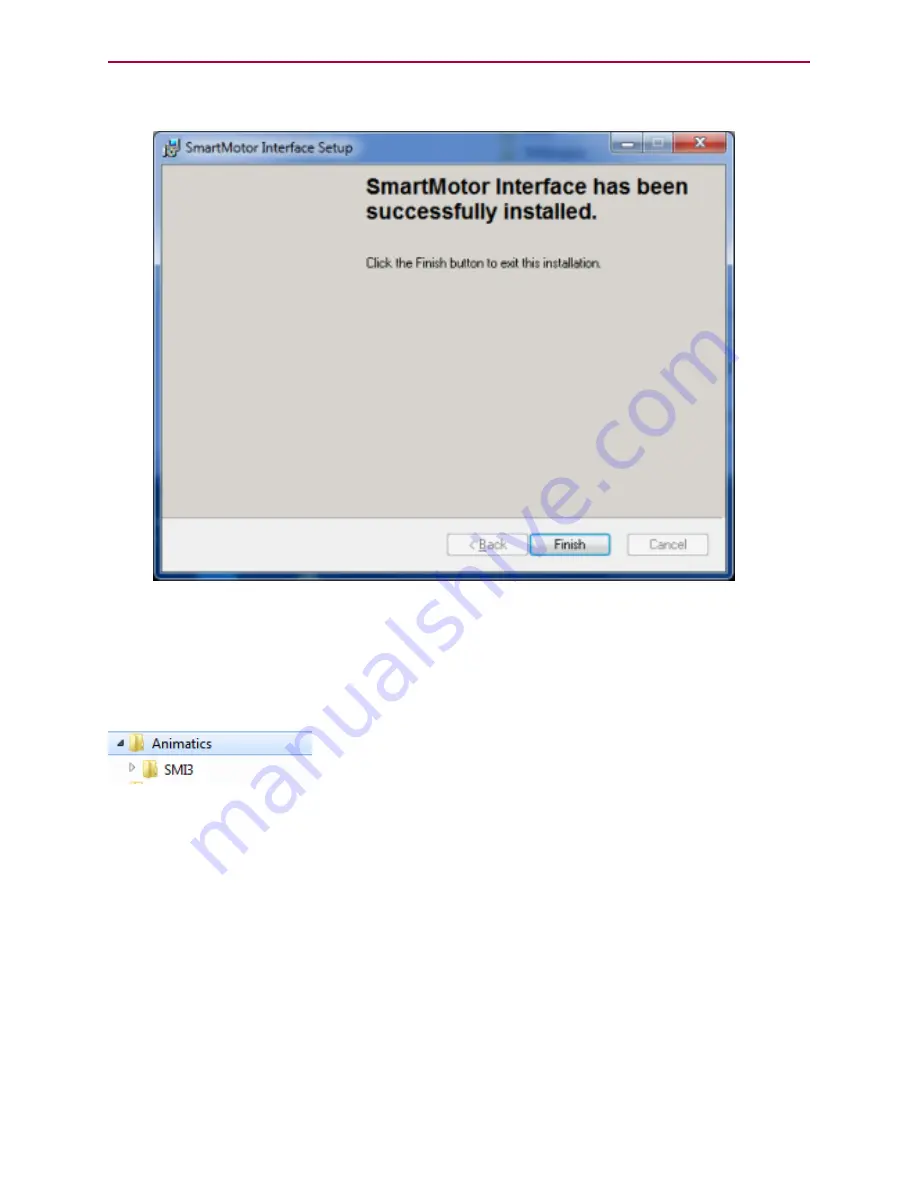
5. When the installation has completed, the installation status message page opens, as shown in

the following figure. Click Finish to complete the installation and close the installation wizard.

NOTE:

After the software is installed, be sure to restart your computer before running the SMI

software.

Installation Verification

To verify the installation, navigate to the C:\Program Files (or folder C:\Program Files x86) folder. You
should see the following folders:

Accessing the SMI Software Interface

The SmartMotor Interface software (SMI software) communicates with a single or series of
SmartMotors from a Windows-based PC and gives you the capability to control and monitor the status
of the motors. The SMI software also allows you to write programs and download them into the
SmartMotor’s long-term memory.

NOTE:

Every SmartMotor has an ASCII interpreter built in. Therefore, it is not necessary to use the

SMI software to operate a SmartMotor.

To open the SMI software, double-click the SmartMotor Interface shortcut on the Windows desktop.

Moog Animatics Class 5 SmartMotor™


Installation and Startup Guide,


Rev. I

Page 30 of 76

Содержание SMARTMOTOR COMBITRONIC

Страница 1: ...TUP OF THE CLASS 5 D AND M STYLE SMARTMOTORS FULLY INTEGRATED SERVO MOTORS INSTALLATION AND STARTUP FOR CLASS 5 SMARTMOTOR WITH COMBITRONIC TECHNOLOGY For the mobile version of this guide see animatic...

Страница 2: ...s in this manual are provided for example purposes only It is the user s responsibility to decide if a particular code sample or program applies to the application being developed and to adjust the va...

Страница 3: ...11 Additional Resources 11 SmartMotor Overview 13 SmartMotor Introduction 14 SmartMotor Features and Options 15 D Style Motors 15 M Style Motors 17 Fieldbus Options 18 CANopen Fieldbus Protocol 18 De...

Страница 4: ...Motors RS 232 Multidrop with Add A Motor Cables 39 D Style Motors RS 232 Multidrop with Custom X Y Z Cable 40 D Style Motors DE Power Option Schematic 41 D Style Motors CDS Option Schematic 41 CDS on...

Страница 5: ...eport Command 64 Viewing the Motor Position with the Motor View Tool 64 Connectors Pinouts and Examples 66 Class 5 D Style Connector Pinouts 67 Class 5 D Style I O Connection Examples 68 Class 5 M Sty...

Страница 6: ...7 Safety Information 8 Safety Symbols 8 Other Safety Considerations 8 Motor Sizing 8 Environmental Considerations 8 Machine Safety 9 Documentation and Training 9 Additional Equipment and Consideratio...

Страница 7: ...urces using Moog Animatics Combitronic technology Combitronic is a protocol that operates over a standard CAN interface It may coexist with either CANopen or DeviceNet protocols It requires no single...

Страница 8: ...cified by the governing authority for example ISO OSHA UL etc for the locale where the machine is being installed and operated For more details see Machine Safety on page 9 Motor Sizing It is the resp...

Страница 9: ...n gates or other points of entry into the protected zone that will stop all machine movement when tripped l Ensure that if a portable control programming device is supplied for example a hand held ope...

Страница 10: ...footwear smocks or aprons gloves hard hats and other protective gear l The work area is equipped with proper safety equipment such as first aid equipment fire suppression equipment emergency eye wash...

Страница 11: ...animatics com download MA_UL_online_listing pdf l SmartMotor Developer s Worksheet interactive tools to assist developer Scale Factor Calculator Status Words CAN Port Status Serial Port Status RMODE D...

Страница 12: ...tor information http www animatics com sales offices html l Application ideas including videos and sample programs http www animatics com applications html Moog Animatics Class 5 SmartMotor Installati...

Страница 13: ...lated documents and additional resources SmartMotor Introduction 14 SmartMotor Features and Options 15 D Style Motors 15 M Style Motors 17 Fieldbus Options 18 CANopen Fieldbus Protocol 18 DeviceNet Fi...

Страница 14: ...ts design is based on the following objectives 1 Reduce development time 2 Lower machine production cost 3 Simplify the machine design build and support D Style Cast and Extruded SmartMotors NOTE Info...

Страница 15: ...lone multi axis linear interpolation with as many as 120 SmartMotors at a time l Virtual axis mastering into camming through gearing which enables stand alone multi axis coordinated motion l Programma...

Страница 16: ...rate power sources For more details see DE Power Option D Style Motors on page 21 CAUTION For D style SmartMotors pins 14 and 15 of the 15 pin D sub port are intended for use with DE series motors for...

Страница 17: ...IBUS fieldbus protocol is not available on the M style motors All firmware options include l Modbus Remote Terminal Unit RTU Slave RS 485 COM 0 l DMX Slave RS 485 COM 0 In addition a hardware DE power...

Страница 18: ...e all SmartMotor variables l Use of on board I O through CANopen gateway SmartMotor program or serial commands l Ability to run 1000 SmartMotor subroutines through CANopen l Online diagnostics of the...

Страница 19: ...available on D style and M style motors The DeviceNet Fieldbus protocol provides the following features l Polled I O and Explicit Messages from your PLC to control all SmartMotor operation l Read wri...

Страница 20: ...s Protocol NOTE The PROFIBUS fieldbus protocol is not available on the M style motors The PROFIBUS fieldbus protocol provides the following features l Command Response Codes for all Class 5 SmartMotor...

Страница 21: ...arate DC power supplies see the following figure For a schematic diagram see D Style Motors DE Power Option Schematic on page 41 This hardware option provides the following advantages l Controller can...

Страница 22: ...dustproof the IP rating system provides a uniform quantifiable set of standards to which each product is rigorously tested The IP code refers to the degree of protection for the electrical enclosures...

Страница 23: ...er an internal program or serial commands from outside or both To make the SmartMotor move the program or serial host must set a mode of operation state a target position with or a maximum velocity at...

Страница 24: ...o not have an effect on dwell time or distance Dwell is strictly based on raw master encoder counts selected by the SRC command specifying internal virtual or external master count source 2 When feedi...

Страница 25: ...ments 35 M Style Drive Enable Power 35 Connecting the System 35 Minimum Requirements 36 D Style Motors Connectors and Pinouts 36 D Style Motors Demo or Development System 37 D Style Motors RS 232 Thro...

Страница 26: ...re 55 Using the Address Motors Feature 57 Checking and Clearing the Status Bits 59 Polling the Motor 60 Clearing the Overtravel Limits and Fault Bits 61 Moving the SmartMotor 62 Making the Motor Move...

Страница 27: ...talled on a Microsoft Windows PC The SMI software is distributed on CD ROM or USB stick and is also available as a download from the Moog Animatics website To download the latest version of the SMI so...

Страница 28: ...software restart the installation process NOTE All personal settings and user files will be retained 2 Click Next to proceed The Installation Configuration page opens Moog Animatics Class 5 SmartMotor...

Страница 29: ...arts and the Welcome page opens 4 After you have finished reviewing the welcome information click Next to proceed Continue following the on screen instructions to complete the SMI software installatio...

Страница 30: ...folders Accessing the SMI Software Interface The SmartMotor Interface software SMI software communicates with a single or series of SmartMotors from a Windows based PC and gives you the capability to...

Страница 31: ...an be accessed through the menu bar Many of these are also accessible through the icons on the toolbar l Toolbar The toolbar contains a collection of icons for accessing the primary features of the SM...

Страница 32: ...procedures for using the editor should seem familiar if you have used other Windows based text editors For more details about these items see the SMI software online help which can be viewed in SMI by...

Страница 33: ...r more information see the CPU I O and Communications Power section Voltages below 18 VDC could cause a brownout shutdown of the CPU or what would appear as a power off reset under sudden load changes...

Страница 34: ...ss 5 D style AD1 option motors at no time should the voltage to any input exceed the level on the I O power input pin 11 Doing so could cause immediate damage to the expanded I O hardware Communicatio...

Страница 35: ...232 Multidrop with Add A Motor Cables on page 39 l D Style Motors RS 232 Multidrop with Custom X Y Z Cable on page 40 l D Style Motors DE Power Option Schematic on page 41 l D Style Motors CDS Option...

Страница 36: ...1 I O 2 I O 3 I O 4 I O 5 I O 6 Encoder A Out Encoder B Out RS 232 Transmit RS 232 Receive 5VDC Out Common Ground typ SIG Ground Common Ground Power PIN DESCRIPTION 7 Pin Combo D Sub Power I O A1 A2...

Страница 37: ...u to connect from an available USB port to the serial interface on the SmartMotor The adapter simply connects between the USB port and the serial cable When the adapter is used it is recommended that...

Страница 38: ...ngs window For example in the previous figure you would double click the COM6 port 4 Click Advanced to open the Advanced Settings window for the COM port 5 Move the Receive and Transmit Buffer sliders...

Страница 39: ...RS 232 with Protective Shunt CBLSM1 xM CBLDC1 PS24V8AG 110 or PS42V6AG 110 SHUNT42V100W or SHUNT42V200W D Style Motors RS 232 Multidrop with Add A Motor Cables CBLSM1 xM CBLSMADD xM PS24V8AG 110 or PS...

Страница 40: ...le Motors RS 232 Multidrop with Custom X Y Z Cable D Style Motors RS 232 Multidrop with Custom X Y Z Cable CBLSM1 X Y Z Moog Animatics Class 5 SmartMotor Installation and Startup Guide Rev I Page 40 o...

Страница 41: ...e power but maximum protection is provided with separate power supplies This circuit is recommended for smoother startup of large switch mode supplies where surge currents may cause noise issues Prote...

Страница 42: ...10 11 12 13 14 15 1 2 3 4 5 6 7 8 9 10 11 12 13 14 15 10 11 CAN Low CAN High PIN DESCRIPTION All other pins are as previously shown 10 CAN Low 11 CAN High 13 Shield Drain 120 Ohm Terminator 120 Ohm Te...

Страница 43: ...nector or the 7W2 connector and there is no change in motor part numbers for the 7W2 method The only part change is the cabling used to connect the motors refer to the figures descriptions and part nu...

Страница 44: ...11 CAN Low CAN High PIN DESCRIPTION All other pins are as previously shown See the D Style Con nector Pinouts table later in this guide for full details 15 pin D sub Male 1 2 3 4 5 6 7 8 9 10 11 12 13...

Страница 45: ...oming CAN wires on the 7W2 connector Incoming RS 232 Incoming Power CBLSM1 xM CBLIO5V xM OR Pass Thru Terminator PN CBLSM TR120 Refer to the following tables for part numbers and cable lengths CDS7 Ca...

Страница 46: ...2 3 4 5 6 7 8 9 10 11 12 I O 0 I O 1 I O 4 I O 5 I O 6 I O 7 I O 8 I O 9 Not Fault Out Drive Enable In 24VDC Out GND Common PIN I Os 1 2 3 4 5 6 7 8 GND Common RS 485B CH0 RS 485A CH0 ENC A In Out EN...

Страница 47: ...0 Separate 24V Control Power 24V 48V Drive Power M Style Motors Power Multidrop Separate 24V Control Power 24V 48V Drive Power CBLIP PWR4 Y1 xM 15 Amps maximum continuous load CBLIP PWR4 FL xM This po...

Страница 48: ...d 3 at both ends of the network cable This follows RS 485 standards for biasing to ensure reliable performance The termination can be created by adding the resistor to CBLIP COM FL Flying Lead cables...

Страница 49: ...mination resistor at each end If the master device PC PLC etc does not include one then an external termination resistor must be supplied This communications connection method would be combined with a...

Страница 50: ...ry Status Indicator Off Not busy Solid green Drive on trajectory in progress LED 2 CAN Bus Network Fault Red LED Off No error Single Flash At least one error exceeded limit Double Flash Heartbeat or g...

Страница 51: ...thod can be used if you know the communications port used to connect your motors and if your motors may be pre addressed For details see Using the Detect Motors Feature on page 55 l Use the Address Mo...

Страница 52: ...e Z command either of these actions will delete the addresses l For CAN addresses l These are stored in the SmartMotor nonvolatile memory NVRAM which means they are retained when motor power is turned...

Страница 53: ...ve many ports this method can also take a long time To begin searching for motors across all ports on the PC in the Configuration window of the SMI software interface click Find Motors The SMI softwar...

Страница 54: ...ge while the SMI software addresses the motors During this process the SMI software is collecting the following information on each motor The information is the same as that shown in the Motor View wi...

Страница 55: ...thod for detecting M style motors after they have been pre addressed and daisy chained to the communications port To use the Detect Motors feature in the Configuration window of the SMI software right...

Страница 56: ...sage while the SMI software addresses the motors During this process the SMI software is collecting the following information on each motor The information is the same as that shown in the Motor View...

Страница 57: ...This method assumes that there are motors connected to the specified port and will simply address each one that it finds NOTE This method will address or re address every motor If you pre addressed y...

Страница 58: ...sage while the SMI software addresses the motors During this process the SMI software is collecting the following information on each motor The information is the same as that shown in the Motor View...

Страница 59: ...The Motor View window is used to view and monitor various motor parameters It is used in conjunction with the Terminal window to clear any active overtravel limits This procedure assumes that l The S...

Страница 60: ...ns will boot up with active overtravel limits see the red status bits numbered 10 through 15 in the previous figure The EIGN command is used to clear these status bits as described in the next section...

Страница 61: ...eneral inputs outputs enter EIGN W 0 NOTE You can either type the command in the white text box or type the command directly in the blue area of the terminal screen and then click Send or press Enter...

Страница 62: ...nd Addressing the SmartMotors on page 51 l The Drive Enable input on the M series motor must be connected and activated with 24V For the input location see M Style Motors Connectors and Pinouts on pag...

Страница 63: ...represents 99 99 to 99 99 PWM pulse width modulation commanded RTRQ Report Actual Torque Enter RTRQ at the Terminal window to report the commanded torque from the trajectory generator Note that RTRQ...

Страница 64: ...SmartMotor has been detected and addressed For details see Detecting and Addressing the SmartMotors on page 51 l The overtravel limits and fault bits have been cleared For details see Checking and Cl...

Страница 65: ...select Motor View from the menu Opening the Motor View Tool After the Motor View window opens click the Poll button to begin polling getting information from the motor After polling begins the motor...

Страница 66: ...style motors It also provides example I O connection diagrams For information on connecting the motors see Connecting the System on page 35 Class 5 D Style Connector Pinouts 67 Class 5 D Style I O Con...

Страница 67: ...SIG Ground 14 Common Ground 15 Main Power 20 48 VDC If DE Option Control Power separate from Main Power PIN CAN bus Connection P3 1 NC NC 2 V NC except DeviceNet 3 V ground not common 4 CAN H 1 MBaud...

Страница 68: ...er Quadrature Signals Pos Right Limit Dry Switch Neg Left Limit Dry Switch NPN Switch Momentary Switch SMARTMOTOR 15 PIN D SUB I Os NOTE I O is Sinking type NPN Digital I O Analog Input Counter or Com...

Страница 69: ...ix PLC DC DC COM DC A B Output Block A B Input Block Output Output Output Output Input Input Input Input Input SMARTMOTOR AD1 OPTION I Os NOTE I O is Sourcing type PNP 4 I O 18 GP I O 19 GP 3 2 5 I O...

Страница 70: ...t 150 mAmps Max 5 I O 10 GP 150 mAmps Max PIN CAN Connector Notes P5 1 NC NC 2 V NC except DeviceNet 3 V ground Common Ground Nonisolated 4 CAN H 1 MBaud Max 5 CAN L 1 MBaud Max P4 5 Pin Limit Inputs...

Страница 71: ...ESCRIPTION LIMIT INPUTS 24VDC Out see Notes 1 2 3 4 5 6 7 8 GND Common RS 485B CH0 RS 485A CH0 ENC A In Out ENC B In Out ENC A In Out 5VDC Out ENC B In Out PIN DESCRIPTION COMMUNICATION 5 6 Enc B Enc...

Страница 72: ...6 GP or G Cmd I O 7 GP I O 8 GP or Brake Line Output I O 9 GP Not Fault Out Drive Enable In 24 VDC Out GND Common PIN I Os DESCRIPTION Analog Output Sensor Analog Potentiometer Class 5 M Style Analog...

Страница 73: ...allowed when within the described limits DIFFERENTIAL ENCODER The Differential Encoder inputs use the standard RS 485 chipset l If a true differential output TTL encoder is used just wire A and B sig...

Страница 74: ...SU may be undersized for the application which causes it to brown out during motion Make moves less aggressive increase PSU size or change to a linear unregulated power supply Motor stops communicatin...

Страница 75: ...not accurately following trajectory Historical positive negative hardware limit faults A limit switch was tripped in the past Clear errors with the ZS command Motor does not have limit switches attac...

Страница 76: ...worldwide web site for more information Americas West Americas East Europe Asia Moog Animatics Moog Animatics Moog Memmingen GmbH Moog Animatics 2581 Leghorn Street 1995 NC Hwy 141 Allgaeustr 8a Kichi...

Отзывы: