GB
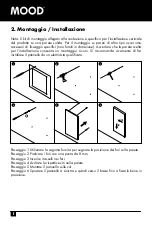
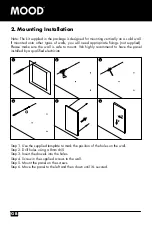
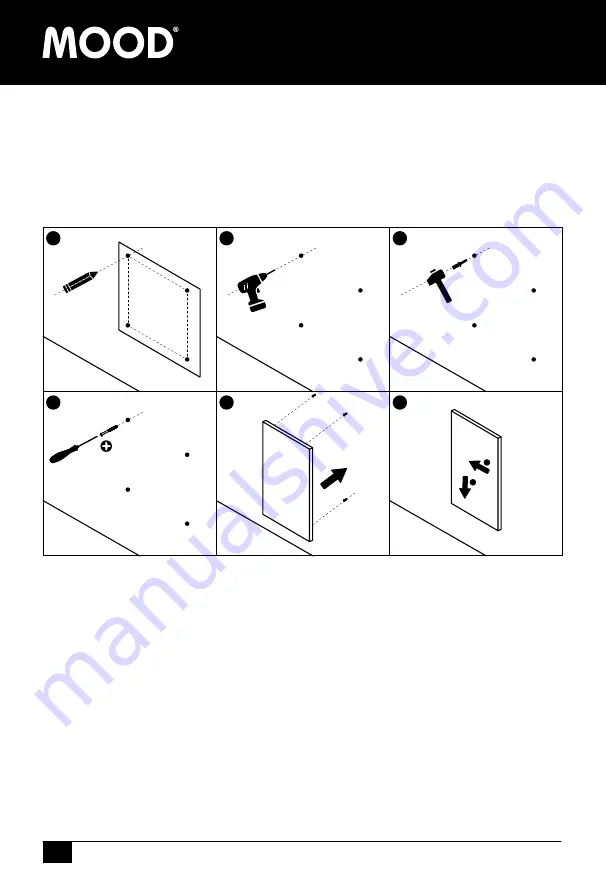
2. Mounting Installation
Note: The kit supplied in the package is designed for mounting vertically on a solid wall.
If mounted onto other types of walls, you will need appropriate fixings (not supplied).
Please make sure the wall is safe to mount. We highly recommend to have the panel
installed by a qualified electrician.
1
2
3
4
5
6
1
2
Step 1. Use the supplied template to mark the position of the holes on the wall.
Step 2. Drill holes using a 8mm drill.
Step 3. Insert the dowels into the holes.
Step 4. Screw in the supplied screws to the wall.
Step 5. Mount the panel on the screws.
Step 6. Move the panel to the left and then down until it’s secured.
Содержание 1359320
Страница 13: ...5 Garantie Tel 41 848 11 33 11 ...
Страница 14: ...D NOTIZEN ...
Страница 27: ...5 Garantie Tel 41 848 11 33 11 ...
Страница 28: ...F REMARQUE ...
Страница 41: ...5 Garanzia Tel 41 848 11 33 11 ...
Страница 42: ...I NOTA ...
Страница 55: ...5 Warranty Tel 41 848 11 33 11 ...
Страница 56: ...GB ...
Страница 58: ......
Страница 59: ......

