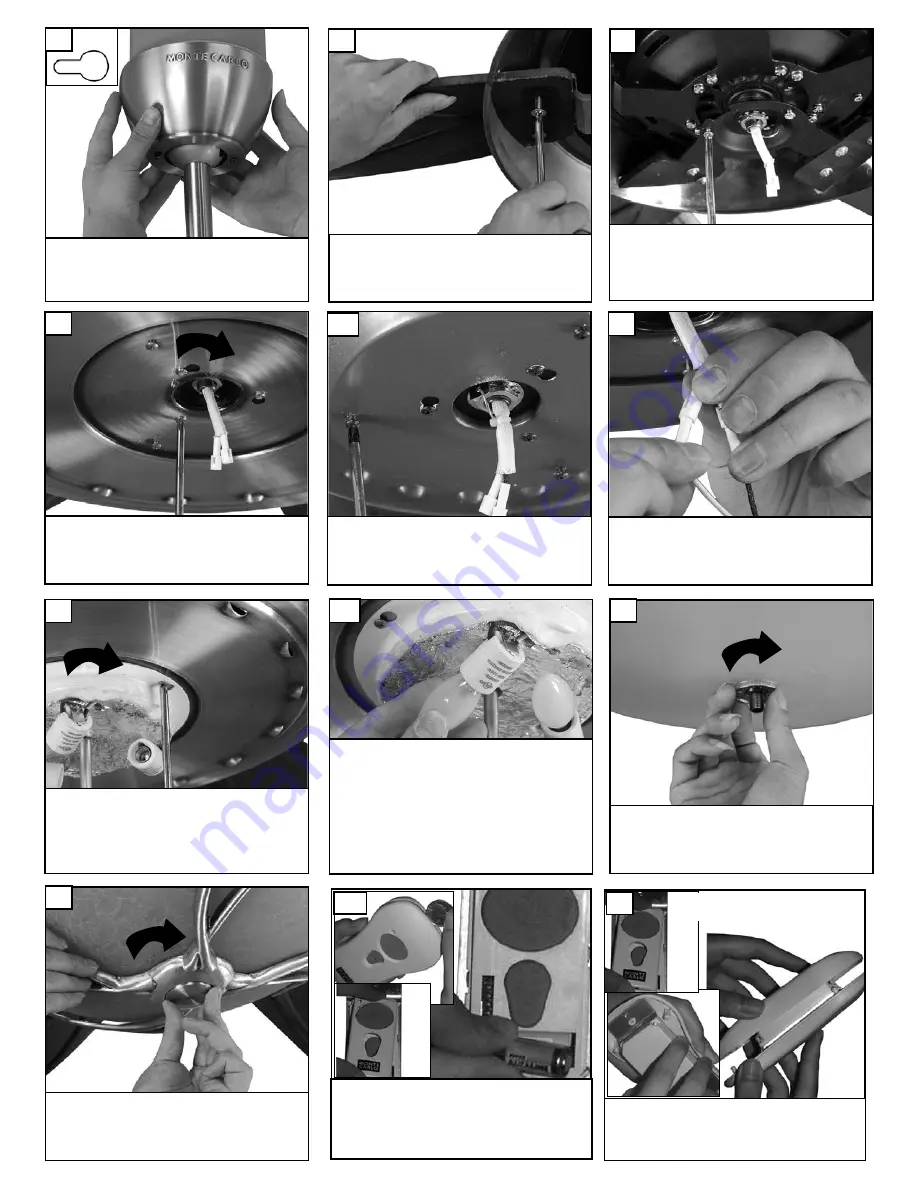
Align the blade and then the blade
plate with castings on motor to
attach blades to motor.
32
Loosen 2 screws and remo ve 1
screw. Save screw removed.
33
Lift canopy to ceiling aligning the k ey hole slots
with the screws on the bottom of the mounting
bracket. Rotate the canopy counter clockwise
to lock in place. Tighten the screws to secure
the canopy. See inset for k eyhole shape
31
Twist lower cover plate into place b y
twisting in direction of arrow.
Replace 1 screw removed and tighten
all 3 screws securely.
34
Loosen 2 screws and remove 1 screw
from light plate. Keep the screw
removed for later use.
Plug white wire from fan to white
wire from light kit. Then plug black
wire from fan to black wire from light
kit.
35
36
Align keyslot holes of the light fixture
and twist it to lock. Install the screw
removed in step 35 and tighten all
screws securely.
37
Install glass onto light kit, install
rubber washer on the top side of the
screw nut to hold in place and tight -
en in direction of arrow.
39
Install 3 x 60 w att candelabra bulbs. Bulbs
included.
WARNING: Over lamping the fan will
result in the fan lights shutting down
until the proper wattage of bulbs are
installed.
Reset the lights by turning off the wall
switch, breaker,or by remote. Replace
bulbs with the correct wattage bulbs, turn
the power on.
38
Install cage and finial cap and tight -
en in direction of arrow.
40
Remove cover by snaping off from top or bot -
tom. Remove battery cover. Install 12V battery
into wall remote. Duracell MN21 / Eveready A23
/ GP 23A all 12V.Attach cover of remote by plac-
ing over buttons and snap the battery co ver in
place.
Place face plate over battery compartment and
buttons. Place remote over 2 pins on front
cover. Attach cover of remote by placing over 4
pins and snaping into place.
42
41
HAND HELD INSTALL


