


48
Assigning Samples to Specific Pads
You can specify a pattern and position and assign a sample to each in the
following steps:
•
Connect the Monster
®
GO-DJ
™
to a computer.
•
Upload the sample to the corresponding sub-folder located in the
“/GO-DJ Drive/pad” folder. The audio sample file needs to be in .WAV
format. The file name should be name “padXX.wav” where XX corresponds
to the sampler pad position number. The “XX” in the filename template is
a number between 00 to 07 as the image below shows. For example, if
you want to assign a specific sample to the sampler pad labeled 03 in the
diagram, name the file as “pad03.wav” for proper assignment.
•
Disconnect the Monster
®
GO-DJ
™
from the computer properly (set
USB Mode to the OFF position in the Options screen), and reboot the
Monster
®
GO-DJ
™
.
SAMPLERS SCREEN
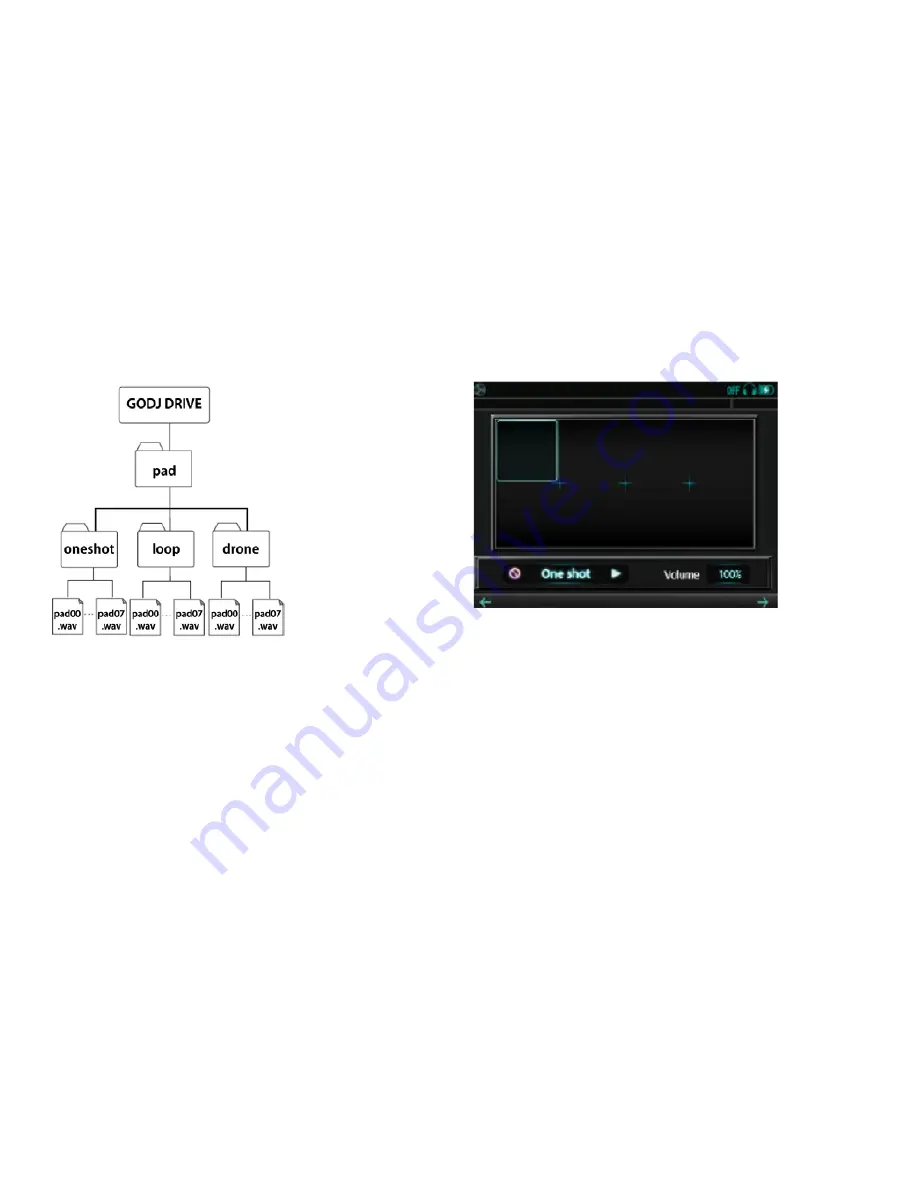
Loading and Assigning Samples
Dedicated folders to store sample files for the sampler pads are created
automatically in the GO-DJ Drive. These directories are as follows:
•
GO-DJ DRIVE
•
Pad
•
[oneshot, loop, drone]
By storing WAV files in these directories, you can assign them to the
corresponding sampler pads. Just like the file format for playback files, .WAV
files need to be in the format of 8-48 kHz and 8-24 bit. If your files are available
but not in 44.1 kHz, 16 bit stereo, the files are converted during the reboot
cycle. Once converted properly, the sample files are able to be assigned.
Please note:
You cannot use .mp3 files for samplers.
00
04
01
05
02
06
03
07
Содержание Go-DJ
Страница 1: ...Manual and Warranty...