MFH5398_REV00.doc
Page 5 of 7
Last printed 10/23/2006
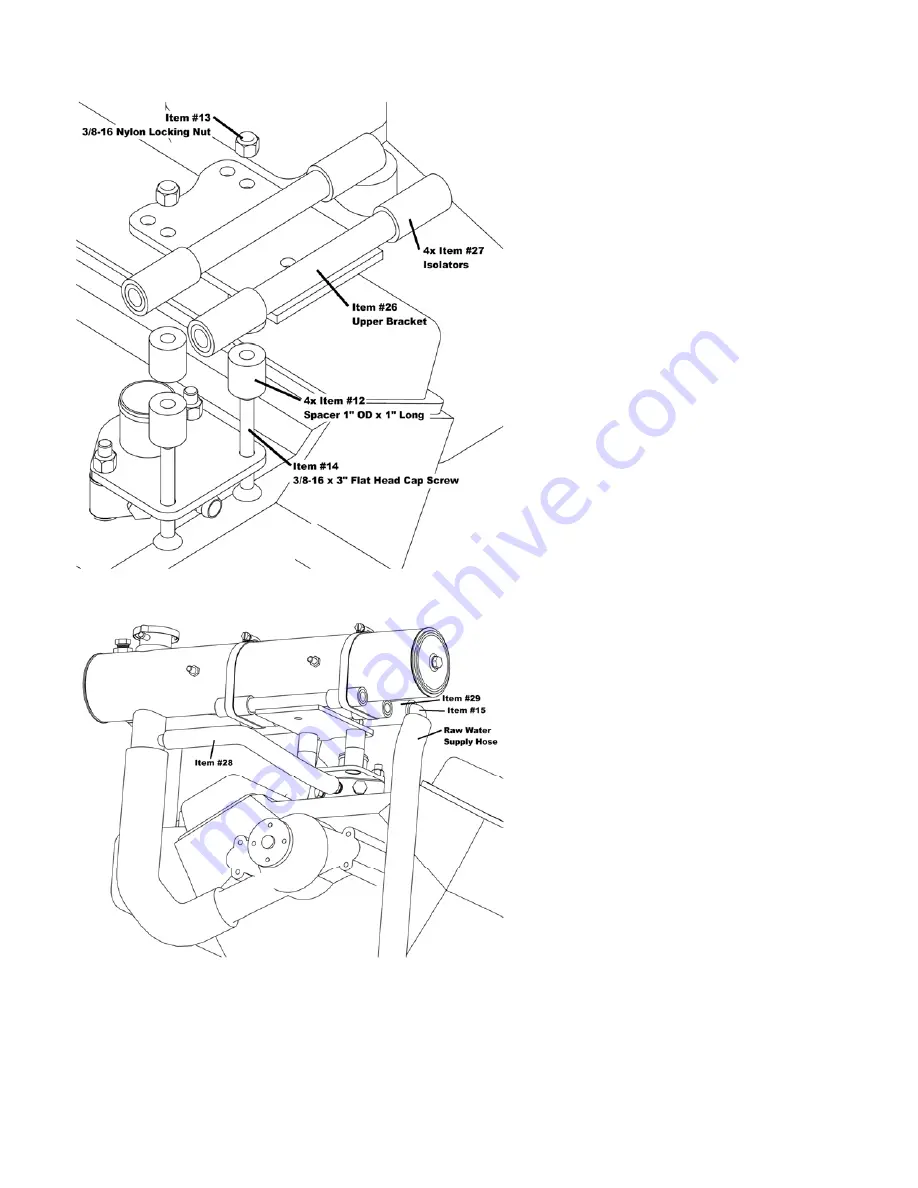
10. Install upper bracket (Item #26),
with the 3/8-16 flat head screws
(Item #14) and 3/8-16 nylon locking
nuts (Item #13), using the
appropriate number of spacers
(Item #12) needed for your
application. Be sure that when heat
exchanger is installed it will not
interfere with any belts, fuel lines,
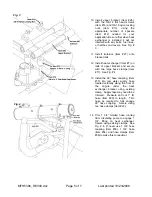
or hatches and covers. See Fig. #
3.
11. Install isolators (Item #27) onto
bracket rails.
12. Install heat exchanger (Item #1) on
rails of upper bracket and secure
with two large hose clamps (Item
#17). See Fig. # 4.
13. Install the 90° hose coupling, (Item
#15) into raw water supply hose
located vertically along the front of
the engine under the heat
exchanger bracket using existing
clamp. Supply hose may need to be
trimmed. Measure and cut 1” ID
hose (Item #29) to length. Trim
hose as required to fully engage
90° hose coupling. Secure using
two hose clamps (Item #23).
14. Trim 1 3/4” molded hose running
from circulating pump to engage 1
3/4” fitting on heat exchanger.
Secure using existing clamps. See
Fig. # 4. (If need, use 1 3/4” hose
coupling (Item #35), 1 3/4” hose
(Item #34), and hose clamps (Item
#36) to make this connection.)
Fig. 3
Fig. 4


