MFH5398_REV00.doc
Page 4 of 7
Last printed 10/23/2006
Installation Steps
1. Drain water from block by removing
plugs from both lower sides of
engine.
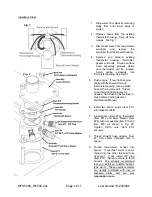
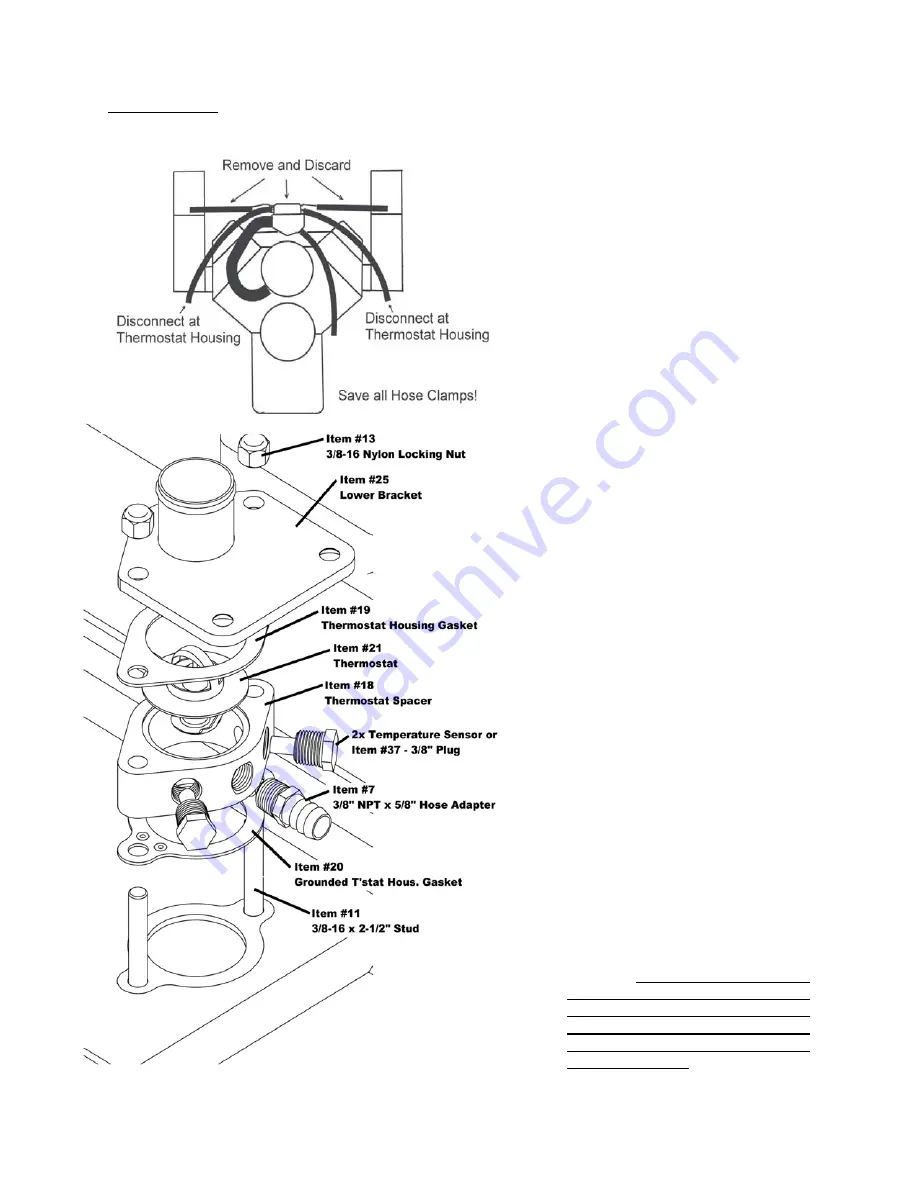
2. Remove hoses from the existing
thermostat housing. Save all hose
clamps. See Fig. 1.
3. Disconnect wires from temperature
sender(s)
and
remove
the
sender(s) from thermostat housing.
4. Remove and discard existing
thermostat housing, thermostat,
gasket and bolts. Scrape surface
clean especially grooves where
new thermostat will be located.
Avoid getting scrapings into
thermostat opening. See Fig. #1
5. Flush engine. If new, flush engine
briefly with fresh water through
thermostat opening. Use a garden
hose with a rag around it. If used,
more thorough flushing may be
needed. See Flushing instructions in
Fresh Water Cooling General
Maintenance Manual.
6. Install two 3/8-16 studs (Item #11)
into intake manifold.
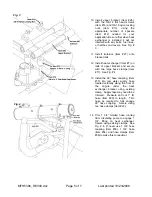
7. Install spacer (Item #18), thermostat
(Item #21), and lower bracket (Item
#25), with two gaskets (Item #19 and
Item #20) as shown in Fig. #2.
Tighten 3/8-16 nuts (Item #13)
securely.
8. Thread straight hose adapter (Item
#7) into center threaded hole in
spacer.
9. Thread temperature sender into
spacer. If overheat alarm is used,
thread into the other threaded hole
of spacer. If not, install 3/8” plug
(Item #37). Reconnect wire to temp
senders. We strongly recommend
that you install an audible “buzzer”
type alarm. These overheat alarms
are usually combined with low oil
pressure alarm and are very
reasonable in price.
Fig. 1
Fig. 2


