


Moneris® iPP320 PIN Pad Merchant Resource Center Quick Install Guide
15
Hardware setup: iPP320 PIN Pad using cloud pairing
Follow these instructions to set up your iPP320 PIN Pad to pair with your Merchant Resource Center store via
the cloud.
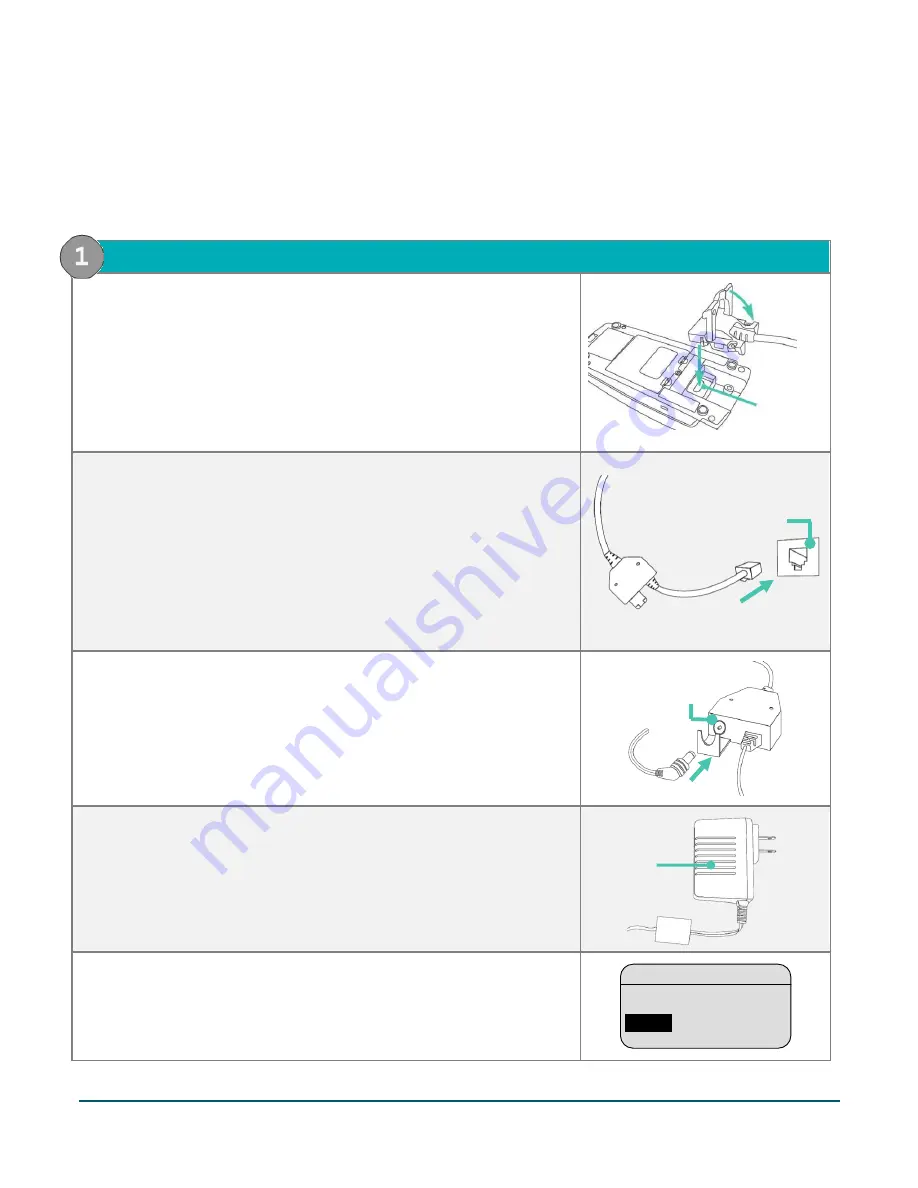
1.
Connect the iPP320 PIN Pad to your Ethernet network
a.
Plug the PIN Pad Ethernet cable into the port on the underside of the
iPP320 PIN Pad.
b.
Fold the latch down and press to secure the cable to the iPP320 PIN
Pad.
c.
Plug the other end of the PIN Pad Ethernet cable into your wired hi-
speed Internet access point (e.g., a router/switch/hub/internal
wiring – whatever is applicable to the high-speed Internet service at
your specific location).
Note:
If your LAN has firewall restrictions on IP traffic to the
Internet, ensure that the firewall is configured so that the TCP port
for SSL = 443. This port must be open to allow the iPP320 PIN Pad to
communicate with Moneris (
https://ipterm.moneris.com
).
d.
Plug the power cable connector into the power port on the cable
box.
e.
Plug the power cable adaptor into a working power outlet.
f.
When the iPP320 PIN Pad starts to power on, go to the next step
g.
When the "LANGUAGE/LANGUE" screen displays, go to step 2
(
Configure the iPP320 PIN Pad for the cloud
LANGUAGE/LANGUE
ENGL
FRAN
ENGL
WIRED HI-SPEED
INTERNET ACCESS POINT
(e.g., a ROUTER)
PIN PAD ETHERNET CABLE
POWER PORT
(CABLE BOX)
(
POWER
CABLE CONNECTOR
PORT
LATCH
PIN PAD
ETHERNET
CABLE
IPP320
PIN PAD
POWER CABLE
ADAPTOR


