background image


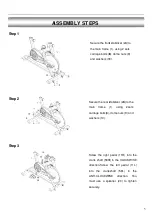
Step 1


Step 2 


Step 3   


ASSEMBLY STEPS


Screw  the  right  pedal  (

crank shaft (59R) in the

direction.Screw  the  left  pedal  (

into  the  crankshaft  (

ANTI-CLOCKWISE 

direction. 

You 

must  use  a  spanner  (

securely. 

Secure the rear stabilizer (

main  frame  (1

carriage bolts(8), dome nuts (9)

washers (10). 

Secure the front stabilizer (

the main frame (

carriage bolts (8

and washers (10

ASSEMBLY STEPS


Screw  the  right  pedal  (11R)  into  the 

R) in the CLOCKWISE 

direction.Screw  the  left  pedal  (11L) 

e  crankshaft  (59L)  in  the 

CLOCKWISE 

direction. 

You 

must  use  a  spanner  (20)  to  tighten 

stabilizer (2B)to the 

1),  using  2sets 

, dome nuts (9) and 

front stabilizer (2A)to 

(1), using 2 sets 

8), dome nuts (9) 

10). 

Содержание Spinning

Страница 1: ...OWNER S MANUAL Spinning OWNER S MANUAL...

Страница 2: ...you are taking medication that affects your heart rate blood pressure or cholesterol level 3 Be aware of your body s signals Incorrect or excessive exercise can damage your health Stop exercising if...

Страница 3: ...ent or if you hear any unusual noises coming from the equipment during exercising stop using the equipment immediately and don t use the equipment until the problem has been repaired 9 Wear suitable c...

Страница 4: ...8 50 9 Dome nut M8 13 Washer 6 14 Spring washer 2A Front feet tube welding 2B Rear feet tube 5 Seat lift adjust welding 6 Seat tube Computer 19 Fixing knob M10 24 Armrest cover 22Adjustable knob M16 D...

Страница 5: ...in frame 1 carriage bolts 8 dome nuts 9 washers 10 Secure the front stabilizer the main frame carriage bolts 8 and washers 10 ASSEMBLY STEPS Screw the right pedal 11R into the R in the CLOCKWISE direc...

Страница 6: ...d tighten the fixing knob 22 Slide the seat 7 onto the rod of the seat bar 6 Then tighten the two nuts under the seat 7 securely slider 6 into the seat post 5 The bolt which is welded on must be locat...

Страница 7: ...e handlebar 4 onto the handlebar stem 3 and make the holes aligned completely Tighten them with 4 sets hexagon socket bolts 12 spring washers 14 washers 13 securely Put the computer 15 onto the handle...

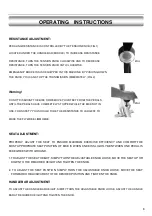
Страница 8: ...HE RESISTANCE TO LARGEST TO MAKE THE FLYWHEEL IMMOBILE SEAT ADJUSTMENT PROPERLY ADJUST THE SEAT TO ENSURE MAXIMUM EXERCISE EFFICIENCY AND COMFORT THE MOST APPROPRIATE SEAT POSITION OF BIKE IS WHEN KNE...

Страница 9: ...es as shown below Each stretch should be held for approximately 30 seconds do not force or jerk your muscles into a stretch if it hurts STOP 2 The Exercise Phase This is the stage where you put the ef...

Страница 10: ...g the warm up and cool down phases but towards the end of the exercise phase you should increase resistance making your legs work harder than normal You may have to reduce your speed to keep your hear...

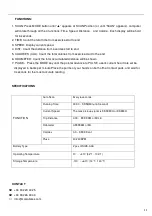
Страница 11: ...nce will be shown 7 PULSE Press the MODE key until the pointer advance to PULSE user s current heart rate wil be displayed in beats per minute Place the palms of your hands on both ofthe Contact pads...

Отзывы: