


Customer Service 908-368-1025
︱
Page 3 of 10
Bx4
Hardware required. Screwdriver not included
STEP 1:
STEP 2:
www.modway.com
Ax4
Cx12
Hardware required. Screwdriver not included
Mx1
9
10
C
A
Refer to Step 9
10
9
B
B
9
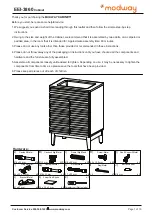
EEI-3860
Cabinet
10
A
C
C
C
C
C
B
B
1.1- Lay flat both of the Components #9, Properly insert and slowly screw in the
Cambolt (A)
to
the lower portion of the pre-drilled holes at both ends of the
Leg Apron
.
1.2- Insert 2pcs of
Wooden Dowel
to the pre-drilled holes on both of the
Front & Back Leg Apron (9)
top edges, ensure each dowel inserted is in the inner side of the pre-drilled hole.
1.3- Insert 4pcs of
Wooden Dowel
to the pre-drilled holes on both of the
Leg Apron Side Rail (10)
ends
and top edges, ensure each dowel inserted is in the inner side of the pre-drilled hole.
2.1- Insert 4 pcs of
Camlock (B)
to
the designated pre-drilled holes.
Align the
Leg Apron Side Rail (10)
with the already inserted
Wooden Dowel (C)
to the
Front & Back Leg Apron (9)
Push the
Leg Apron Side Rail (10)
and secure both
parts by tightening
the
Camlock (B)
.
2.2 - Repeat step 2.1 to the other
side rail.
2.3 - Properly align the loose
Front
& Back Leg Apron (9)
to the
assembly completed in step 2.2,
and secured the rest of the
Camlock (B)
to complete the Leg
Apron assembly.
Consist of 2 components.
This hole
To assemble the leg Apron
Leg Apron Assembly
This hole
Mx1