background image

FR-W1811

Aviator Instructions 33

Félicitations pour votre nouvel achat.

Votre nouveau ventilateur intelligent Modern Forms est conçu pour vous simplifier la vie au quotidien. Modern Forms 
crée des ventilateurs et des luminaires d’avant-garde qui permettent des économies d’énergie et une efficacité 
exceptionnelle. Notre engagement à bien faire les choses va au-delà de notre amour pour les produits étonnants.
Modern Forms garantit à tous ses produits pour ventilateurs de plafond pour extérieur qu’ils ne doivent présenter 
aucun défaut de matériau ou de fabrication pendant un (1) an date d’achat; Les modules d’éclairage à LED sont 
garantis pendant cinq (5) ans; Les moteurs à courant continu et les finis en acier inoxydable sont garantis à vie dans les 
conditions normales d’utilisation par le premier acheteur non revendeur.

Bien que Modern Forms utilise les meilleurs matériaux disponibles et effectue des tests approfondis pour l’endurance 
de la finition, des décolorations ou des craies peuvent se produire et sont considérés comme normaux. Pour les 
zones côtières, une certaine corrosion et / ou détérioration est considérée comme une «usure normale» dans cet 
environnement. Par conséquent, toute réclamation liée à la finition en raison des conditions de l’environnement côtier 
ne s’applique pas à notre garantie. Si un produit est défectueux, tous les efforts seront déployés pour y remédier. Le 
problème sur le terrain. Si le problème ne peut pas être résolu, un numéro RGA sera attribué. L’obligation de Modern 
Forms est expressément limitée à la réparation ou au remplacement, sans frais, dans l’usine de Modern Forms après 
autorisation écrite préalable du retour. L’obligation de Modern Forms au titre de cette garantie ne s’étendra pas 
au-delà du prix d’achat initial du produit par le distributeur. En conséquence, tout dommage indirect ou tout coût de 
main-d’œuvre résultant d’un défaut est expressément exclu. Cette garantie ne s’applique pas aux produits modifiés, 
mal installés, manipulés ou utilisés de manière inappropriée. Modern Forms doit recevoir un avis écrit du défaut dans 
un délai de cinq (5) ans à compter de la date d’achat (ou selon la période précisée dans les informations fournies). 
Sont exclus de la garantie tout composant tiers bénéficiant de la garantie du fabricant. Remarque: la garantie des 
produits Modern Forms ne s’applique qu’aux achats auprès des distributeurs agréés Modern Forms. IL N’Y A AUCUNE 
GARANTIE QUI ALLAIT AU-DELÀ DE LA DESCRIPTION FACE AU PRESENT, INCLUANT LES GARANTIES DE QUALITÉ 
MARCHANDE ET D’ADÉQUATION À UN USAGE PARTICULIER. La marque et les logos Bluetooth ® sont des marques 
déposées appartenant à Bluetooth SIG, Inc. et toute utilisation de ces marques par Wangs Alliance Corporation est 
sous licence. Les autres marques et noms commerciaux appartiennent à leurs propriétaires respectifs.

parte del distribuidor y, en consecuencia, cualquier daño consecuencial o costo de mano de obra que surja de un 
defecto se excluye expresamente. Esta garantía no se aplicará a los productos que hayan sido alterados, instalados 
incorrectamente, mal manejados o mal utilizados. La notificación de un defecto por escrito debe ser recibida por 
Modern Forms dentro de los cinco (5) años a partir de la fecha de compra (o según el período de tiempo indicado 
en el material). Quedan excluidos de la garantía todos los componentes de terceros que tengan la garantía de su 
propio fabricante. Nota: la garantía del producto Modern Forms se aplica solo a las compras de los distribuidores 
autorizados de Modern Forms. NO HAY GARANTÍAS QUE SE EXTIENDAN MÁS ALLÁ DE LA DESCRIPCIÓN DE SU 
CARACTERÍSTICA, INCLUIDAS LAS GARANTÍAS DE COMERCIABILIDAD Y ADECUACIÓN PARA UN PROPÓSITO 
PARTICULAR. La marca denominativa y los logotipos Bluetooth ® son marcas registradas propiedad de Bluetooth SIG, 
Inc. y cualquier uso de dichas marcas por parte de Wangs Alliance Corporation se realiza bajo licencia. Otras marcas 
comerciales y nombres comerciales pertenecen a sus respectivos propietarios.

Содержание Aviator

Страница 1: ...Aviator Installation Instructions works with the Google Assistant ...

Страница 2: ...FR W1811 Aviator Instructions 2 Please read and save these instructions before installation DO NOT RETURN TO STORE ...

Страница 3: ...neral inquiries call our trained technical staff at 1 866 810 6615 option 0 MON FRI 8AM 8PM EST Email customerservice modernforms com Or live chat at modernforms com For fast service have the following information below when you call 1 Model Name and Number 2 Part Number and Part Description 3 Date Of Purchase and Purchase Location 1 866 810 6615 option 1 MON FRI 8AM 8PM EST Email fansupport moder...

Страница 4: ...the surrounding walls Never place objects in the path of the fan blades To avoid personal injury or damage to the fan and other items please be cautious when working around or cleaning the fan To avoid electrical shock or damage to the motor or finish do not use water or chemicals when cleaning the fan or fan blades A dry cloth or lightly dampened cloth will be suitable for most cleaning After mak...

Страница 5: ...ge personal injury or property damage WARNING To reduce the risk of personal injury do not bend the blade arms when installing the brackets balancing the blades or cleaning the fan WARNING Do not insert foreign objects between rotating fan blades WARNING Do not operate fan unless fan blades are in place Noise and fan damage can occur WARNING This appliance is not intended for use by young children...

Страница 6: ...onalize your experience Quiet reliable and up to 70 more efficient than AC fans Wi Fi and Bluetooth enabled for flexible control Bluetooth Wall Control Dims light to 1 ON OFF 6 fan speeds F WCBT WT White Bluetooth Remote Control Dims light to 1 ON OFF 6 fan speeds Sold separately F RCBT WT White Wet Location listed to the strictest UL cUL safety regulations Finished and rated for interior and exte...

Страница 7: ...Installing the Wall Control 16 5 Attaching the Fan Blades 18 6 Attaching Decorative Lower Cap 18 7 Finishing the Installation 18 8 Installing the Optional LED Luminaire Module 20 9 Controlling the Fan 22 10 Reset 24 11 Breeze Mode 24 12 Application 24 13 Accessories 26 14 Troubleshooting 28 30 Contents Tools Required ...

Страница 8: ...ws 7 6 5x19x2mm Flat Washer 1 3 16 5 2x8 4x1 0mm Spring Washer 1 Hardware Bag RPL AVIATOR PARTS 1 Blade Set of 3 RPL F1811 BD 2 Hanger Assembly Mounting Bracket Downrod Assembly RPL HGR ASM 3 Blade Collector Ring 4 Canopy w Canopy Ring RPL CAN CYL Before discarding packaging materials be certain all parts have been removed Place the parts from the hardware bag into a small container to keep them f...

Страница 9: ...FR W1811 Aviator Instructions 9 IMPORTANT Please make note of the MAC ID on the receiver and keep it in a safe place MAC ID 9 3 7 8 4 5 6 1 2 Hanging Weight 13 lbs ...

Страница 10: ...tlet boxes Use only UL cUL listed outlet boxes marked FOR FAN SUPPORT Secure the outlet box directly to the building structure Figures 1 1C are examples of different ways to mount the outlet box NOTE To hang your fan where there is an existing fixture but no ceiling joist you may need an installation hanger bar NOTE Downrod fans can be suspended up to a maximum recommended length of 72 using addit...

Страница 11: ... W1811 Aviator Instructions 11 1 1A 1B 1C 1 1 2 1 1 2 3 3 1 Support Brace 2 Outlet Box 3 Joist 1 Support Brace 2 Mounting Bracket 3 Recess Outlet Box 1 Outlet Box 1 Outlet Box Support Ceiling Max 30 Angle ...

Страница 12: ...embly 8 Thread the downrod assembly onto motor collar Align the holes of downrod and collar and insert the cotter pin and clevis pin Tighten the two collar screws Fig 2 9 Carefully lift the fan motor assembly up to the mounting bracket and seat the hanger ball in the mounting bracket socket Make sure the tab on the mounting bracket socket is properly seated in the groove in the hanger ball Fig 2A ...

Страница 13: ...FR W1811 Aviator Instructions 13 2 2 1 3 9 8 7 5 6 4 1 Hanger Ball Mounting Bracket 2 Downrod 3 Canopy 4 Canopy Ring 5 Coupling Cover 6 Collar 7 Cotter Pin 8 Clevis Pin 9 Screws 2A 2B ...

Страница 14: ...round wire and receiver ground wire to the ground wire in outlet box WARNING Failure to connect ground wires could result in poor fan control functionality 2 Connect the red wire from the fan to the red wire marked TO MOTOR from the receiver 3 Connect the grey wire from the fan to the grey wire marked TO MOTOR from the receiver 4 Connect the yellow wire from the fan to the yellow wire marked TO MO...

Страница 15: ...onnections 3 3A 1 Mounting Bracket 2 Receiver Black Hot can be RED from Switch leg Black Line in H RED to Motor GREEN Ground BLUE to Light BLACK for Light GREEN GND Must Use GREEN Hanger Bracket Ground GREEN Hanger Bracket Ground RED to Motor GREY to Motor WHITE Neutral WHITE to Light WHITE Neutral Safety Cable GREY to Motor YELLOW to Motor WHITE Line in N YELLOW to Motor Outlet Box Receiver Hange...

Страница 16: ...r Fig 4 3 Connect the red wire from the wall control to the black wire from the wall outlet box that feeds up to the fan Fig 4 4 Connect the white wire from the wall control to the white neutral wire from the wall outlet box Fig 4 5 Carefully tuck the wire connections inside the outlet box Secure the wall control with the two 2 wall control screws provided Fig 4A 6 Attach the wall mounting plate o...

Страница 17: ... Control 3 Wall Mounting Plate 4 Mounting Plate Screws 5 Wallplate Individually pair each of the wall controls with the fan receiver using the pairing instruction See page 22 Line Hot Red Green Green or Bare Wallcontroller 1 Wallcontroller 2 Wallcontroller 3 If Applicable FAN Neutral White ...

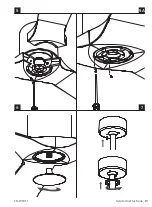
Страница 18: ...sly loosened and the one previously removed 5 Adjust the canopy screws as necessary until the canopy and canopy cover are snug WARNING Make sure tab at bottom of hanger bracket is properly seated in groove of hanger ball before attaching canopy to bracket Failure to properly seat tab in groove could cause damage to electrical wiring 1 Place fan blade on motor as shown Fig 5 and secure with the bla...

Страница 19: ...FR W1811 Aviator Instructions 19 5 5A 6 7 ...

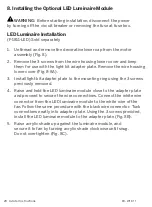
Страница 20: ...pter plate to the mounting ring using the 3 screws previously removed 4 Raise and hold the LED luminaire module close to the adapter plate and proceed to secure the wire connections Connect the white wire connector from the LED luminaire module to the white wire of the fan Follow the same procedure with the black wire connector Tuck connections neatly into adapter plate Using the 3 screws provided...

Страница 21: ...FR W1811 Aviator Instructions 21 8 8B 8C 8A ...

Страница 22: ...e will indicate when the speed is increased or decreased When the fan has reached the minimum maximum speed level the fan will beep twice Controlling One or Multiple Fans with Remote or Wall Controls The Bluetooth Remote or Wall Control is capable of controlling an unlimited number of fans within line of site See Fig 9C for Pairing NOTE Pairing must be completed within three 3 minutes of powering ...

Страница 23: ...beep to indicate the message has been received All fans will turn off This will bring all fans controlled by the remote into sync Light On Off Press and hold button for 4 seconds The LED on the remote will flash green and all connected fans will beep to indicate the message has been received All lights will turn off This will bring all fans controlled by the remote into sync Fan Direction Press an...

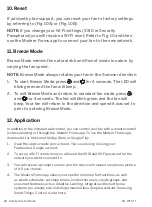
Страница 24: ... fan will return to the direction and speed it was set to prior to entering Breeze Mode In addition to the included wall control you can control your fan with a remote control sold separately or through the Modern Forms app To use the Modern Forms app download it for free from the App Store or Google Play 1 Open the app to create your account You can also log in using your Facebook or Google accou...

Страница 25: ... Reset Press and hold buttons for 10 seconds until the fan emits 3 beeps indicating the reset Unpairing To purge press and hold buttons for 4 seconds For detailed Instructions and Smart Home Device Integration Scan and follow prompts for multilingual instruction options and Smart Fan FAQs Spanish French 10 LV2 Fan Wi Fi Reset Press and hold the and for 10 seconds until LED blinks green and receive...

Страница 26: ...ructions 26 13 Accessories personalize your experience Bluetooth Wall Control Dims light to 1 ON OFF 6 fan speeds F WCBT WT White Bluetooth Remote Control Dims light to 1 ON OFF 6 fan speeds Sold separately F RCBT WT White ...

Страница 27: ...F 60 60 Downrod XF 72 72 Downrod 12 72 Finishes AS BA BZ GH GW MB MW OB SS TT Coupler Connects two downrods downrod only XF I Finishes AS BA BZ GH GW MB MW OB SS TT Sloped Ceiling Kit Designed to accommodate buildings with steeper sloped ceilings up to 45 or 12 12 pitch downrod only XF SCK Finishes AS BA BZ GH GW MB MW OB SS TT ...

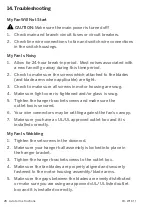
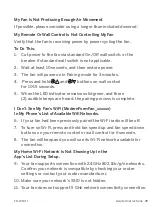
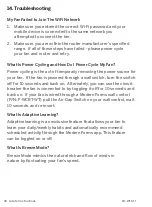
Страница 28: ...are snug 4 Make sure light cover is tightened and or glass is snug 5 Tighten the hanger bracket screws and make sure the outlet box is secured 6 Your wire connectors may be rattling against the fan s canopy 7 Make sure you have a cUL UL approved outlet box and it is installed correctly My Fan Is Wobbling 1 Tighten the setscrews in the downrod 2 Make sure your hanger ball assembly is locked into pl...

Страница 29: ...en and three 2 audible beeps are heard the pairing process is complete I Don t See My Fan s WiFi ModernFormFan_xxxxxx In My Phone s List of Available Wifi Networks 6 If your fan had been previously paired the Wi Fi radio will be off 7 To turn on Wi Fi press and hold fan speed up and fan speed down buttons on your remote control or wall control for 6 seconds 8 The fan will beep and you will see its...

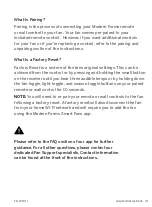
Страница 30: ...our fan If the fan is powered through a wall switch turn the switch off for 10 seconds and back on Alternately you can use the circuit breaker the fan is connected to by toggling it off for 10 seconds and back on If your fan is wired through a Modern Forms wall control P N F WCBT WT pull the Air Gap Switch on your wall control wait 10 seconds and re insert What Is Adaptive Learning Adaptive learni...

Страница 31: ... by pressing and holding the small button on the receiver until you hear three audible beeps or by holding down the fan toggle light toggle and season toggle buttons on your paired remote or wall control for 10 seconds NOTE You will need to re pair your remote or wall controls to the fan following a factory reset A factory reset will also disconnect the fan from your home Wi Fi network and will re...

Страница 32: ...rries its own manufacturer s warranty Note Modern Forms product warranty applies only to purchases from authorized Modern Forms distributors THERE ARE NO WARRANTIES WHICH EXTEND BEYOND THE DESCRIPTION ON THE FACE HEREOF INCLUDING WARRANTIES OF MERCHANTABILITY AND FITNESS FOR A PARTICULAR PURPOSE The Bluetooth word mark and logos are registered trademarks owned by Bluetooth SIG Inc and any use of s...

Страница 33: ...expressément exclu Cette garantie ne s applique pas aux produits modifiés mal installés manipulés ou utilisés de manière inappropriée Modern Forms doit recevoir un avis écrit du défaut dans un délai de cinq 5 ans à compter de la date d achat ou selon la période précisée dans les informations fournies Sont exclus de la garantie tout composant tiers bénéficiant de la garantie du fabricant Remarque l...

Страница 34: ...modernforms com FR W1811 ...

Отзывы: