background image

8  


INSTALLATION 

OPERATION 

Finger pull tabs 

1.  Remove the inner glass panel by first 

removing the 2 screws in the finger pull tabs 
(finger pull tabs are located on the top of the 
glass panel.) Tilt the glass face down about 
45 degrees and remove the glass. Store the 
glass panel upright (not on it’s face) in a 
safe place.  

CAUTION

: There are locator pins on the 

bottom of the glass panel. Lift gently to avoid 
damaging the pins and unit face. 

Installing a fire feature (Canyon Juniper Log set, Crystal Glass Coal set) 

Optional installations: 

Installing remote touch control 

2.  Follow the instructions included with the fire 

feature. 

1.  Locate and remove the access door on the 

rear right side of the fire unit. 

2.  Locate the remote touch control directly 

inside the access panel. Pull the touch 
control through the access panel and 
replace the access door. Locate the touch 
control anywhere within cable length. 

Содержание LANDSCAPE FULLVIEW LFV10015-SH

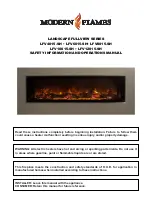
Страница 1: ...ting in serious injury and or property damage WARNING All electric heaters have hot and arcing or sparking parts inside Do not use it in areas where gasoline paint or flammable liquids are or are stored This fireplace meets the construction and safety standards of H U D for application in manufactured homes when installed according to these instructions INSTALLER Leave this manual with the applian...

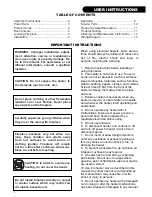
Страница 2: ...ock and injury to persons including the following 1 Read all instructions before installing or using this heater 2 This heater is hot when in use To avoid burns do not let bare skin touch hot surfaces Keep combustible materials such as furniture pillows bedding papers clothes and curtains at least 3 feet 0 9m from the front of the heater and keep them away from the sides and rear 3 Extreme caution...

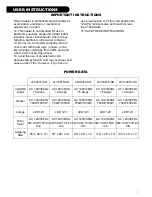
Страница 3: ...98 x 26 x 14 118 x 26 x 14 138 x 26 x 14 USER INSTRUCTIONS Return heater to authorized service facility for examination electrical or mechanical adjustment or repair 12 This heater is not intended for use in bathrooms laundry areas and similar indoor locations Never locate heater where it may fall into a bathtub or other water container 13 Do not run cord under carpeting Do not cover cord with thr...

Страница 4: ...W x 15 H 74 3 4 W x 22 1 2 H x 11 1 2 D 75 3 4 W x 23 H x 12 D LFV8015 SH 80 W x 15 H 94 3 4 W x 22 1 2 H x 11 1 2 D 95 3 4 W x 23 H x 12 D LFV10015 SH 100 W x 15 H 114 3 4 W x 22 1 2 H x 11 1 2 D 115 3 4 W x 23 H x 12 D LFV12015 SH 120 W x 15 H 134 3 4 W x 22 1 2 H x 11 1 2 D 135 3 4 W x 23 H x 12 D 3 L Metal Nailing Flanges with screws L Metal Nailing Flanges 4 L Metal Deco Trim Glass Pull Tabs ...

Страница 5: ...e insulation against the firebox Installing fireplace Select a suitable location that is not suscep tible to moisture and is a safe distance from drapes furniture and high traffic areas A qualified electrician should add a flexible 15 amp 120 volt circuit per local building codes Note Follow all national and local electrical codes WARNING If the information in these in structions is not followed e...

Страница 6: ...wire installation 2 Install L Metal Nailing Flanges To be performed by a qualified electrician according to local building codes 3 Connect hard wire to the terminal block Terminal block Model H W D LFV4015 SH 23 55 3 4 12 LFV6015 SH 23 75 3 4 12 LFV8015 SH 23 95 3 4 12 LFV10015 SH 23 115 3 4 12 LFV12015 SH 23 135 3 4 12 W H D ...

Страница 7: ...uring the drywall process Install drywall to the drywall stops on the perimeter of the fire insert For more information on the drywall stops see the Product Guide on page 4 Decorate as desired 6 After installation user may elect to use the L Metal Deco Trim To install use a small amount of construction adhesive and secure to the drywall face ...

Страница 8: ...the bottom of the glass panel Lift gently to avoid damaging the pins and unit face Installing a fire feature Canyon Juniper Log set Crystal Glass Coal set Optional installations Installing remote touch control 2 Follow the instructions included with the fire feature 1 Locate and remove the access door on the rear right side of the fire unit 2 Locate the remote touch control directly inside the acc...

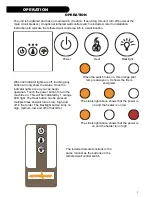
Страница 9: ...eration Touch the power button to turn the machine on This will be indicated by 1 orange LED light The Heat button can be pressed multiple times and will turn on low high and off in that order The Backlight button turns on high medium low and off in that order Power Heat Backlight When the switch turns on this orange pilot lamp is always on It shows the fire is energized The status light above sho...

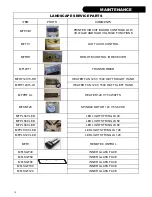
Страница 10: ...HT HAND MFHF12015 LH HEATER FAN 120 V 1500 WATTS LEFT HAND MFPHF AL HEATER 120 V 750 WATTS MFSM120 SPINDLE MOTOR 120 V 50 60 HZ MFPLS40 LED LED LIGHT STRING LS 40 MFPLS60 LED LED LIGHT STRING LS 60 MFPLS80 LED LED LIGHT STRING LS 80 MFPLS100 LED LED LIGHT STRING LS 100 MFPLS120 LED LED LIGHT STRING LS 120 MFR1 REMOTE CONTROL MFLSGF40 INNER GLASS FACE MFLSGF60 INNER GLASS FACE MFLSGF80 INNER GLASS ...

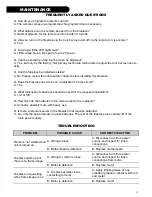
Страница 11: ...Yes Q What thickness of sheetrock should be used for the recessed installation A 1 2 or 5 8 Q How often do the batteries in the remote need to be replaced A Annually possibly more with heavy use Q Is there a remote receiver in the fireplace that requires batteries A No only the actual remote requires batteries The rest of the fireplace runs entirely off of the main power supply PROBLEM POSSIBLE CA...

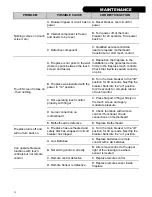
Страница 12: ...the breaker back into the on position for 20 seconds for complete reboot of touch control C Not operating touch control properly with finger C Press flat part of finger firmly on the touch screen and apply moderate pressure D Loose connection on motherboard D Check functions with remote control if functional check connections on motherboard E Motherboard is defective E Replace Motherboard Fireplac...

Страница 13: ... desired glass cleaner with paper towels To clean the air inlets outlets wipe with a soft cloth or the nozzle of a vacuum cleaner Dust can easily build up around the heater area under the appliance Take particular care to clean this area on a regular basis to prevent buildup WIRING DIAGRAM PROBLEM POSSIBLE CAUSE CORRECTIVE ACTION A Wiring is loose A Disconnect unit from power source and inspect fo...

Страница 14: ...14 NOTES MAINTENANCE ...

Страница 15: ...15 NOTES MAINTENANCE ...

Страница 16: ...16 2013 www modernflames com Please dispose of properly ...

Отзывы: