background image

English

 16 


additional  double  switch  according  to  the  standard,  which  ensures  disconnection  of  the  power 
source in case of conditions associated with excess flow category III. 

The failure to follow these instructions may cause the electric shock, fire, or other hazards which 
are fatal. 

Before usage make sure the power cable has been installed properly. 

If the power cord is damaged contact service center MODENA for improvement. 


INSTALLATION


(slim hood)


Suction hood can be mounted on a concrete wall (wall) or at the bottom of the wall cabinets kitchen 
set. 
 

Installation at the concrete wall


(wall)


Make the center line on the wall where it will be placed suction hood. 

If it is included, attach the template H to drill on the wall. Or otherwise has templates, attach the 
suction  hood  on  the  wall  and  mark  the  holes  to  make  the  center  hole  spacing  reference  rear 
suction hood.  
Attention : 

Before drilling, make sure no cable installation, water pipes and other installations in the wall. 

Drill the wall then input fisher J into the hole. 

Install the screws K on both the top and leaving a hole distance of 1 cm between the screw head 
and the wall surface. 

Attach the hood on the wall that has been installed screws by means of a suction hood hanging 
on the screws. 

If the position of the hood on the wall is correct, tighten the two screws using the locking L. 

Then close the grid. 

Connect sewer with spigot / Flange if suction hood will function for the system ducting / exhaust. 


Installation


at


the bottom of the


kitchen cabinet


set


Place the suction  hood on the bottom of the kitchen  cabinet  set in  accordance with the  planned 
position precisely. 

Make a sign at the bottom of the kitchen cabinet set for flexible pipe hole and then to back hole if 
would  use  a  suction  hood  ducting  system  /  exhaust.  Drill  4  holes  at  the  corresponding  position. 
Posting  spigot  /  flange  and  attach  the  suction  hood  and  fasten  with  4  screws  M  at  position  has 
been prepared. 


How to work


MODENA suction hood has two (2) versions of the workings of  the  system  

  of

   DUCTING 

  /

   EXHAUST


recirculating systems: 
A. DUCTING / EXHAUST SYSTEM: 

In  this  version,  the  suction  hood  works  by  sucking  fumes  /  smoke  aroma  of  cooking  which then 
are thrown out through sewer. 

The hood  has two air duct out  to throw the  smoke of suction.  Channel  air  out  the  top of the  B1 
and the air duct out optional back panel B2 *. 

Required system ducting heat resistant / fire for removing smoke / scent through the outlet. 

To  connect  the  suction  hood  with  sewer  use  "spigot  /  Flange"  C  which  have  been  provided  on 
each package suction hood. 

Be sure to close the unused hole duct with cover D *. 

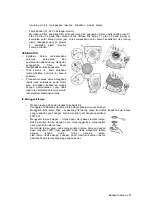
In some models the upper hole B1 is closed, press firmly to release the part that closes the outlet 
hole. 


Содержание RX 9503

Страница 1: ...RX Series BUKU PETUNJUK PENGGUNAAN TUDUNG HISAP DAN KARTU GARANSI 01 15 www modena co id HOOD MANUAL AND WARRANTY CARD ...

Страница 2: ......

Страница 3: ...ci sehingga memudahkan Anda dalam menggunakan dan memanfaatkannya Agar produk tudung hisap ini dapat berfungsi normal dalam jangka waktu yang panjang kami sangat merekomendasikan agar buku ini tidak saja menjadi pegangan Anda sebagai pembeli namun juga sebagai panduan bagi siapa saja yang menggunakan dan mengoperasikannya sehingga keawetan dan kualitas fungsionalnya lebih tahan lama Buku ini sanga...

Страница 4: ...R ISI HLM Kata Pengantar 1 Bagian 1 Nama nama Bagian 3 Bagian 2 Instalasi 3 Bagian 3 Cara Penggunaan 7 Bagian 4 Pemeliharaan 8 Bagian 5 Masalah Solusinya 10 Bagian 6 Spesifikasi 11 NOMOR 20 DJ ILMEA MG V 2000 728 ILMEA IX 2003 ...

Страница 5: ...angan menghubungkan alat ke sumber listrik sampai instalasi sepenuhnya lengkap Sebelum membersihkan dan melakukan perawatan lainnya matikan dan lepaskan kabel dari sumber listrik Selalu gunakan sarung tangan kerja untuk semua operasi instalasi dan pemeliharaan Unit ini tidak dimaksudkan untuk digunakan oleh anak anak atau orang dengan kemampuan fisik sensorik atau mental terganggu atau jika kurang...

Страница 6: ... dengan instruksi 2002 96 EC Eropa mengenai Peralatan Limbah Listrik dan Elektronik WEEE Dengan memastikan bahwa produk ini telah dibuang dengan benar Anda akan membantu mencegah konsekuensi yang berpotensi negatif terhadap lingkungan dan kesehatan manusia yang dapat disebabkan oleh penanganan limbah yang tidak tepat dari produk ini Simbol pada produk atau pada dokumen yang menyertai produk menunj...

Страница 7: ...rhatian Sebelum mengebor pastikan tidak ada instalasi kabel pipa air dan instalasi lainnya di dalam tembok Borlah tembok kemudian masukan fisher J ke dalam lubang Pasang sekrup K pada kedua lubang bagian atas dan sisakan jarak 1 cm antara kepala sekrup dan permukaan tembok Pasang tudung hisap pada tembok yang sudah dipasang sekrup dengan cara menggantung tudung hisap pada sekrup tersebut Bila posi...

Страница 8: ... didalam tudung hisap pada posisi hisap A Beberapa hal yang perlu diperhatikan untuk pemasangan tudung hisap sistem ducting 1 Karbon filter harus dilepas karena aroma masakan yang dihisap akan langsung dibuang keluar ruangan 2 Daya hisap akan berkurang jika saluran pembuangan terlalu panjang dan banyak siku sikunya 3 Jangan menghubungkan saluran pembuangan dengan cerobong asap atau saluran udara u...

Страница 9: ...laan lampu Catatan Untuk pengaturan kecepatan motor tudung hisap disesuaikan dengan ketebalan asap uap yang timbul ketika memasak Tombol kecepatan motor RENDAH Cocok digunakan untuk sirkulasi udara dapur atau digunakan pada kondisi memasak yang tidak menimbulkan banyak asap atau uap Tombol kecepatan motor SEDANG Kecepatan perputaran udara yang cocok untuk proses memasak yang menimbulkan volume asa...

Страница 10: ...ali atau jika warna muncul di sisi atas dalam kasus ini warna timbul melalui celah grid Metal filter harus dibersihkan sebulan sekali dengan deterjen non abrasif dengan tangan atau mesin cuci piring gpada suhu rendah dan siklus pendek Ketika dicuci di mesin cuci piring filter grease bisa merubah warna sedikit tapi ini tidak mempengaruhi kinerja filter Untuk melepaskan grease filter buka grid melal...

Страница 11: ...usen menolak semua tanggung jawab atas kerusakan pada motor atau kerusakan kebakaran terkait dengan pemeliharaan yang tidak tepat atau kelalaian dalam mematuhi rekomendasi keamanan di atas IV Mengganti lampu Matikan tudung hisap dan lepaskan kabel listrik Peringatan Pastikan bola lampu telah dingin sebelum menyentuhnya Mengganti bola lampu 40W Lepaskan grid tudung hisap kemudian lepaskan bola lamp...

Страница 12: ...gi Service Center MODENA Lampu menyala tapi kipas tidak berfungsi Kipas macet Matikan unit dan perbaikan harus Hubungi Service Center MODENA Motor rusak Lampu dan kipas tidak menyala Bola lampu putus terbakar Ganti bola lampu dengan daya yang sesuai Kabel listrik lepas atau belum terpasang Hubungkan kembali kabel listrik ke sumber listrik Unit bergetar Kipas rusak Matikan unit dan perbaikan harus ...

Страница 13: ...900 x 510 x 132 S Stainless W White B Brown V Silver G Gray L Black Desain dan spesifikasi dapat berubah setiap saat tanpa pemberitahuan terlebih dahulu Untuk meningkatan kualitas produk desain dan spesifikasi diatas dapat berubah setiap saat tanpa pemberitahuan Gambar pada buku ini bersifat skematis dan bisa saja tidak tepat sama dengan produk aktual Nilai yang tercantum pada label atau dalam dok...

Страница 14: ......

Страница 15: ...tion in this manual to facilitate the users In order for this hood to perform normally for an extended period of time we highly recommend not only the buyer to hold onto this manual but also those who wish to operate the product optimally to maintain its service period and quality This manual is recommended for use by anyone who operates the hood We also provide a customer care service for MODENA ...

Страница 16: ...English 13 CONTENTS PAGE Introduction 12 Part 1 Name of Part 14 Part 2 Installation 14 Part 3 How to Use 18 Part 4 Maintenance 19 Part 5 Problem Solution 21 Part 6 Specification 22 ...

Страница 17: ...n is fully complete Before any cleaning or maintenance operation disconnect hood from the mains by removing the plug or disconnecting the mains electrical supply Always wear work gloves for all installation and maintenance operations The appliance is not intended for use by children or persons with impaired physical sensorial or mental faculties or if lacking in experience or knowledge unless they...

Страница 18: ... harus dilakukan sesuai dengan peraturan lingkungan setempat untuk pembuangan limbah The symbol on the product or on the documents accompanying the product indicates that this appliance may not be treated as household waste Instead it should be taken to the appropriate collection point for the recycling of electrical and electronic equipment Disposal must be carried out in accordance with local en...

Страница 19: ...ws If the position of the hood on the wall is correct tighten the two screws using the locking L Then close the grid Connect sewer with spigot Flange if suction hood will function for the system ducting exhaust Installation at the bottom of the kitchen cabinet set Place the suction hood on the bottom of the kitchen cabinet set in accordance with the planned position precisely Make a sign at the bo...

Страница 20: ...installed again Remove these parts only if you are sure about the type of installation that will be created Attention In some models the rear hole duct is not easily accessible even when the cover if fitted is released In this case remove the plastic piece E1 or E2 that is blocking the hole duct using pliers and cutter Check that the selector knob filter suction G inside at the hood on the suction...

Страница 21: ...n as shown below Note The setting of the cooker hood motor speed is adjusted to the thickness of the smoke steam that arises when cooking Motor speed button LOW Suitable for air circulation used in the kitchen or cooking conditions that do not cause a lot of smoke or steam Motor speed button MEDIUM Air circulation speed which is suitable for a cooking process that raises a medium volume of smoke o...

Страница 22: ...e top side in this case the colors arise through the grid gap Metal filters should be cleaned once a month with a non abrasive detergent by hand or dishwasher gpada low temperature and short cycle When washed in a dishwasher the grease filter may discolour slightly but this does not affect the performance of the filter To remove grease filter open grid through P hooks and remove the stopper R1 and...

Страница 23: ...with improper maintenance or failure to comply with the above safety recommendations IV Replacing lamps Disconnect the hood from the electricity Warning Prior to touching the light bulbs ensure they are cooled down Replacing lightbulbs 40W remove the grid Unscrew the damaged light bulb and replace with an incandescent oval light bulb with a maximum of 40W E14 Remove the grill in order to reach the...

Страница 24: ... Contact MODENA Service Center Light on but fan does not work The fan blade is jammed Switch of the unit and Contact MODENA Service Center The motor is damaged Both light and fan do not work Light bulb is burn Replace the bulb with correct rating Power cord looses Plug in to the power supply again Serious Vibration of the unit The fan blade is damaged Switch of the unit Contact MODENA Service Cent...

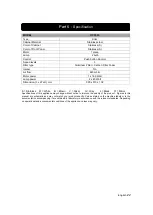
Страница 25: ...Dimension L x W x H mm 900 x 510 x 132 S Stainless W White B Brown V Silver G Gray L Black R Mirror Specifications of this appliance may change without notice to improve the quality of the product Figures in this manual are schematic and may not match your product exactly Values stated on the machine labels or in the documentation accompanying it are obtained in laboratory in accordance with the r...

Страница 26: ......

Страница 27: ......

Страница 28: ...Kepada Yth MODENA Customer Care Jln Prof Dr Satrio C 4 No 13 Jakarta 12950 Indonesia ...

Отзывы: