English 26
B
B
O
O
2
2
6
6
3
3
3
3
;
;
B
B
O
O
2
2
6
6
3
3
4
4
;
;
B
B
O
O
3
3
6
6
3
3
2
2
;
;
B
B
O
O
3
3
6
6
3
3
0
0
;
;
B
B
O
O
2
2
7
7
3
3
3
3
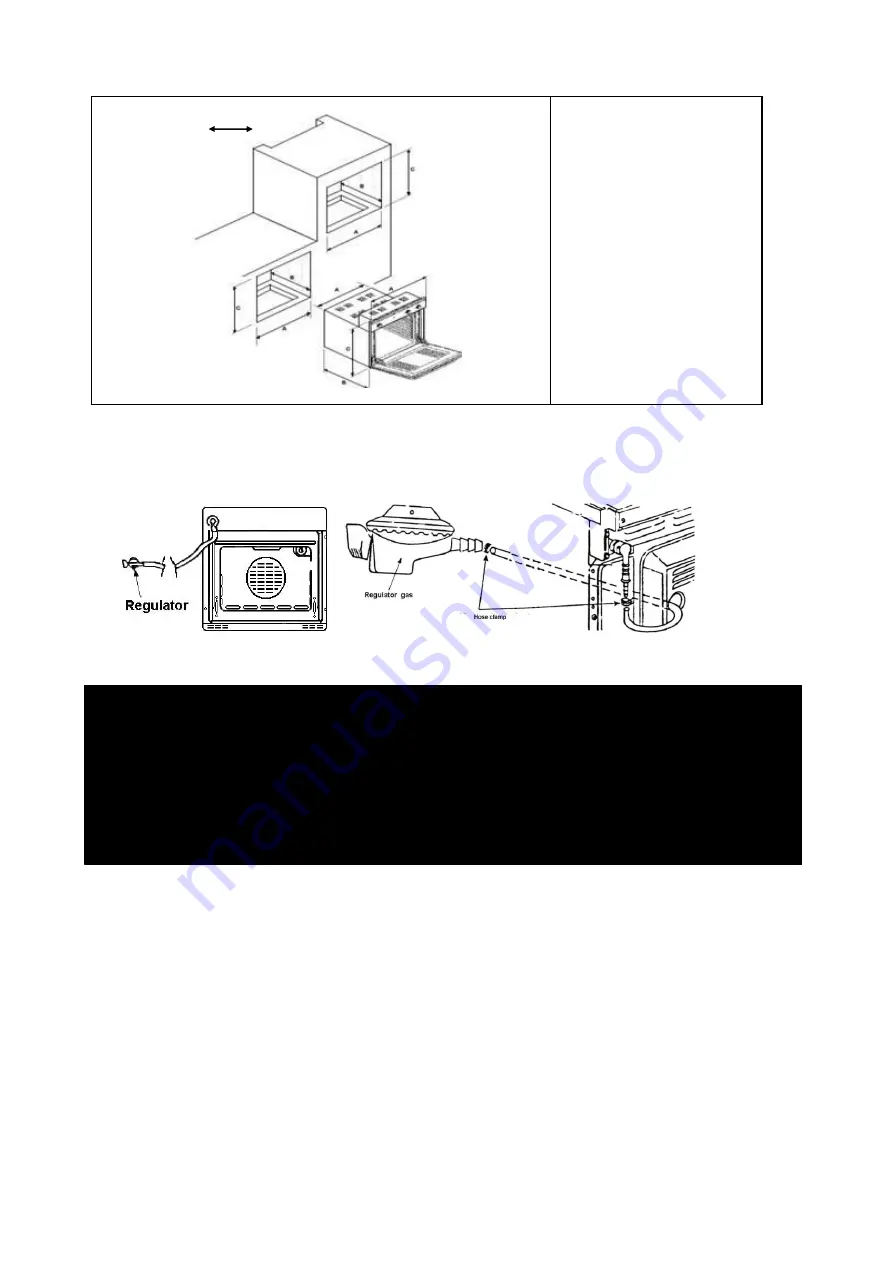
A : 560 mm
B : 550 mm
C : 580 mm
BO 2433 :
A : 560 mm
B : 550 mm
C : 448 mm
B
B
O
O
2
2
6
6
6
6
3
3
;
;
B
B
O
O
2
2
6
6
6
6
4
4
;
;
B
B
O
O
3
3
6
6
6
6
0
0
A : 560 mm
B : 570 mm
C : 580 mm
-
For Gas oven type
Connect the gas hose into oven, and then tighten it using clamp/hose clamp.
Once the gas hose attached, do a test on a gas leak in the oven connection with the following way:
a. Connect the regulator to the gas cylinder.
b. Apply soap solution (water + soap) on the connection around.
c. Observe the connection. If the connection visible presence of air bubbles that arise as a result of
the exit gas pressure means there is a leak in the connection.
d. To overcome the leak ed connection can follow the instructions below:
-
Remove the regulator on the gas cylinder.
-
Tighten the clamp / hose clamp on the leaky connection.
-
Repeat the gas leak test (repeat point a - c).
-
Fit the appliance into its surround (beneath a work -top or above another appliance) by inserting screws
into the 4 holes that can be seen in the frame of the oven when the door is open.
Attention:
-
Use standard hose for gas hose and safety gas leak regulator.
-
Please use good hose and regulat or to avoid gas leaks that can cause an explosion.
-
Do not use high pressure gas regulat or. Gas hose s hould not be touched / attached to the wall
of a hot oven.
-
Gas hose should not be touched / attached to the wall of a hot oven.
ventilation
Содержание BO 2433
Страница 1: ...2016 ...
Страница 25: ......
Страница 31: ...English 28 BO 3632 Keterangan BO 2733 BO 2633 BO 2634 BO 2433 BO 3660 BO 2663 BO 2664 Part 3 Control Panel ...
Страница 47: ......


