Installation & Operation
Power to the Arm
Power for the Pioneer Arm’s controller comes from your robot’s batteries, as switched by
Main Power
.
Power to the Pioneer Arm servo joints is normally OFF and only switched ON from software by toggling
a digital output port in the arm controller.
For power conservation and safety reasons, the arm-servo power relay normally is deactivated.
Accordingly, all the joints are limp and easily rotated and swiveled manually. When engaged, the servo
motors will resist your efforts to move them.
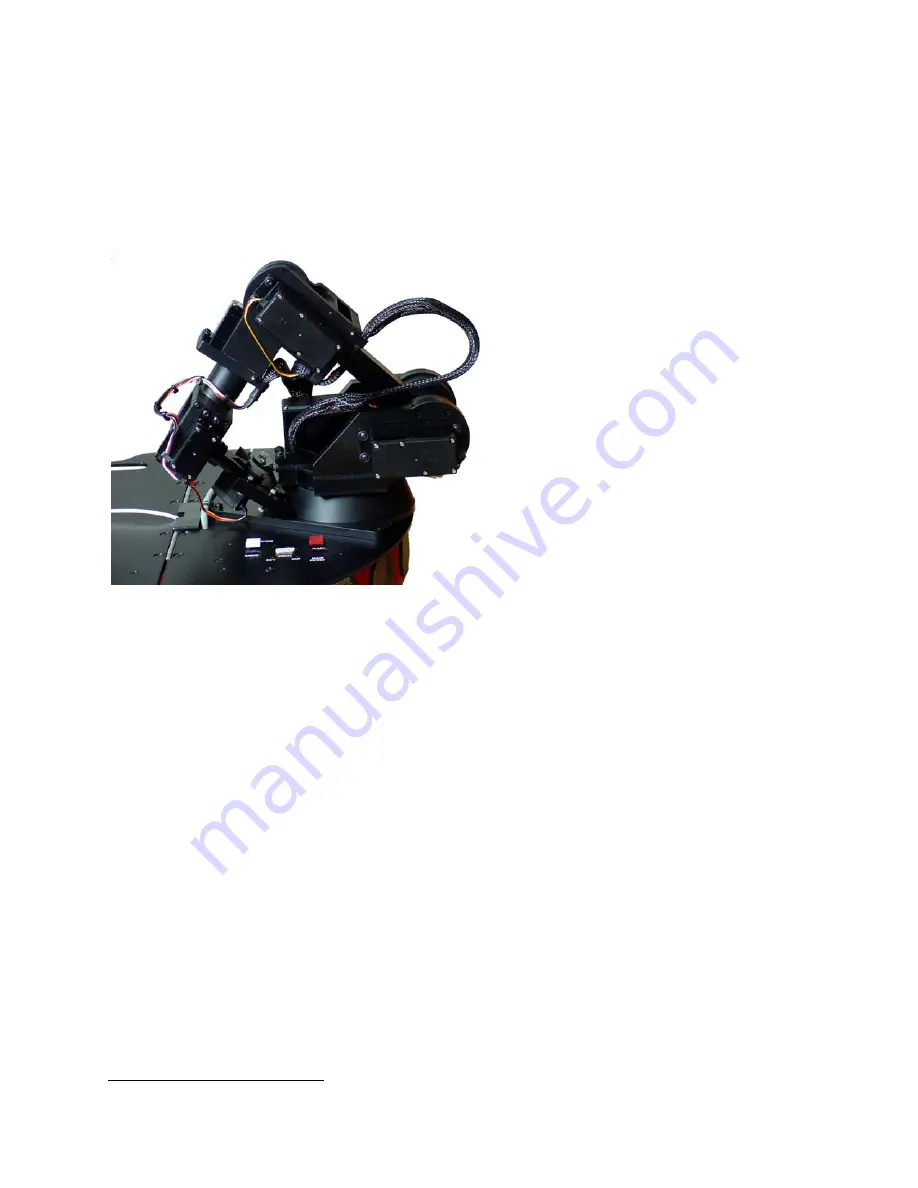
Figure 4. Your Pioneer 2 Arm safely at
HOME
When the Pioneer Arm servos get
power, all joints simultaneously and as
quickly as possible jump to their
positions last programmed into the
arm’s controller. If power is removed
from the servos, all the joints fall into
their mechanically limpest position.
Since the Pioneer Arm’s joint positions
cannot be known, they are assumed by
their generic controller to be in a
default center position. When you
apply power to the servos, the arm
thereby snaps fully extended into a
“salute” nowhere near any reasonable
limp configuration. This snap-to-salute
draws excessive power and can swing
the joints into nearby objects.
Arm Safely at HOME
On start up or reset, your robot
controller’s Arm servers establish
communication with the Arm’s
controller and reset the joints to be in a low-energy, folded
HOME
position. When limp in that same
position, no joint is far from its
HOME
position when servo power gets applied. This way, the snap-to-
position jolts characteristic of servo motors when first powered up are minimized.
Accordingly, when operating the Pioneer Arm, be sure to manually place it in its
HOME
resting position
before
applying power to its servos, and be careful to have it resume its
HOME
position before removing
power. Failure to do so may cause damage to the Pioneer Arm or to nearby people, animals, lamps,
vases, undergraduates...
For additional safety, the Pioneer Arm normally should ride on the moving robot in its
HOME
resting
position with servo power OFF, unless involved in manipulation activities. It only makes good sense to
protect the arm from damage and to conserve power; the servos draw precious battery power while
holding a position as well as while moving, and the Pioneer Arm can go dangerously limp if you
carelessly withdraw power from it.
Configuration
We normally install and configure the Pioneer Arm at the factory. During that process, we enable the
Pioneer Arm servers in your robot’s controller. And we calibrate each arm joint to arm-unique
maximum, minimum, center, and
HOME
positions. All these details are saved in your robot controller’s
FLASH parameters and recorded on a document that comes with your robot and arm. If you move the
Pioneer Arm to another robot or if you change controllers, you’ll need to reset that robot’s FLASH
configuration.
Please consult a subsequent chapter in this manual concerning editing the FLASH parameters, as
needed. Note here that with C166-based controller with P2OS, you need to set in FLASH the
6
4
Some may argue that this presents a fine opportunity to perfect your robot’s “dope slap” maneuver made famous by Click and
Clack, the Tappet Brothers, on their infamous National Public Radio show, Car Talk©.


