background image

MODELS: WS-55859 / WS-55909 / WS-65869 / WS-65909 / WS-73909

Page 66

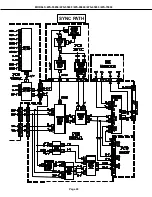
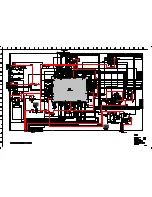
SYNC PATH

Содержание WS-55859

Страница 1: ...869 6 round type full range 2 pcs 8Ω 10W WS 55909 WS 65909 WS 739090 5 round type full range 2 pcs 8Ω 10W 2 round type tweeter 2 pcs 8Ω 10W Weight WS 55859 250 lbs WS 55909 256 lbs WS 65869 326 lbs WS 65909 348 lbs WS 73909 405 lbs Cabinet Model H x W x D Dimensions WS 55859 50 3 x50 6 x27 8 WS 55909 51 4 x46 9 x28 1 WS 65869 61 9 x59 x28 1 WS 65909 61 5 x58 2 x28 3 WS 73909 65 7 x65 2 x29 8 Input...

Страница 2: ......

Страница 3: ...amondShield TM Removal Installation 14 SERVICING PCBs Chassis Removal 15 PCB Locations 16 Main Components Location 16 DM Module Main Components Location 17 CRT REPLACEMENT CRTRemoval 18 CRT Installation 19 ELECTRICAL ADJUSTMENTS Test Equipment 21 Initial Setup 22 LED Indicator Diagnostics 23 Remote Control Operational Mode 23 Circuit Adjustment Mode 24 On Screen Display Position Mode 25 Convergenc...

Страница 4: ...cal and Warranty Parts Designation 46 Parts Tolerance Codes 46 Quick Reference List 47 Service Parts List 48 Screen Parts List 59 CIRCUITRY BLOCK DIAGRAMS Standby Supplies Regulator 61 Switched Supplies Regulator 62 DM Power Supply 63 Video Color A V Switch Circuit 64 Video Color Signal Path 65 Sync Signal Path 66 Deflection HV 67 X Ray Protect 67 Sound Circuit 68 Convergence 69 Control Circuitry ...

Страница 5: ...1 Cabinet and screen parts 2 Electrical parts Schematic and block diagrams of the above listed models are included in this service manual for better under standing of the circuitry PCB drawings are also included for easy location of parts and test points PRODUCT SAFETY NOTICE Many electrical and mechanical parts in television receivers have special safety related characteristics These characterist...

Страница 6: ...rd to X Radiation High voltage must be set as prescribed under the section titled Electrical Adjustments Leakage current check Before returning the receiver to the customer it is recommended that leakage current be measured according to the following methods 1 Cold Check With the alternating current AC plug removed from the AC source place a jumper across the two AC plug prongs Connect one lead of...

Страница 7: ...VIEW WS 55859 Refer to the Parts List for Part Numbers 1a Front Cabinet Disassembly 1 Remove the Speaker Grille by pulling forward 2 Remove the Board Front by removing 4 screws a 3 Remove the 4 screws b holding the Screen Assembly 4 Lift the Screen Assembly up and away from the cabinet ...

Страница 8: ... Parts List for Part Numbers 1b Front Cabinet Disassembly 1 Remove the Speaker Grille by pulling forward 2 Remove the Board Front by removing screws b 3 Remove the Control Panel by removing two screws a 4 Remove the four screws b holding the Screen Assembly 5 Lift the Screen Assembly up and away from the cabinet ...

Страница 9: ...efer to the Parts List for Part Numbers 1c Front Cabinet Disassembly 1 Remove the Speaker Grille by pulling forward 2 Remove 2 screws a to remove the Control Panel 3 Remove the Board Front by removing 4 screws b 4 Remove the 4 screws c holding the Screen Assembly 5 Lift the Screen Assembly up and away from the cabinet ...

Страница 10: ...WS 55909 WS 65869 WS 65909 WS 73909 Refer to the Parts List for Part Numbers 2b Rear Cabinet Disassembly 1 Remove screws a holding the Back Board 2 Remove the 4 screws b holding each Board Shelf 3 Remove the 4 screws c securing the Light Box Assembly 4 Slide the Light Box out the rear of the Cabinet ...

Страница 11: ... fire and heat related injuries WS 55859 1a Lenticular Screen and Fresnel Lens Removal 1 Remove the screen assembly shown in the Cabinet Disassembly procedure 2 Remove the screws a securing the Screen Holder 3 Slide the Lenticular Screen and Fresnel Lens from the Screen Frame Note When separating the Lenticular Screen from the Fresnel Lens use caution while prying the Screen and Lens apart Use a s...

Страница 12: ...869 WS 65909 WS 73909 1b Lenticular Screen and Fresnel Lens Removal 1 Remove the screen assembly shown in the Cabinet Disassembly procedure 2 Remove the Screen Frame top section by removing 4 screws a 3 Carefully grasp the Lenticular Screen and Fresnel Lens combination and pull upward and out of the Screen Frame Assembly Note When separating the Lenticular Screen from the Fresnel Lens use caution ...

Страница 13: ... may deform the Lenticular Screen and Fresnel Lens 1 Apply double coated tape Part LENS TAPE along the top front edge of the Fresnel Lens as shown below Refer to the Table below for proper tape length 2 Place the Fresnel Lens on top of the Lenticular Screen and apply pressure at the top edge to bond them together as shown below Model Screen Size Tape Length WS 55859 55 47 8 WS 55909 55 47 8 WS 658...

Страница 14: ... pull the Shield slightly away from the unit Place your hands at the points shown and gently bow the Shield toward you and remove from the unit Then re install the two clips Top Bottom Molding Clips Side Molding Clips 1 Gently insert a small screwdriver between the DiamondShield and one end of the clip to pry the clip loose 2 Remove both clips by pulling them toward you 3 Carefully insert a small ...

Страница 15: ...s CRTs etc 2 Remove 3 screws a securing the Main Chassis 3 Unlatch the two chassis locks on the front of the chassis 4 Slide the Chassis and DM Module out the rear of the unit 5 Tilt upward to access the bottom of the main chassis NOTE If the chassis cannot be removed with the DM Module due to insufficient cable length 1 Perform Step 1 through 3 above 2 Remove 3 screws b 3 Slide the chassis only o...

Страница 16: ...Page 16 MODELS WS 55859 WS 55909 WS 65869 WS 65909 WS 73909 PCB Locations Main Components Location ...

Страница 17: ...Page 17 MODELS WS 55859 WS 55909 WS 65869 WS 65909 WS 73909 DM POWER SUPPLY ATV TUNER DE MODULATOR E2P MODULE FLASH CARD SLOT COVER DM Module Main Components Location ...

Страница 18: ...ck Board 3 Remove the Anode Lead Wire from the CR Block 4 Remove the PCB CRT 5 Remove 4 hex screws a retaining the Optical Unit Figure 5 1 6 Remove 4 screws b retaining the Lens Note DO NOT loosen the RED screws Doing so will break the seal between the C Element and the 6 Lens causing leakage of the CRT Coolant 7 Remove 4 screws c retaining the CRT Figure 5 2 8 Remove the Deflection Yoke from the ...

Страница 19: ...hem filled with ethylene glycol Care should be taken during handling and installation to prevent shock from disrupting the seal or alignment between the CRT and Inner Lens Figure 5 3 Note The CRT fixing screws should not be loosened nor should they be removed Figure 5 4 1 Carefully position the replacement CRT and fasten in place using 4 screws d Figure 5 6 Figure 5 6 Figure 5 5 Figure 5 4 Figure ...

Страница 20: ...the Label faces the direction shown in Figure 5 8 b Install the mounting screws Figure 5 1 4 Connect the PCB CRT 5 Insert the Optical Unit into the Light Box Assembly 6 Insert the Anode Lead Wire into the Flyback Transformer 7 Re clamp the Lead Wire in its original position Adjustment procedures after replacing the CRT s CRT Cut Off White Balance Adjustment Static Convergence Adjustment Dynamic Co...

Страница 21: ...cope Unless otherwise specified use 10 1 probes Signal Generator both SD and HD capable Frequency Counter Direct Current Voltmeter Direct Current Power Supply Multiplex Audio Signal Generator Direct Current Ampere Meter Test Signal A Monoscope Signal Note If you do not have a monoscope signal source connect the unit to a VCR and play a Monoscope alignment tape Part Number 859C568060 B Color Bar Si...

Страница 22: ...anguage English V Chip Start Time 12 00 PM Video Noise Standard V Chip Stop Time 12 00 PM Image Type Video Antenna ANT A Lock by Time Off Video Mute On Memorize Channels Air Unlock Time N A Black Enhancement On Channel Ch 3 Front Button Lock Off Memory Deleted Source Ant A Ch 3 Timer Off PIP Position Lower Right Clock Setting Auto Set Day Everyday POP Position Right Half Time Zone Eastern Set Time...

Страница 23: ...ashes indicating the value of the LSD ones digit of the Error Code The Error Code is repeated a total of 5 times Example If the Error Code is 24 the LED will flash two times pause and then flash four times 3 Error Codes The Error Code designations indicating a malfunction or no malfunction are listed below Remote Control Operational Modes There are two Remote Hand Unit Operational Modes Standard a...

Страница 24: ...ems To select an adjustment item in the circuit adjustment mode first select the adjustment function that includes the specific adjustment item to be selected Then select the adjustment item Refer to the following pages for the listing of adjustment functions and adjustment items 1 Press the AUDIO button on a remote hand unit to select an adjustment function Each time the button is pressed the Fun...

Страница 25: ...ENU 0 1 5 9 2 When the Convergence Mode is activated this display appears on a Green Crosshatch B Selecting the HD or SD Mode 1 Select the Signal Source before entering the Con vergence Mode either an NTSC or HD source 2 Enter the Convergence Mode If the signal source is NTSC the SD mode is activated If the signal source is HD the HD mode is activated 3 Activating the HD mode when no HD signal is ...

Страница 26: ...utton FINE GREEN a Green Crosshatch is displayed to make Fine Raster Corrections FINE RED a White Crosshatch is displayed to make Fine Red Convergence Adjustments FINE BLUE a White Crosshatch is displayed to make Fine Blue Convergence Adjustments Cursor In the Fine mode a Cursor is added to the Crosshatch The ENTER button toggles the Cursor between two modes MOVE blinking Cursor use the ADJUST but...

Страница 27: ...5 15 15 17 SCTL Picture Gain L Temp 0 63 42 42 42 42 Preset 18 SBRL Sub Brightness L Temp 0 63 25 25 25 25 User 19 SCLL Sub Color L Temp 0 15 2 2 2 2 User 20 SCNL Color Gain L Temp 0 15 2 2 2 2 23 COL Color Gain 0 63 31 31 31 31 56 VM VM level 0 3 2 2 2 0 60 CRO1 CR Offset 1 0 15 10 7 7 7 Cb Cr Offset 61 CBO1 CB Offset 1 0 15 10 7 7 7 Cb Cr Offset 64 R YR R Y gain of R Y 0 15 7 7 7 7 Preset 65 R Y...

Страница 28: ...lay Adjustment Data Initial Notes Item Abbrev Description Range Data 1 INP Input Level Alignment 0 15 8 Input Level 2 WDE Wideband Separator Align 0 31 3 Separation 3 SPC Spectral Separator Align 0 31 3 OSD Horizontal Centering MENU 0 1 8 8 Abbrev Description Data Initial Range Data OSDHD HD OSD Horizontal Position 0 960 122 OSDSD SD OSC Horizontal Position 0 960 120 DYNAMIC FOCUS MENU 0 1 5 9 Ite...

Страница 29: ...t X axix rotation 0 0 0 0 0 0 0 0 0 0 5 HLIN Horixontal Linearity 150 150 150 150 150 150 150 150 200 150 6 HWID Horizontal Width 10 10 10 10 10 10 10 10 10 10 7 VKEY Vertical Keystone Correction 90 90 90 90 90 90 90 90 100 90 8 VWID Vertical Height 0 0 0 0 0 0 0 0 0 0 9 VLIN Vertical Linearity 0 0 0 0 0 0 0 0 0 0 10 TPPC Top Bottom PC Correction 20 20 20 20 20 20 20 20 20 20 11 SDBW Horizontal Si...

Страница 30: ...09 Page 30 Adjustment Test Point Location Test Points DT pin 3 HV Adjust DT pin 6 Ground DT pin 7 12 Volts DT pin 8 ACL EA pin 1 Sub Picture Y EA pin 15 Main Picture Y EB pin 5 POP Cr ST pin 12 Left Audio ST pin 16 Right Audio TP6 R G or B CRT Cathode ...

Страница 31: ... that the left audio level at pin 12 of the ST connector is 1 56 Vp p 0 06V Note Adjustment 2 Stereo Separation must be performed after this adjustment Audio Circuit 1 MCS Input Level Oscilloscope Conector ST pin 16 10mV Div RF Stereo RF Input Audio Circuit 2 Separation Check stereo separation Poor stereo separation Note This adjustment must follow Adjustment 1 Input Level 1 Supply a RF Stereo Sig...

Страница 32: ...e This adjustment must be performed if E2RESET or Convergence E2RESET are activated HV Circuit 3 HV Regulation Oscilloscope EA connector pins 15 1 Color Bars Video Input Video Circuit 4 Main Sub Y Level To set picture luminance Excess or insufficient brightness 1 Supply a color bar signal to a Video Input not an RF input 2 Select the color bar signal for both the main and sub pictures 3 Connect th...

Страница 33: ...just Items 4 VPDS and 5 UPDS 5 Side by Side Sub Picture Tint To set the sub picture color level Main and sub pictures color levels differs Video Circuit 6 Side by Side Sub Color Oscilloscope EB connector pin 5 200mV div 20usec div Color Bars Video Input Note Let the set run for at least one minute before making this adjustment 1 Supply a color bar signal 2 Select the color bar signal as the source...

Страница 34: ...s white level in the NTSC mode Monochrome has a color tint Note Use the FORMAT button to activate the Expand mode full screen 1 Supply a full White Raster Signal 2 Activate the Service Mode VC function 3 Set the data for Item 23 COL to 0 4 Adjust Items 6 RDRH and 8 BDRH for optimum white at the center of the screen 5 Reduce the input luminance level to 30 6 Adjust Items 9 CTRH and 11 CTBH for opti...

Страница 35: ... for optimum white at the center of the screen 6 Reduce the input signal luminance to 30 7 Adjust Items 9 CTRH and 11 CTBH for optimum white 8 Set the data for Item 23 COL back to 31 White Raster HD NTSC Video DTV Inputs CRT Circuit 10 Cb Cr Offset To set Cb and Cr color signal level Incorrect colors 1 Supply an NTSC White Raster 30 luminance signal to a Video Input 2 Activate the Adjust Mode VC F...

Страница 36: ... 50 0 0 0 60 70 80 90 GRADATION SCALE DC ma meter DT connector pins 7 8 Grayscale RF Input To set overall beam current to its optimum level Excess or insufficient contrast Note Activate the Expand mode full screen 1 Supply a Grayscale signal to a RF Input 2 Activate the Adjust Mode VC Function 3 Select Item 1 SCT signal level automatically reduces 4 Connect a 3ma DC meter between DT connector pins...

Страница 37: ... 5 Exit the Conv Mode CONVERGENCE MODE Activate MENU 0 1 5 9 Misc 6 Coarse 5 Fine 4 Color R G or B AUDIO Item No VIDEO Adjust Move ADJUST Cursor Toggle ENTER Save Exit MENU twice Monoscope Video Input Poor focus Note This adjustment must be done before Electrostatic Focus Perform this adjustment for RED GREEN and BLUE monochrome pictures 1 Supply a VIDEO signal Monoscope 2 Cover the Red and Blue L...

Страница 38: ...ectrostatic Focus Alignment Magnet To set electrostatic focus to the optimum point Poor focus Note This adjustment must be performed after the Sub Contrast adjustment Alignment Magnet Adjustment WS 55909 WS 65909 and WS 73909 Only This adjustment must be performed before Static Focus Adjustment 1 Supply a Crosshatch with Center Dot signal to a Video Input 2 Select a Green raster using the table be...

Страница 39: ... 22 16 22 5 EWPB 31 27 21 27 7 VHGT 27 25 32 32 8 VLIN 9 13 9 9 9 VSCN 0 0 0 0 20 VPOS 31 31 31 31 55 65 Data 73 Data CONV GREEN MENU 0 1 5 9 5 Item Abbrev SD HD SD HD SD HD 0 HSTA 0 0 0 0 0 0 1 VSTA 0 0 0 0 0 0 2 SKEW 0 0 0 0 0 0 3 TILT 0 0 0 0 0 0 4 HWID 0 0 0 0 0 0 5 HLIN 0 0 0 0 0 0 6 SPCC 0 0 0 0 0 0 7 HKEY 0 0 0 0 0 0 8 TBPC 200 170 200 170 200 170 9 VKEY 0 0 0 0 0 0 10 VWID 0 0 0 0 0 0 11 V...

Страница 40: ...cope as the signal source 3 Activate the Adjustment Mode JNGL Function 4 Select and adjust each of the following items 7 VHGT so the vertical marker sum 4 1 HWD so the horizontal marker sum 7 5 Save data and Exit the Service Mode HD Mode 1 Supply an HD Monoscope signal to the DTV HD Inputs 2 Select the DTV Inputs as the signal source Input button 3 Activate the Service Mode Defl Jungle Function 4 ...

Страница 41: ...se Green Items shown below for straight crosshatch lines 4 Select the Fine Green Mode a Cursor is displayed on the crosshatch 5 Use the Cursor to adjust for straight crosshatch lines 6 Exit the Convergence Mode HD mode 1 Supply horizontal and vertical HD sync to the DTV Inputs and select the DTV Inputs as the source Note If an HD signal is not available select Ant DTV with no signal as the source ...

Страница 42: ...mode Center the Green Raster using the Green Centering Magnet Rotate the Green Deflection Yoke to correct any tilt 6 In the Coarse Red mode use the Red Centering Magnet to converge red on the green at the center of screen Correct any red tilt with the Red Deflection Yoke 7 In the Coarse Blue mode repeat Step 6 using the Blue Centering magnet and the Blue Deflection Yoke 8 Exit the Convergence mode...

Страница 43: ...4 Select Coarse Blue mode 5 Adjust the Items shown below to converge the blue on the green Note If center convergence shifts use red and blue Items 0 HSTA and 1 VSTA to correct the shift 6 Exit the Convergence Mode HD mode 1 Supply horizontal and vertical HD sync to the DTV Inputs and select the DTV Inputs as the source Note If an HD signal is not available select Ant DTV with no signal as the sou...

Страница 44: ... the green 4 Select the Fine Blue mode 5 Use the Cursor to converge blue on the green 6 Exit the Convergence mode HD Fine Adjustment 1 Supply an HD signal sync only to the DTV inputs and select DTV with the Audio button Note If an HD signal is not available select Ant DTV with no signal as the source 2 Repeat SD Fine Adjustment Steps 2 through 6 in the HD mode Convergence Circuit 22 Fine Convergen...

Страница 45: ... 3 three seconds to new chip parts 5 Avoid using a rubbing stroke when soldering 6 Take care not to scratch or damage the chip parts when soldering 7 Supplementary cementing is not required Chip Parts Removal Resistors Capacitors etc 1 Grasp the part with tweezers Melt the solder at both sides alternately and remove one side of the part with a twisting motion 2 Melt the solder at the other side an...

Страница 46: ...t Critical and Warranty Parts Designation Critical Electrical Components are indicated by Bold Type in the Parts List and in the schematic diagrams by shading Warranty Return Parts are indicated in the Parts List with an Parts Tolerance Codes Refer to the following chart for tolerance characteristics of electrical components MARK B C D F G J K Tolerance 0 1 0 25 0 5 1 2 5 10 MARK M N V X Z P Q Tol...

Страница 47: ... WS 65909 453B035020 CAP ANODE LONG G B WS 55859 WS 55909 WS 65869 WS 65909 453B035030 CAP ANODE SHORT RED WS 73909 453B035040 CAP ANODE LONG G B WS 73909 MODEL ASSY CRT RED ASSY CRT GREEN ASSY CRT BLUE WS 55859 251C213040 251C213050 251C213060 WS 55909 251C214010 251C214020 251C214030 WS 65869 251C213070 251C213080 251C213090 WS 65909 251C214040 251C214050 251C214060 WS 73909 251C214070 251C21408...

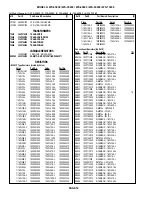
Страница 48: ...30 275P419010 IC C MOS SN74AHCT1G126DBV IC7D00 275P451010 IC C MOS TC74HC4066AFN ELP IC7D01 275P560010 IC ADS931E A2D CONVERTER IC7D02 275P560010 IC ADS931E A2D CONVERTER IC7D03 275P560010 IC ADS931E A2D CONVERTER IC7D10 275P535010 IC C MOS TC74AC157FN ELP IC7D11 275P535010 IC C MOS TC74AC157FN ELP IC7E00 275P451010 IC C MOS TC74HC4066AFN ELP IC7E01 275P560010 IC ADS931E A2D CONVERTER IC7E02 275P5...

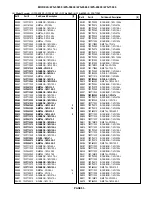
Страница 49: ...7 5FB2 D2J05 264P485060 DIODE RD7 5FB2 D2J91 264P485060 DIODE RD7 5FB2 D2M22 264P822010 D CHIP HSM2838 D2V44 264P828010 D CHIP DAN202U MA142WK D2W01 264P828010 D CHIP DAN202U MA142WK D2W02 264P828010 D CHIP DAN202U MA142WK D2W04 264P828010 D CHIP DAN202U MA142WK D2W05 264P828010 D CHIP DAN202U MA142WK D2W06 264P828010 D CHIP DAN202U MA142WK D4B01 264D056020 DIODE S5500D EM1Z ERB12 02RK D4B04 264P0...

Страница 50: ...25C146030 COIL CHIP 10MH J L2H61 325C146030 COIL CHIP 10MH J L2J30 409P777050 EMI F CHIP BLM21B201S L2J31 409P777050 EMI F CHIP BLM21B201S L2J32 409P777050 EMI F CHIP BLM21B201S L2J33 409P777050 EMI F CHIP BLM21B201S L2J34 409P777050 EMI F CHIP BLM21B201S L2J35 409P777050 EMI F CHIP BLM21B201S L2K42 409P777080 EMI F CHIP BLM21P221S L2L42 409P777080 EMI F CHIP BLM21P221S L2M00 409P777080 EMI F CHIP...

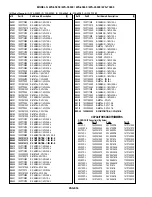
Страница 51: ...1070 COIL RF 22MH K L9A67 321C130090 COIL RF 10MH K L9B01 321C140060 COIL RF 2 7MH M9X9 5 L9B02 321C141070 COIL RF 22MH K L9B03 321C140060 COIL RF 2 7MH M9X9 5 L9B04 321C140060 COIL RF 2 7MH M9X9 5 L9D00 351P222010 LINE FILTER ELF24V050A L9D01 351P222010 LINE FILTER ELF24V050A LC2J01 409P876060 EMI F CHIP CNF20R102S CKD510JB1H102S LC2J02 409P876060 EMI F CHIP CNF20R102S CKD510JB1H102S LC2J03 409P8...

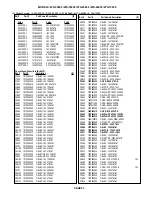
Страница 52: ...20 J 103P502040 1 16W56K J 103P504060 1 16W 1K J 103P502050 1 16W68K J 103P504070 1 16W 1K F 103P492050 1 16W75K J 103P509090 1 16W 1 2K F 103P492070 1 16W82K J 103P504080 1 16W 1 2K J 103P502060 1 16W100K F 103P497030 1 16W 1 3K F 103P492080 1 16W100K J 103P504090 Value Part No Value Part No 1 10W 1 5K F 103P472090 1 16W120K J 103P505000 1 10W 1 5K J 103P402070 1 16W150K J 103P505010 1 16W 1 5K F...

Страница 53: ... CARBON 1 4W 100 J R5A98 103C197090 R METAL 3W0 82 J 1 4 R5A98 103C198010 R METAL 3W 1 2 J 5 R5A99 103P714020 R CARBON 1 4W 27K J R5B01 103P712010 R CARBON 1 4W 470 J R5H02 103P750010 R FUSE 1 4W 10 J R5H03 103P715000 R CARBON 1 4W 120K J R5H04 103P712010 R CARBON 1 4W 470 J R5H05 103P712060 R CARBON 1 4W 1 2K J R5H06 103P712060 R CARBON 1 4W 1 2K J R5H22 103P712010 R CARBON 1 4W 470 J R5H40 103P7...

Страница 54: ...ETAL 2W0 39 J R9A28 103P711070 R CARBON 1 4W 220 J R9A29 103C187050 R METAL 2W0 39 J R9A30 103P712090 R CARBON 1 4W 2 2K J R9A31 103P712050 R CARBON 1 4W 1K J R9A32 103P713070 R CARBON 1 4W 10K J R9A33 103P711030 R CARBON 1 4W 100 J R9A35 103P715010 R CARBON 1 4W 150K J R9A36 103P714090 R CARBON 1 4W 100K J R9A37 103P712090 R CARBON 1 4W 2 2K J R9A38 103P713030 R CARBON 1 4W 4 7K J R9A39 103P71103...

Страница 55: ...ELEC 16V220M M C2V72 181P352050 C ELEC 16V220M M C2W04 181P352050 C ELEC 16V220M M C2W05 181P352030 C ELEC 16V47M M C2W09 181P352030 C ELEC 16V47M M C2W14 181P352030 C ELEC 16V47M M C2X00 181P352040 C ELEC 16V100M M C2Y01 181P352030 C ELEC 16V47M M C2Y11 181P352030 C ELEC 16V47M M C2Y30 181P352030 C ELEC 16V47M M C3A11 181P352040 C ELEC 16V100M M C3A15 181P124020 C ELEC NP 50V 4 7M M NP C3A27 181P...

Страница 56: ...C2200P M C9A20 189P152070 C M POLY 250VAC0 01M M C9A22 154P260050 C CER R1KV 1000P K C9A24 142P020050 C CER B50V 470P K C9A35 181P352040 C ELEC 16V100M M C9A40 181P352040 C ELEC 16V100M M C9A42 181P352040 C ELEC 16V100M M C9A50 142P020050 C CER B50V 470P K C9A53 185D122050 C ELEC H200V1000M M105C C9A54 154P260080 C CER R1KV 3300P K C9A56 181P186000 C ELEC 50V100M M105C C9A58 185D163020 C ELEC H50V...

Страница 57: ...6P 245 PJ2J04 440C261070 PIN JACK BOARD 2P 135 PJ2J04 440C383040 PIN JACK BOARD 2P 245 PJ2J05 440C261050 PIN JACK BOARD 2P 135 PJ2J05 440C383020 PIN JACK BOARD 2P 245 PJ2J07 440C261070 PIN JACK BOARD 2P 135 PJ2J07 440C383040 PIN JACK BOARD 2P 245 PJ2J08 440C385020 PIN JACK BOARD 6P 135 PJ2J08 440C385040 PIN JACK B0ARD 6P 245 PJ2J09 440C261050 PIN JACK BOARD 2P 135 PJ2J09 440C383020 PIN JACK BOARD ...

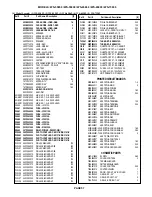
Страница 58: ...T 2 761A173030 GRILLE SPEAKER 3 752A003020 UNIT FRONT TOP 4 5 761A175010 GRILLE SP LEFT 65 4 761A175020 GRILLE SP RIGHT 65 4 762B358020 UNIT FRONT 4 761A186010 GRILLE SP LEFT 73 5 761A186020 GRILLE SP RIGHT 73 5 762B358030 UNIT FRONT 5 803B878010 CUSHION 245 ACCESSORIES 290P106010 REMOTECONTROL I G V19 NETCOMMANDGUIDE BOOK 852B087010 NETCOMMANDCONFIGURATION FOLD 1235 853B291010 REGISTRATION CARD I...

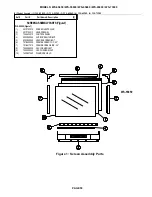
Страница 59: ...9 SCREENASSEMBLYPARTS Figure1 WS 55859 Figure 1 1 491P103010 SCREEN LENTICULAR 2 491P104010 LENS FRESNEL 3 702A403010 CONTROLPANEL 4 622C060040 CLIP SCREEN TOP BOT 5 622C063040 HOLDER SCREEN BOT 6 701B400080 FRAME SCREEN TOP 60 7 701B417010 FRAME SCREEN SIDE 55 8 702A388030 CAP CORNER LEFT 9 702A388040 CAP CORNER RIGHT 10 760D627060 DIAMOND SHIELD Figure 1 Screen Assembly Parts WS 55859 ...

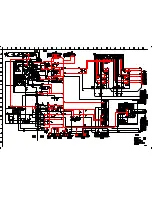
Страница 60: ...010 SCREEN LENTICULAR 2 491P106010 LENS FRESNEL 9 622C071020 CLIP SCREEN TOP BOT 4 6 701B429020 SCREEN FRAME TOP BOT 65 5 701B430020 SCREEN FRAME SIDES 65 7 702A396010 CAP CORNER 8 760D627070 DIAMOND SHIELD 802B816010 SCREENPAD WS 65909 Figure 2 1 491P105010 SCREEN LENTICULAR 2 491P106010 LENS FRESNEL 3 622D746020 CLIP SCREEN SIDES 4 711C026040 FRAME SCREEN TOP 65 5 711C026050 FRAME SCREEN SIDES 6...

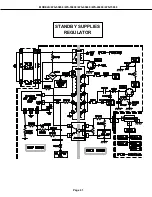
Страница 61: ...MODELS WS 55859 WS 55909 WS 65869 WS 65909 WS 73909 Page 61 STANDBY SUPPLIES REGULATOR ...

Страница 62: ...MODELS WS 55859 WS 55909 WS 65869 WS 65909 WS 73909 Page 62 SWITCHED SUPPLIES REGULATOR ...

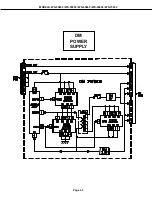
Страница 63: ...MODELS WS 55859 WS 55909 WS 65869 WS 65909 WS 73909 Page 63 DM POWER SUPPLY ...

Страница 64: ...MODELS WS 55859 WS 55909 WS 65869 WS 65909 WS 73909 Page 64 VIDEO COLOR A V SWITCH CIRCUIT ...

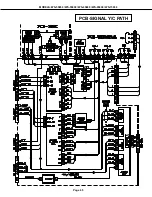
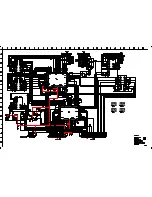
Страница 65: ...MODELS WS 55859 WS 55909 WS 65869 WS 65909 WS 73909 Page 65 PCB SIGNAL Y C PATH ...

Страница 66: ...MODELS WS 55859 WS 55909 WS 65869 WS 65909 WS 73909 Page 66 SYNC PATH ...

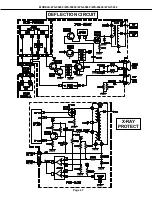
Страница 67: ...MODELS WS 55859 WS 55909 WS 65869 WS 65909 WS 73909 Page 67 DEFLECTION CIRCUIT X RAY PROTECT ...

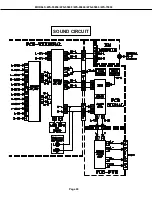
Страница 68: ...MODELS WS 55859 WS 55909 WS 65869 WS 65909 WS 73909 Page 68 SOUND CIRCUIT ...

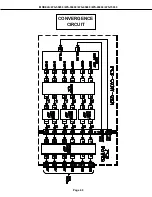
Страница 69: ...MODELS WS 55859 WS 55909 WS 65869 WS 65909 WS 73909 Page 69 CONVERGENCE CIRCUIT ...

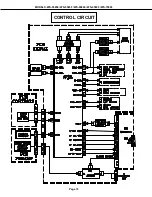
Страница 70: ...MODELS WS 55859 WS 55909 WS 65869 WS 65909 WS 73909 Page 70 CONTROL CIRCUIT ...

Страница 71: ... Manual Manual Manual Manual 2001 2001 2001 2001 2001 PROJECTION TELEVISION V19 V19 CHASSIS V19 MODELS WS 55859 WS 65869 V19 MODELS WS 55909 WS 65909 WS 73909 WS 65869 PART 2 SCHEMATIC DIAGRAMS CONTENTS Page Overall PCB Block Diagram 1 PCB MAIN 2 PCB POWER 3 PCB TERMINAL 4 PCB SIGNAL 1 MICRO 5 PCB SIGNAL 2 AV I O 6 PCB SIGNAL 3 VIDEO CHROMA 7 PCB 3DYC 8 PCBs CONV GEN JUNGLE 9 PCBs CRT CONTROL SVM ...

Страница 72: ......

Страница 73: ......

Страница 74: ......

Страница 75: ......

Страница 76: ......

Отзывы: