


EN-45
When using Mac OS X
1. Copy “LAN Display System_v201.dmg” contained
in the TOOLS folder of CD-ROM to the hard disk of
your computer.
2. Double-click “LAN Display System_v201.dmg” on
the hard disk.
• The volume is mounted.
3. Drag and drop “LAN Display System” and
“SidePadLite” into the [Applications] folder.
When deleting LAN Display System (Uninstallation)
Important:
• When uninstalling LAN Display System, it should
be ended in advance. If the application continues
operating, uninstallation cannot be performed
normally.
When using Windows XP, Windows Vista,
Windows 7, Windows Server 2008 R2 or
Windows MultiPoint Server
1. Select [Start]-[All Programs]-[LAN Display System]-
[Uninstall].
2. Follow the on-screen instructions to uninstall the
software.
When using Mac OS X
1. Open the [Applications] folder.
2. Drag and drop “LAN Display System” and
“SidePadLite” to the trash.
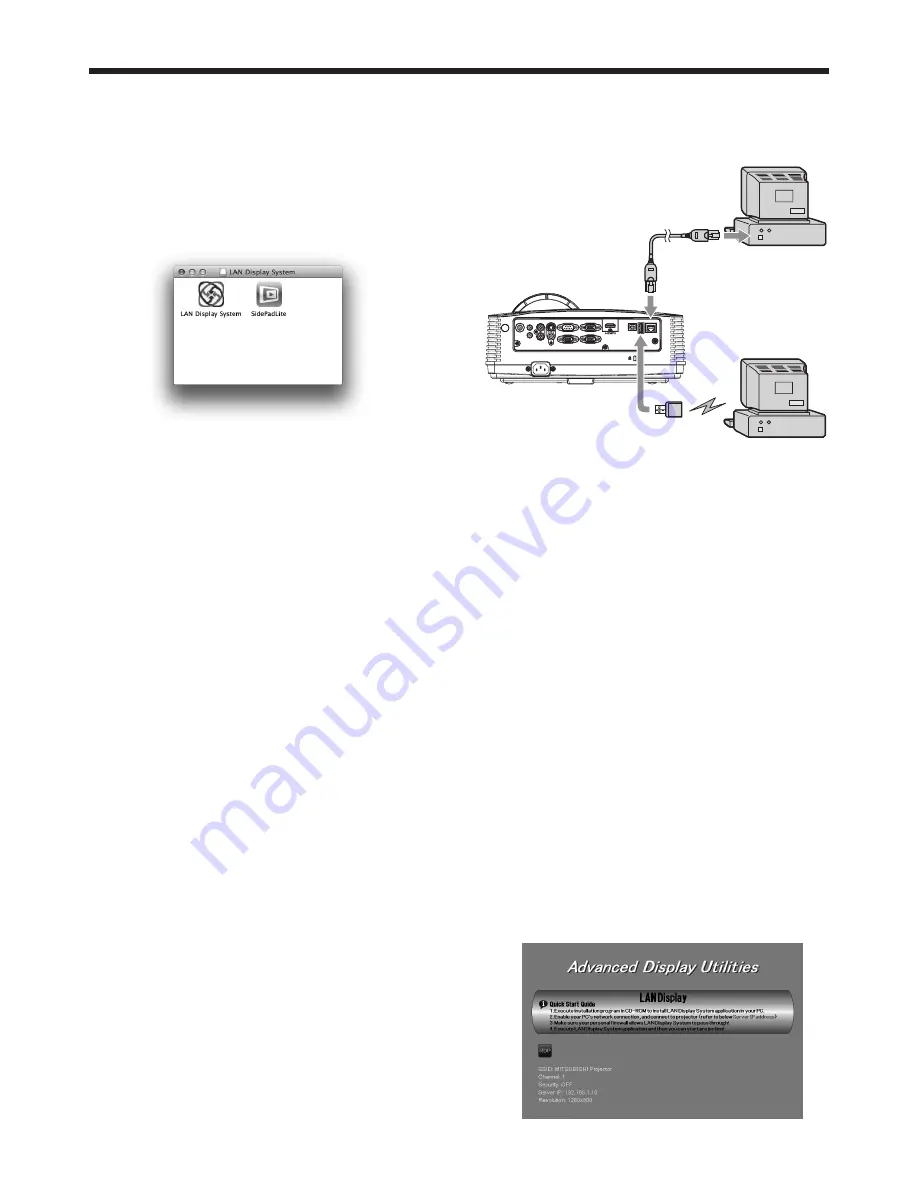
Connection
Connect the projector and the computer either by
using a commercially available LAN cable or USB
wireless LAN adapter.
AUDIO OUT
AUDIO IN-3R
VIDEO
MONITOR OUT
IN-2
USB-B USB-A
LAN
IN-1
COMPUTER / COMPONENT VIDEO
SERIAL
S-VIDEO
AUDIO IN-3L
AUDIO
IN-2
AUDIO
IN-1
LAN cable
(option)
Computer
Computer
USB wireless
LAN adapter
(option)
To LAN
terminal
To USB-A
terminal
Important:
• For wired LAN connection, use a category-5 LAN
cable. Both straight-through and crossover cables
can be used.
• The USB-A terminal on this projector is compatible
with USB 2.0.
• When using a USB hub, you are recommended to
use the one with external power supply.
• Some USB hubs cannot be used depending on the
specifications.
• Some USB wireless LAN adapters cannot be used
depending on the specifications.
• IP address, subnet mask, default gateway values
are the same for both wired LAN and wireless LAN.
• Data are not filtered between wired LAN and
wireless LAN interface.
Projection
Selecting a LAN Display input
1. Press the LAN DISP. button on the remote control
or the COMPUTER button on the projector.
• Each time you press the COMPUTER
button, the input source is switched between
Computer1, Computer2, HDMI, LAN Display,
USB Display and PC Less Presentation.
• When the LAN Display input is selected, the
splash screen for LAN Display appears on the
screen.
Advanced display utilities (continued)


