background image

System Product Guide

6-7

Problems Operating Add-in Boards

Problems related to add-in boards are usually related to improper board
installation or interrupt and address conflicts.  Go through the checklist
below to see if you can correct the problem. If the problem persists after you
have checked and corrected all of these items, contact the board vendor's
customer service representative.

___ Did you install the add-in board according to the manufacturer’s

instructions?  Check the documentation that came with the board.

___ Are all cables installed properly?

The following items are suggestions for troubleshooting problems related to
ISA legacy (non-Plug and Play) add-in boards.

___ If the ISA legacy board uses an interrupt, run Setup and set the interrupt

that is being used by the ISA board to Used by ISA Card.

___ If the ISA legacy board uses memory space between 80000H - 9FFFFH,

run Setup and set conventional memory to 512 K.

___ If the ISA legacy board uses shared memory between C8000H - DFFFH,

run Setup and enable shared memory for the appropriate memory space.

Содержание apricot VS660

Страница 1: ...SYSTEM PRODUCT GUIDE VS660 apricot MITSUBISHI ELECTRIC ...

Страница 2: ...Mini Tower System Product Guide ...

Страница 3: ...m Radio Frequency Interference Testing USA This equipment has been tested for radio frequency emissions and has been certified to the limits for a Class B digital device pursuant to Part 15 of the FCC Rules For more information about compliance with FCC regulations about RFI see Chapter 7 in this manual Europe This equipment complies with the relevant clauses of following European directives 89 33...

Страница 4: ...Subsystem 1 7 Power Supply 1 7 System Security 1 7 Battery 1 8 Speaker 1 8 2 Installing Your System Selecting a Site 2 2 Checking the Input Voltage Setting 2 3 Checking the Power Cord 2 4 Connecting Devices When Configuring the System 2 4 Before Installing Optional Items 2 4 System Front Panel Controls and Indicators 2 5 Back Panel Connectors and Features 2 6 Turning on the System at First Start u...

Страница 5: ... 3 5 Base Memory 3 5 Extended Memory 3 5 Floppy Options Subscreen 3 6 Floppy A 3 6 Floppy B 3 6 Floppy A Type 3 6 Floppy B Type 3 6 IDE Configuration Subscreen 3 7 IDE Device Configuration 3 7 Number of Cylinders 3 7 Number of Heads 3 7 Number of Sectors 3 7 Maximum Capacity 3 7 IDE Translation Mode 3 8 Multiple Sector Setting 3 8 Fast Programmed I O Modes 3 8 Boot Options Subscreen 3 9 First Boot...

Страница 6: ...ort Address 3 13 Parallel Port Mode 3 13 Advanced Chipset Configuration Subscreen 3 14 Base Memory Size 3 14 ISA LFB Size 3 14 ISA LFB Base Address 3 14 Video Palette Snoop 3 14 Latency Timer PCI Clocks 3 14 PCI Burst 3 14 Bank O SIMM Detected 3 15 Bank 1 SIMM Detected 3 15 Power Management Configuration Subscreen 3 16 Advanced Power Management 3 16 IDE Drive Power Down 3 16 VESA Video Power Down ...

Страница 7: ...4 7 Removing Expansion Slot Covers 4 9 Removing Breakout Slot Covers 4 9 Removing Standard Slot Covers 4 10 Installing an Expansion Slot Cover 4 11 Installing an Add in Board 4 11 Removing an Add in Board 4 12 Removing the 3 5 inch Drive Carrier 4 13 Installing the 3 5 inch Drive Carrier 4 14 Removing the Floppy Disk Drive 4 14 Installing a Floppy Disk Drive 4 15 Installing a Drive in the 3 5 inch...

Страница 8: ...ng Procedure 6 2 Problems at Initial System Start up 6 4 Problems After the System Has Been Running Correctly 6 5 Problems Running New Application Software 6 6 Problems Operating Add in Boards 6 7 Problems and Suggestions 6 8 Error and Information Messages 6 11 Beep Codes 6 11 Error and Information Messages 6 12 PCI Configuration Status and Error Messages 6 15 7 Technical Reference Safety Complian...

Страница 9: ...e USA 7 25 Electromagnetic Compatibility Notices International 7 26 A BIOS Update BIOS Update A 1 Using the Upgrade Utility A 1 B Installing Software Drivers Installing Plug and Play Software B 1 Installing Power Management Software B 2 Turning the System Off with APM Installed B 2 Using the Suspend Resume Feature B 3 C Optional Integrated Audio System Audio System Features C 1 System Board Audio ...

Страница 10: ... File C 4 How to Play a WAV File C 4 How to Control the Volume C 4 How to Mix Sounds C 4 D Optional Graphics Controller Installing Video Drivers D 1 Using the Galileo Control Panel D 2 Resolution D 3 Color Depth D 3 Refresh Rate D 3 Switches D 3 Small Large Fonts Enabled Switch D 3 Polygon and Ellipse Support Switches D 3 About D 3 Available Resolutions D 4 ...

Страница 11: ...a Breakout Expansion Slot Cover 4 9 4 5 Removing an Expansion Slot Cover 4 10 4 6 Installing an Add in Board 4 12 4 7 Removing the 3 5 inch Drive Carrier 4 13 4 8 Removing the Floppy Disk Drive 4 15 4 9 Installing an Internal Drive 4 17 4 10 Removing EMI Shields and Filler Panels 4 19 4 11 Installing the Snap In Slide Rails 4 20 4 12 Installing a 5 25 inch Device 4 21 4 13 Removing the System Boar...

Страница 12: ...icroprocessor This chapter describes the principal features of the system After unpacking the system make sure the following items are present and in good condition System unit Keyboard Mouse Power cord If any item is damaged or missing contact your system supplier Save all boxes and packing material to repack the system in the future ...

Страница 13: ...y Support for Advanced Power Management APM 200 watt power supply switchable between 115 and 230 V ac Three dedicated PCI slots Two dedicated ISA slots One combination slot for one PCI or ISA board AMIBIOS in a flash memory device supports system setup and PCI auto configuration Two PCI IDE peripheral connectors on the system board Two RS 232C compatible 9 pin serial connectors One multimode 25 pi...

Страница 14: ...s Chapter 5 tells how to upgrade the CPU System Memory The system supports base conventional and extended memory Operating systems such as MS DOS OS 2 UNIX and all application programs use base memory For better performance Windows 95 OS 2 and UNIX as well as many MS DOS applications use extended memory For the system memory map see Chapter 7 The system supports up to 128 MB of DRAM DRAM is implem...

Страница 15: ...ers or non IDE hard disk drives the system Setup program provides options that allow you to manually configure the controller functions System I O A single onboard I O controller integrates the functions for the serial ports parallel port and diskette drive This component provides Multimode bi directional parallel port Standard mode Centronics compatible operation Support for Enhanced Parallel Por...

Страница 16: ...skette or hard disk or over a network The DOS based upgrade utility Flash Memory Update Program FMUP has three main options Update the flash BIOS from a file on disk Copy the current BIOS code from the flash device to a disk file to provide a backup if the upgrade cannot be finished Compare the flash BIOS to a disk file to verify that the versions are the same and make sure that the system has the...

Страница 17: ...nageable hardware Power Management works with APM capable operating systems to reduce power consumption in your system IDE hard drives and monitor graphics card combinations that support the VESA DPMS standards can be put to sleep along with the processor after a user defined period of inactivity The system Setup program provides options for defining a time and a hotkey to enable the power saving ...

Страница 18: ...f use A VESA compliant 8514 A feature connector is provided on the system board in addition to a standard 15 pin analog VGA connector on the back panel The VESA pass through connector is useful when an auxiliary video subsystem is installed in one of the expansion slots such as an 8514 A compatible video card or DVI board Appendix D tells more about the Trio64V graphics controller Power Supply The...

Страница 19: ...cing the battery You can set the time for the clock and the CMOS values by using the system BIOS Setup program described in Chapter 3 Speaker A speaker is mounted on the system board The speaker provides audible error code information beep codes during the power on self test POST if the system cannot use the video interface See Chapter 6 for beep code information ...

Страница 20: ... set up your system including Selecting a site Checking the input voltage setting and power cord Location of front and back panel connectors and controls Turning on the system at first start up Turning the system off Resetting the system Using keyboard shortcuts Setting up drives ...

Страница 21: ...three pronged power outlet approved by the electrical code of the region Clean and dust free Well ventilated and away from sources of heat including direct sunlight Away from sources of vibration or physical shock Isolated from strong electromagnetic fields produced by electrical devices such as air conditioners large fans large electric motors radio and TV transmitters and high frequency security...

Страница 22: ...can be used to set the power supply to operate at 115 V ac in the range of 100 120 V ac or 230 V ac in the range of 220 240 V ac To verify that your system has the correct setting for your environment check the input power selection switch The voltage visible on the switch is the voltage the system is set to operate at For power supply output ratings see Chapter 7 OM04060 115 230 Figure 2 1 Check ...

Страница 23: ...The cord must be less than 14 8 feet 4 5 meters long and be created with HAR harmonized or VDE certified cordage Connecting Devices When Configuring the System To configure the system you must add a monitor a graphics controller and a keyboard to the system If the system normally operates without a monitor or keyboard for example as a network server you may remove these devices after configuring t...

Страница 24: ... the drive B Diskette drive light Turns on when the system reads or writes data to a diskette C Bay for 5 25 inch devices shown with three plastic filler panels in place D Power control button Press to turn on the system E Power on off light Turns on when the system power is on blinks when in power saving sleep mode F Hard disk light Turns on when the system reads or writes data to an IDE hard dis...

Страница 25: ...or COM2 D PS 2 style mouse keyboard connector E PS 2 style mouse keyboard connector F Video graphics connector G Line out speaker jack may not be fitted H Line in jack may not be fitted I Microphone jack may not be fitted J Add in board expansion slots K Socket for AC power input L Power supply fan M Parallel port connector N Knock outs for additional I O ports O MIDI and dual game port connector ...

Страница 26: ...power to the monitor 4 Press the power button at the front of the system the green power LED on the front panel will go on The system will power up and immediately begin the power on self test POST When you boot the system the POST checks the settings stored in CMOS RAM against the actual hardware configuration During the memory test the POST displays the amount of memory that it has tested The PO...

Страница 27: ...leshooting procedures If the POST finds a non fatal error an error that doesn t stop the boot process from continuing the system displays a message in the following format Error message line 1 Error message line 2 Press F1 for Setup Esc to Boot Locate the error message in Chapter 7 and take action as indicated under the explanation for the error message If needed run the Setup program If you need ...

Страница 28: ...rtcuts The keyboard controller supports using shortcuts to reset the system soft boot and toggle between fast turbo and slow CPU speed Normally the CPU runs in fast turbo mode at its full rated speed Some application software requires running the system in slow mode Changing to fast mode by using shortcuts may not be supported by some systems or by some applications in which case you can specify f...

Страница 29: ...System runs at the full rated speed of the CPU You ll hear a high tone beep Ctrl Alt Setting Up Add in Boards and Drives Chapter 4 explains how to physically install add in boards and drives The system is fully Plug and Play compatible With Plug and Play capability the system automatically configures IDE hard disk drives diskette drives PCI cards and Plug and Play ISA add in boards ...

Страница 30: ...ess memory RAM and is backed up by a battery when power to the system is off If the system does not operate as described here see the chapter titled Solving Problems for problem descriptions and error messages If you want to go into the Setup program press the F1 key after the POST starts the memory test but before the system boots up You have about five seconds to press F1 to enter Setup before t...

Страница 31: ...ying the more advanced features of a PC such as peripheral configuration and advanced chipset configuration Security For specifying passwords that can be used to limit access to the system Exit For saving or discarding changes Setup Subscreen Description Floppy Options For configuring your diskette drives IDE Configuration For configuring your hard drives Boot Options For modifying options that af...

Страница 32: ...the Enter key selects the current item or option Pressing the up arrow key changes the selection to the previous item or option Pressing the down arrow key changes the selection to the next item or option Pressing the left or right arrow keys in the Main Advanced Security or Exit menu screens changes the menu screen Pressing either key in a subscreen does nothing F5 Pressing the F5 key allows you ...

Страница 33: ...DE Master Reports if a IDE device is connected to the system When selected this brings up the IDE Configuration subscreen Primary IDE Slave Reports if a IDE device is connected to the system When selected this brings up the IDE Configuration subscreen Secondary IDE Master Reports if a IDE device is connected to the system When selected this brings up the IDE Configuration subscreen Secondary IDE S...

Страница 34: ...ptions subscreen Video Mode Reports the video mode There are no options Mouse Reports if a mouse is installed or not There are no options Base Memory Reports the amount of base memory There are no options Extended Memory Reports the amount of extended memory There are no options ...

Страница 35: ...y A Type Specifies the physical size and capacity of the diskette drive The options are Disabled 360 KB 5 25 inch 1 2 MB 5 25 inch 720 KB 3 5 inch 1 44 1 25 MB 3 5 inch 2 88 MB 3 5 inch The default is 1 44 1 25 MB 3 5 inch Floppy B Type Specifies the physical size and capacity of the diskette drive The options are Disabled 360 KB 5 25 inch 1 2 MB 5 25 inch 720 KB 3 5 inch 1 44 1 25 MB 3 5 inch 2 8...

Страница 36: ...this reports the number of cylinders for your hard disk and cannot be modified Number of Heads If IDE Device Configuration is set to User Definable you must type the correct number of heads for your hard disk If IDE Device Configuration is set to Auto Configured this reports the number of heads for your hard disk and cannot be modified Number of Sectors If IDE Device Configuration is set to User D...

Страница 37: ...ion can result in corrupted data Multiple Sector Setting Sets the number of sectors transferred by an IDE drive per interrupt generated The options are Disabled 4 Sectors Block 8 Sectors Block or Auto Detected The default is Auto Detected Check the specifications for your hard disk drive to determine which setting provides optimum performance for your drive Fast Programmed I O Modes Sets how fast ...

Страница 38: ...system will check the device selected for Second Boot Device Second Boot Device The options are Floppy Hard Disk CD ROM Network and Disabled Default is Hard Disk If the system is unable to boot from the selected boot device the system will check the device selected for Third Boot Device Third Boot Device The options are Floppy Hard Disk CD ROM Network and Disabled The default is disabled If the sy...

Страница 39: ...m It only toggles the prompt Typematic Rate Programming Sets the typematic rates The options are Default and Override The default is Default Choosing Override enables Typematic Rate Delay and Typematic Rate Typematic Rate Delay Sets how long it takes for the key repeat function to start when you hold down a key on the keyboard The options are 250 500 750 and 1000 millisecond delays The default is ...

Страница 40: ...options Processor Speed Reports the CPU clock speed There are no options Cache Size Reports the size of the secondary cache There are no options If your system contains no L2 cache this item will not appear Peripheral Configuration When selected this brings up the Peripheral Configuration subscreen Advanced Chipset Configuration When selected this brings up the Advanced Chipset Configuration subsc...

Страница 41: ...tate of the hardware PCI IDE Interface Enables or disables the PCI IDE hard disk interface The options are Enabled and Disabled The default is Enabled If Configuration Mode is set to Auto this option cannot be modified Floppy Interface Enables or disables the diskette drive interface The options are Enabled and Disabled The default is Enabled If Configuration Mode is set to Auto this option cannot...

Страница 42: ...plications The options are Enabled and Disabled The default is Disabled If Configuration Mode is set to Auto this option cannot be modified Parallel Port Address Selects the address and IRQ of the parallel port The options are Disabled LPT3 3BCh IRQ7 LPT1 378h IRQ7 LPT2 278h IRQ7 LPT3 3BCh IRQ5 LPT1 378h IRQ5 and LPT2 278h IRQ5 If the Configuration Mode is set to Auto the setup program assigns LPT...

Страница 43: ...no options This field will not appear if the ISA LFB Size is set to Disabled Video Palette Snoop Controls the ability of a primary PCI graphics controller to share a common palette with an ISA add in video card The options are Enabled and Disabled The default is Disabled Latency Timer PCI Clocks Sets the length of time an agent on the PCI bus can hold the bus when another agent has requested the b...

Страница 44: ...ct Guide 3 15 Bank O SIMM Detected Reports the type of memory found in the bank 0 SIMM slots There are no options Bank 1 SIMM Detected Reports the type of memory found in the bank 1 SIMM slots There are no options ...

Страница 45: ...ent subscreen will be visible IDE Drive Power Down Sets any IDE drives to spin down when the system goes into power managed mode The options are Enabled and Disabled The default is Enabled VESA Video Power Down Sets the command issued to your graphics controller when the system goes into power managed mode The command options are Disabled Standby Suspend and Sleep The default is Sleep Inactivity T...

Страница 46: ...dows 95 If Configuration Mode above is set to Use Setup Utility this option will not be visible ISA Shared Memory Size Enables you to unshadow a block of the upper memory area The options are Disabled 16 KB 32 KB 48 KB 64 KB 80 KB and 96 KB The default is Disabled If this is set to Disabled the ISA Shared Memory Base Address described below will not be visible Shadowing is a technique that copies ...

Страница 47: ...ilable The PCI auto configuration code looks here to see if these interrupts are available for use by a PCI add in board If an interrupt is available the PCI auto configuration code can assign the interrupt to be used by the system If your system contains an ISA agent that uses one of these interrupts select Used By ISA Card for that interrupt ...

Страница 48: ...an boot the system set the User password This is the password that the system asks for before booting If only the Administrative password is set the system boots up without asking for a password If both passwords are set you can enter either password to boot the system The following table shows the effects of setting the Administrative and User passwords The table is for reference only and is not ...

Страница 49: ...ord can be up to seven alphanumeric characters Unattended Start Controls when the security password is requested The options are Enabled and Disabled The default is Disabled The User password must be enabled before you can enable this option If Enabled is selected the system boots but the keyboard will be locked until the User password is entered Security Hot Key CTRL ALT Sets a hot key that when ...

Страница 50: ...made while in the Setup program are discarded and NOT SAVED Pressing the Esc key in any of the four main screens will do this Load Setup Defaults Resets all of the setup options to their defaults You can also press the F5 key anywhere in the Setup program to do this This selection loads the default Setup values from the ROM table Discard Changes Discards any changes you made during the current Set...

Страница 51: ......

Страница 52: ...u need this information it will be easier to consult the log than to open up and examine the system You will need a Phillips screwdriver 2 bit We recommend that you use an antistatic wrist strap and a conductive foam pad when working on the system WARNINGS The procedures in this chapter assume familiarity with the general terminology associated with personal computers and with the safety practices...

Страница 53: ...cifications for the power supply See Chapter 7 for the power supply specifications Electrostatic discharge ESD can damage disk drives add in boards and other components Conduct the procedures described in this chapter only at an ESD workstation If such a station is not available you can provide some ESD protection by wearing an antistatic wrist strap and attaching it to a metal part of the system ...

Страница 54: ...n all cables attached to the system 4 Disconnect the cables from the system 5 If you installed a padlock on the back of the system unlock the padlock and remove it Figure 4 1 A 6 The side cover is on the left side of the system as viewed from the front The cover is secured with two screws at the rear of the system Remove the screws Figure 4 1 B 7 Pull the cover so it slides backwards Make sure tha...

Страница 55: ...4 4 Taking Your System Apart OM04061 A B A Figure 4 1 Removing the Side cover ...

Страница 56: ...and tighten the screws securing the side cover to the chassis 7 For security you may want to install a padlock on the system to prevent unauthorized removal of the cover from the chassis 8 Reconnect all cables to the system Removing the Bezel 1 Observe the precautions in Before You Begin 2 Remove the side cover 3 Remove the screw securing the bezel to the chassis Figure 4 2 A 4 Squeeze the two tab...

Страница 57: ... the Bezel 1 Observe the precautions in Before You Begin 2 Insert the metal tabs on the right side into their slots 3 Squeeze the bezel and the chassis together along the left side so the tabs snap into their slots 4 Replace and tighten the bezel retaining screw 5 Replace the side cover ...

Страница 58: ...ots CAUTIONS Do not overload the system board by installing add in boards that draw excessive current The system is designed to provide 2 A average of 5 V power for each board in the system The total 5 V current draw in a fully loaded system all add in board slots filled must not exceed 14 A Add in boards can be extremely sensitive to ESD and always require careful handling Hold the board by the e...

Страница 59: ...umbering convention for the connectors on the system board and for the slot openings on the back panel The numbers are for reference only and are not actually printed on the system board or the back panel Notice that slot opening 3 in the back panel can hold either a PCI or an ISA board but not both at the same time ...

Страница 60: ... to not damage components on the system board or add in boards when doing this procedure You may need to remove add in boards that are next to the slot cover you want to remove 2 Insert a 2 bit Phillips screwdriver into the top of the slot cover Move the screwdriver and slot cover toward the inside of the chassis until the slot cover breaks away from the chassis Figure 4 4 Lift the slot cover up a...

Страница 61: ...he system board or add in boards when doing this procedure You may need to remove add in boards that are next to the slot cover you want to remove 2 Remove the expansion slot screw from the top of the slot cover Figure 4 5 Lift the cover up and out Save the slot cover in case you remove the board later OM04178 Figure 4 5 Removing an Expansion Slot Cover ...

Страница 62: ... and screw to reinstall if you decide not to install a board in that slot 3 Remove the board from its wrapper and place it on a grounded static free surface 4 Set any board jumpers or switches according to the manufacturer s instructions 5 Hold the board by its top edge or upper corners and firmly press the board into the connector on the system board Figure 4 6 6 Align the rounded notch in the re...

Страница 63: ...of the system and to ensure proper cooling of the system components 1 Observe the precautions in Before You Begin 2 Disconnect any cables attached to the add in board you are removing 3 Remove the screw that holds the board retaining bracket to the chassis 4 Hold the board at each end and carefully rock it back and forth until the edge connectors pull free Make sure that you do not scrape the boar...

Страница 64: ...g the 3 5 inch Drive Carrier 1 Observe the precautions in Before You Begin 2 Disconnect the power cable and the ribbon data cable from any drives in the carrier 3 Remove the two screws that secure the carrier to the 5 25 inch drive bay Figure 4 7 A and B 4 Slide the carrier back until the tabs hit their stops Figure 4 7 5 Pull the carrier away from the 5 25 inch drive bay and remove it from the ch...

Страница 65: ...tach the power cable and the ribbon data cable to the drive Removing the Floppy Disk Drive 1 Observe the precautions in Before You Begin 2 Remove the 3 5 inch drive carrier from the system 3 Remove the four screws holding the drive to the drive carrier Figure 4 8 B 4 Slide the drive out of the drive carrier 5 If you do not plan to replace the drive you just removed and there are no other diskette ...

Страница 66: ...rom its protective wrapper and place it on an antistatic surface 4 Set any drive jumpers or switches according to the manufacturer s instructions 5 Slide the floppy drive into the 3 5 inch drive carrier Line the holes on the carrier up with the screw holes on the drive 6 Insert and tighten four screws of the appropriate size and length not supplied 7 Install the 3 5 inch drive carrier 8 Attach the...

Страница 67: ... and length not supplied 7 Connect a power connector from the power supply to the drive If the drive is an IDE drive connect the data cable between the drive and one of the PCI IDE connectors on the system board If the drive is a non IDE type refer to the drive manufacturer s instructions for connecting a data cable and interface board and for configuring the drive Note The system board provides t...

Страница 68: ...precautions in Before You Begin 2 Disconnect the data cables and power cables from any drives in the rear drive carrier 3 Remove the 3 5 inch drive carrier from the system 4 Remove the four screws that attach the drive to the carrier 5 Remove the drive from the carrier and place it on an antistatic surface 6 Replace the 3 5 inch drive carrier ...

Страница 69: ... necessary 1 Observe the precautions in Before You Begin 2 Remove one of the EMI shields from the chassis Figure 4 10 A Save the shield in case you need to it them later 3 If the device will be accessible from the front remove the screws securing the filler panel to the bezel Figure 4 10 B Remove the filler panel Save the filler panel and screw in case you need to replace them later 4 Remove the d...

Страница 70: ...Removing EMI Shields and Filler Panels 5 Set any device jumpers or switches according to the manufacturer s instructions 6 Use two screws not supplied plus the EMC caps to attach a plastic snap in slide rail to each side of the device Figure 4 11 A B C ...

Страница 71: ...ing the Snap In Slide Rails 7 Position the drive so that the plastic slide rails on each side of the device engage the front peripheral bay guide rails 8 Push the drive into the bay until the slide rails lock in place 9 Connect power and data cables to the device ...

Страница 72: ...System Product Guide 4 21 OM04080 Figure 4 12 Installing a 5 25 inch Device 10 If the device won t be accessible from the front replace the EMI shield 11 Replace the bezel ...

Страница 73: ...ing the System Board 1 Observe the precautions in Before You Begin 2 Disconnect all internal cables connected to any add in boards installed in the expansion slots 3 Remove all add in boards 4 Disconnect all internal cables connected to the system board 5 Remove the nine retaining screws and set them aside Figure 4 13 6 Carefully pop the board off of the snap in standoff located near the card reta...

Страница 74: ...n 2 Position the system board over the threaded standoffs inside the chassis and press it onto the snap in standoff Figure 4 13 3 Secure the board to the chassis with nine screws 4 Connect all internal cables to the system board 5 Install any add in boards 6 Connect all internal cables that go to the add in boards installed in the expansion slots ...

Страница 75: ......

Страница 76: ...orrect order The procedures and warnings for removing and reinstalling the system cover are assumed to precede all other procedures described in this chapter Chapter 4 tells how to remove the system cover Set up an equipment log to record the system model and serial numbers all installed options and other information about the system If you need this information it will be easier to consult the lo...

Страница 77: ...ore you open the system or do any procedures can result in personal injury or equipment damage Do not operate the system with the cover removed Always replace the cover before turning on the system CAUTIONS The total power draw on the system must not exceed the specifications for the power supply See Chapter 7 for the power supply specifications Electrostatic discharge ESD can damage disk drives a...

Страница 78: ...nnectors H VESA feature connector I Optional S3 Trio64V graphics controller J Video memory sockets K Fan connector L Battery M ISA add in board connectors N Optional Yamaha OPL3 synthesizer O Optional Crystal Audio device P PCI add in board connectors Q Voice modem audio interface R Wave table connector S CD ROM audio connector T Audio MIDI Game Port connectors may not be fitted U Fan connector V ...

Страница 79: ...ssword Change the ISA bus speed Recover from a corrupted BIOS during a BIOS upgrade Table 5 1 describes the function of the jumper blocks Figure 5 2 shows the location of the jumper blocks on the system board Descriptions of how to change the jumpers follow Figure 5 2 CAUTIONS If you change a jumper you will need to remove the system cover and possibly add in boards or other system components Be s...

Страница 80: ... a slower or faster setting 2 3 8 33 MHz 50 MHz CPU bus 7 5 MHz 60 MHz CPU bus 8 25 MHz 66 MHz CPU bus Default 1 2 8 33 MHz 50 MHz CPU bus 10 MHz 60 MHz CPU bus 11 MHz 66 MHz CPU bus J10C4 Enables disables access to Setup Program 5 6 Setup program can be accessed Default 4 5 Setup program access disabled J10K1 CPU Voltage Regulator some upgrade processors may require changing from the default VR s...

Страница 81: ...5 6 Installing and Configuring System Board Options OM04227 6 3 4 1 6 3 4 1 6 3 4 1 J10C2 J10C3 J10C4 3 1 J10K1 6 3 4 1 J2G1 1 2 3 Figure 5 2 System Board Jumper Blocks see Table 5 1 ...

Страница 82: ... the jumper on J10C5 from pins 2 3 to pins 1 2 3 Turn on power and allow the system to boot 4 Turn off power 5 Move the jumper on J10C4 from pins 1 2 back to pins 2 3 to restore normal operation 6 Replace the system cover and turn power back on How to Clear the Password This procedure should only be done if the user password has been forgotten 1 Turn off power and remove the system cover 2 Move th...

Страница 83: ...8 MHz If you change the jumper on J10C4 to pins 1 2 and experience operating problems with ISA boards you may want to move the jumper back to the slower position Table 5 2 below shows how the two settings for jumper J10C4 affect the ISA bus clock speed for different CPUs Table 5 2 ISA Bus Clock Speeds ISA Bus Clock Speed CPU Bus Speed Jumper J10C4 pins 2 3 default setting Jumper J10C4 pins 1 2 50 ...

Страница 84: ... OverDrive processor upgrade Clearance Requirements The OverDrive processor comes with a heat sink mounted on top To maintain proper airflow once the upgrade is installed in the system the processor and heat sink require certain clearances Table 5 3 shows the required clearances Table 5 3 Clearances for OverDrive Processor Upgrades Location Minimum Clearance Clearance above the top of the OverDriv...

Страница 85: ...ssor and heat sink may be hot if the system has been running To avoid the possibility of a burn if the system has been running let the processor and heat sink cool for 10 minutes before going on with this procedure 3 Remove any add in boards that block access to the socket 4 Figure 5 1 shows the location of the processor socket You must first remove the clamp over the heat sink and CPU Insert a sm...

Страница 86: ...System Product Guide 5 11 OM03834 Figure 5 3 Removing the CPU Clamp ...

Страница 87: ... upgrade processor from its antistatic package do not touch or bend the pins 8 Center the processor over the socket Take care to align the beveled edge of the processor Pin 1 as shown in Figure 5 4 A 9 With the processor in place lower it gently being careful not to bend the pins Push the lever on the socket forward until it snaps into place Figure 5 4 OM04466 A A Figure 5 4 Installing a Microproc...

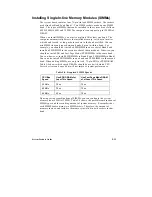
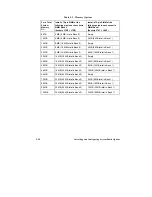
Страница 88: ...e same bank Likewise you should not mix EDO and Fast Page Mode FPM SIMMs in the same bank You can however install 4 MB SIMMs in Bank 0 and 8 MB SIMMs in Bank 1 You can also install EDO SIMMs in one bank and FPM SIMMs in the second bank When adding SIMMs use only tin lead 72 pin EDO or FPM DRAM Table 5 4 shows which speed DRAMs should be used with which CPU Faster devices can be used but will not i...

Страница 89: ...24 MB 8 MB 16 MB total in Bank 0 4 MB 8 MB total in Bank 1 32 MB 8 MB 16 MB total in Bank 0 8 MB 16 MB total in Bank 1 32 MB 16 MB 32 MB total in Bank 0 Empty 40 MB 16 MB 32 MB total in Bank 0 4 MB 8 MB total in Bank 1 48 MB 16 MB 32 MB total in Bank 0 8 MB 16 MB total in Bank 1 64 MB 16 MB 32 MB total in Bank 0 16 MB 32 MB total in Bank 1 64 MB 32 MB 64 MB total in Bank 0 Empty 72 MB 32 MB 64 MB ...

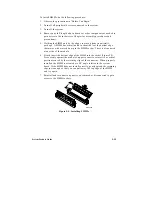
Страница 90: ...edge that mates with a raised bump in the SIMM socket There is also a notch at one side of the module 6 Firmly insert the bottom edge of the SIMM into the socket Figure 5 5 Press evenly against the module s upper corners to rotate it to a vertical position secured by the retaining clips of the connector When properly installed the SIMM is oriented at a 90 angle relative to the system board If the ...

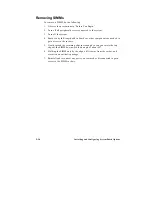
Страница 91: ...m 4 Remove any full length add in boards or other components as needed to gain access to the sockets 5 Gently spread the retaining clips just enough so you can rotate the top edge of the SIMM downward to an angle of about 45 6 Holding the SIMM only by the edges lift it away from the socket and store it in an antistatic package 7 Reinstall and reconnect any parts you removed or disconnected to gain...

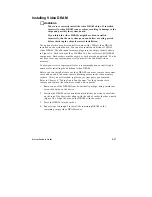
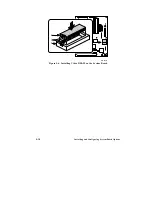
Страница 92: ...t any system jumpers if you install the additional video memory Contact your service representative for a recommendation on specific part numbers for installing the additional video DRAM Before you can install or remove video DRAM you must remove the system cover and any add in boards that are blocking access to the video memory sockets After you are finished replace any system parts you removed R...

Страница 93: ...5 18 Installing and Configuring System Board Options B A C OM04215 Figure 5 6 Installing Video DRAM on the System Board ...

Страница 94: ...at or fire Keep all batteries away from children CAUTION Danger of explosion if the battery is incorrectly replaced Replace only with the same or equivalent type recommended by the equipment manufacturer Discard used batteries according to manufacturer s instructions ATTENTION Il y a danger d explosion s li y a remplacement incorrect de la batterie Remplacer uniquement avec une batterie du méme ty...

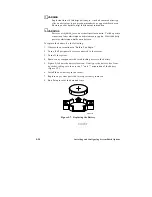
Страница 95: ...paristo valmistajan ohjeiden mukaisesti To replace the battery do the following 1 Observe the precautions in Before You Begin 2 Turn off all peripheral devices connected to the system 3 Turn off the system 4 Remove any components that are blocking access to the battery 5 Figure 5 1 shows the battery location Gently pry the battery free from its socket taking care to note the and orientation of the...

Страница 96: ...re two ways to reset the system Press Ctrl Alt Del Cycle the system power To do this 1 Press in and release the front panel power control button 2 Wait at least 20 seconds 3 Press in and release the front panel power control button The system will power up and immediately begin the power on self test POST Resetting the system will Clear the system memory Restart the power on self test POST Reiniti...

Страница 97: ...Make sure the system is plugged into a properly grounded power outlet 3 Make sure your keyboard and video display are correctly connected to the system Turn on the video display and turn up its brightness and contrast controls to at least two thirds of the maximum refer to the documentation supplied with the video display 4 If the operating system normally loads from the hard disk drive make sure ...

Страница 98: ...essing the Esc Check the following during the POST a If the POST does not detect any errors the system beeps once and boots up b Errors that do not prevent the boot process non fatal errors display a message that looks similar to the following Error Message Line 1 Error Message Line 2 Press F1 for Setup Esc to Boot You can note the error and press Esc to resume the boot up process or F1 to enter S...

Страница 99: ...d switch settings on add in boards and peripheral devices set correctly For the valid settings see the documentation shipped with these devices Ensure that there are no conflicts for example two add in boards sharing the same interrupt ___ Is the power supply set to the proper input voltage See Chapter 2 ___ Are add in boards and disk drives installed correctly See Chapter 4 ___ Is there a keyboar...

Страница 100: ... disk Reinstall the software on the hard disk and try again Make sure all the necessary files are installed ___ Try clearing CMOS RAM Chapter 5 and running Setup Chapter 3 ___ If the problems are intermittent there may be a loose cable dirt in the keyboard if keyboard input is incorrect a marginal power supply or other random component failures ___ A transient voltage spike power outage or brownou...

Страница 101: ...ice representative ___ Does the system meet the minimum hardware requirements for the software Refer to the software documentation ___ Is the software an authorized copy Unauthorized copies often do not work Obtain an authorized copy of the software ___ If you are running the software from a diskette is it a good copy ___ If you are running the software from a hard disk is the software correctly i...

Страница 102: ...ding to the manufacturer s instructions Check the documentation that came with the board ___ Are all cables installed properly The following items are suggestions for troubleshooting problems related to ISA legacy non Plug and Play add in boards ___ If the ISA legacy board uses an interrupt run Setup and set the interrupt that is being used by the ISA board to Used by ISA Card ___ If the ISA legac...

Страница 103: ... the software documentation for information Try a different copy of the software to see if the problem is with the copy you are using Try running the software in a different speed mode See Using Keyboard Shortcuts in Chapter 2 If other software runs correctly on the system contact the vendor of the software that fails If you check all of the above with no success try clearing CMOS RAM Chapter 5 an...

Страница 104: ... go on when drive is in use or is tested by POST Make sure the power and signal cables for the drive are properly installed Check that the drive is properly configured and enabled in Setup Hard drive light does not go on when drive is in use or is tested by POST Make sure the power and signal cables for the drive are properly installed Make sure the front panel connector is securely attached to th...

Страница 105: ...r is set to allow entry into Setup you might need to clear CMOS RAM to the default values Chapter 5 and reconfigure the system in Setup Chapter 3 System halts before completing POST This indicates a fatal system error that requires immediate service attention Note the screen display and write down any beep code emitted Provide this information to your service representative ...

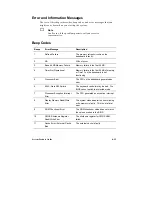
Страница 106: ...ilure in the first 64 KB of memory or Timer 1 on the baseboard is not functioning 5 Processor Error The CPU on the baseboard generated an error 6 8042 Gate A20 Failure The keyboard controller may be bad The BIOS cannot switch to protected mode 7 Processor Exception Interrupt Error The CPU generated an exception interrupt 8 Display Memory Read Write Error The system video adapter is either missing ...

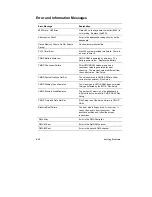
Страница 107: ...nerated for error checking The previous value is different from the current value Run Setup CMOS System Options Not Set The values stored in CMOS RAM are either corrupt or nonexistent Run Setup CMOS Display Type Mismatch The video type in CMOS RAM does not match the type detected by the BIOS Run Setup CMOS Memory Size Mismatch The amount of memory on the baseboard is different than the amount in C...

Страница 108: ... powered down INTR 1 Error Interrupt channel 1 failed POST INTR 2 Error Interrupt channel 2 failed POST Invalid Boot Diskette The BIOS can read the disk in floppy drive A but cannot boot the system Use another boot disk Keyboard is Locked Please Unlock It The keyboard lock on the system is engaged The system must be unlocked to continue Keyboard Error There is timing problem with the keyboard Set ...

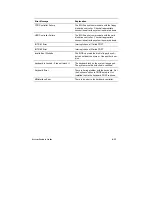
Страница 109: ...ion Off Board Parity Error Parity error in memory installed in an expansion slot The format is OFF BOARD PARITY ERROR ADDR HEX XXXX XXXX is the hex address where the error occurred Parity Error Parity error in system memory at an unknown address ...

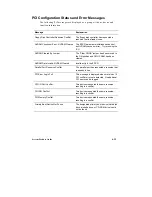
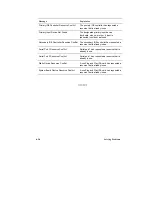
Страница 110: ...nd CMOS RAM has been cleared NVRAM Data Invalid NVRAM Cleared Invalid entry in the ESCD Parallel Port Resource Conflict The parallel port has requested a resource that is already in use PCI Error Log is Full This message is displayed when more than 15 PCI conflict errors are detected No additional PCI errors can be logged PCI I O Port Conflict Two devices requested the same resource resulting in a...

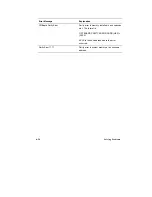
Страница 111: ...oller Resource Conflict The secondary IDE controller has requested a resource that is already in use Serial Port 1 Resource Conflict Serial port 1 has requested a resource that is already in use Serial Port 2 Resource Conflict Serial port 1 has requested a resource that is already in use Static Device Resource Conflict A non Plug and Play ISA card has requested a resource that is already in use Sy...

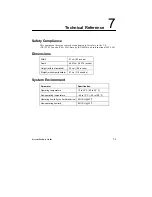
Страница 112: ...nal IEC 950 Dimensions Width 21 cm 8 3 inches Depth 46 67 cm 18 375 inches Height with feet installed 39 cm 15 5 inches Weight without peripherals 9 7 kg 21 4 pounds System Environment Parameter Specification Operating temperature 10 to 35 C 50 to 95 F Non operating temperature 40 to 70 C 40 to 158 F Operating humidity no hard disk drive 80 RH 33 C Non operating humidity 92 RH 33 C ...

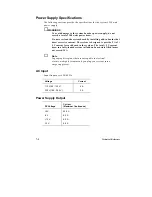
Страница 113: ...ssive current The system is designed to provide 2 A of 5 V current for each board in the system The total 5 V current draw in a fully loaded system all add in board slots filled must not exceed 14 A Note In geographic regions that are susceptible to electrical storms we highly recommend you plug your system into a surge suppressor AC Input Input frequency is 50 60 Hz Voltage Current 115 V 90 135 V...

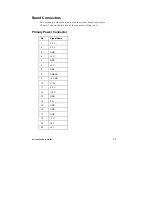
Страница 114: ...ts for the system board connectors Chapter 5 shows the location of the connectors Figure 5 1 Primary Power Connector Pin Signal Name 1 3 3 V 2 3 3 V 3 GND 4 5 V 5 GND 6 5 V 7 GND 8 PWRGD 9 5 V SB 10 12 V 11 3 3 V 12 12 V 13 GND 14 PS 15 GND 16 GND 17 GND 18 5 V 19 5 V 20 5 V ...

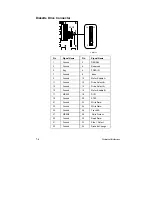
Страница 115: ...ey 6 FDEDIN 7 Ground 8 Index 9 Ground 10 Motor Enable A 11 Ground 12 Drive Select B 13 Ground 14 Drive Select A 15 Ground 16 Motor Enable B 17 MSEN1 18 DIR 19 Ground 20 STEP 21 Ground 22 Write Data 23 Ground 24 Write Gate 25 Ground 26 Track 00 27 MSEN0 28 Write Protect 29 Ground 30 Read Data 31 Ground 32 Side 1 Select 33 Ground 34 Diskette Change ...

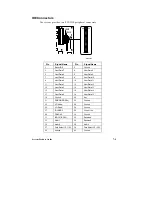
Страница 116: ...ata 5 8 Host Data 10 9 Host Data 4 10 Host Data 11 11 Host Data 3 12 Host Data 12 13 Host Data 2 14 Host Data 13 15 Host Data 1 16 Host Data 14 17 Host Data 0 18 Host Data 15 19 Ground 20 Key 21 DDRQ0 DDRQ1 22 Ground 23 I O Write 24 Ground 25 I O Read 26 Ground 27 IOCHRDY 28 Vcc pull up 29 DDACK0 30 Ground 31 IRQ14 IRQ15 32 Reserved 33 Addr 1 34 Reserved 35 Addr 0 36 Addr 2 37 Chip Select 1P 1S 38...

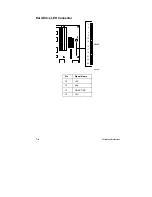
Страница 117: ...7 6 Technical Reference Hard Drive LED Connector OM04221 1 3 6 8 10 15 12 19 17 21 23 26 HD LED Pin Signal Name 12 5 V 13 Key 14 HD ACTIVE 15 5 V ...

Страница 118: ...System Product Guide 7 7 Remote On Off OM04218 1 3 6 8 10 15 12 19 17 21 23 26 PWR ON Pin Signal Name 1 Power on 2 Power return ...

Страница 119: ...7 8 Technical Reference Reset Connector OM04223 1 3 6 8 10 15 12 19 17 21 23 26 RESET Pin Signal Name 21 Ground 22 RESET ...

Страница 120: ...System Product Guide 7 9 Sleep Resume Connector OM04219 1 3 6 8 10 15 12 19 17 21 23 26 SLEEP Pin Signal Name 3 Comatose 4 5 V ...

Страница 121: ...7 10 Technical Reference Infra red Connector OM04220 1 3 6 8 10 15 12 19 17 21 23 26 INFRARED Pin Signal Name 6 5 V 7 Key 8 IR_RX 9 Ground 10 IR_TX ...

Страница 122: ...System Product Guide 7 11 Speaker Connector OM04224 1 3 6 8 10 15 12 19 17 21 23 26 SPEAKER Pin Signal Name 23 5 V 24 Key 25 SPKR_DAT connect 26 SPKR_DAT ...

Страница 123: ...Signal 1 Wave Right 2 Ground 3 Wave Left 4 Ground 5 Key 6 Ground 7 MIDI_Write 8 Ground CD ROM Audio Interface Connector Pin Signal 1 Ground 2 CD Left 3 Ground 4 CD Right Voice Modem Audio Interface Pin Signal Name 1 Mic In 2 Ground 3 Mono Out 4 Ground ...

Страница 124: ...A Connector Pin Signal 1 Ground 2 Ground 3 Blue 4 Green 5 Red 6 Ground 7 No connect reserved 8 Ground 9 Ground 10 Ground 11 DDCCLK DDC Clock 12 VSYNC Vertical Sync 13 HSYNC Horizontal Sync 14 DDCDAT DDC Data 15 No connect reserved ...

Страница 125: ... 3 Ground 4 Data 1 5 Ground 6 Data 2 7 Data enable 8 Data 3 9 Sync enable 10 Data 4 11 PCLK enable 12 Data 5 13 Vcc 14 Data 6 15 Ground 16 Data 7 17 Ground 18 PCLK 19 Ground 20 BLANK 21 Ground 22 HSYNC 23 Vcc 24 VSYNC 25 Ground 26 N C 27 key 28 key 29 IICCLK 30 Ground 31 IICDAT 32 N C 33 EN1 34 EN2 ...

Страница 126: ... SD7 B3 Vcc A3 SD6 B4 IRQ9 A4 SD5 B5 5 V A5 SD4 B6 DRQ2 A6 SD3 B7 12 V A7 SD2 B8 0WS A8 SD1 B9 12 V A9 SD0 B10 GND A10 IOCHRDY B11 SMEMW A11 AEN B12 SMEMR A12 SA19 B13 IOW A13 SA18 B14 IOR A14 SA17 B15 DACK3 A15 SA16 B16 DRQ3 A16 SA15 B17 DACK1 A17 SA14 B18 DRQ1 A18 SA13 B19 REFRESH A19 SA12 Continued ...

Страница 127: ...RQ6 A22 SA9 B23 IRQ5 A23 SA8 B24 IRQ4 A24 SA7 B25 IRQ3 A25 SA6 B26 DACK2 A26 SA5 B27 TC A27 SA4 B28 BALE A28 SA3 B29 Vcc A29 SA2 B30 OSC A30 SA1 B31 GND A31 SA0 KEY KEY D1 MEMCS16 C1 SBHE D2 IOCS16 C2 LA23 D3 IRQ10 C3 LA22 D4 IRQ11 C4 LA21 D5 IRQ12 C5 LA20 D6 IRQ15 C6 LA19 D7 IRQ14 C7 LA18 D8 DACK0 C8 LA17 Continued ...

Страница 128: ... ISA Connectors Pin Signal Name Pin Signal Name D9 DRQ0 C9 MEMR D10 DACK5 C10 MEMW D11 DRQ5 C11 SD8 D12 DACK6 C12 SD9 D13 DRQ6 C13 SD10 D14 DACK7 C14 SD11 D15 DRQ7 C15 SD12 D16 Vcc C16 SD13 D17 Master C17 SD14 D18 GND C18 SD15 ...

Страница 129: ... A38 STOP B38 GND A8 Vcc B8 PCIINT4 A39 3 3 V B39 PLOCK A9 Reserved B9 No Connect A40 SDONE B40 PERR A10 Vcc B10 Reserved A41 SBO B41 3 3 V A11 Reserved B11 No Connect A42 GND B42 SERR A12 GND B12 GND A43 PAR B43 3 3 V A13 GND B13 GND A44 AD15 B44 CBE1 A14 Reserved B14 Reserved A45 3 3 V B45 AD14 A15 SPCIRST B15 GND A46 AD13 B46 GND A16 Vcc B16 PCLKE A47 AD11 B47 AD12 A17 AGNT B17 GND A48 GND B48 ...

Страница 130: ... V B53 AD7 A23 AD26 B23 AD27 A54 AD6 B54 3 3 V A24 GND B24 AD25 A55 AD4 B55 AD5 A25 AD24 B25 3 3 V A56 GND B56 AD3 A26 AD22 IDSEL B26 CBE3 A57 AD2 B57 GND A27 3 3 V B27 AD23 A58 AD0 B58 AD1 A28 AD22 B28 GND A59 Vcc B59 Vcc A29 AD20 B29 AD21 A60 SREQ64 B60 SACK64 A30 GND B30 AD19 A61 Vcc B61 Vcc A31 AD18 B31 3 3 V A62 Vcc B62 Vcc ...

Страница 131: ...1 byte Keyboard Controller CMD STAT Byte 0070 bit 7 1 bit PIIX Enable NMI 0070 bits 6 0 7 bits PIIX Real Time Clock Address 0071 1 byte PIIX Real Time Clock Data 0078 1 byte Reserved Brd Config 0079 1 byte Reserved Brd Config 0080 008F 16 bytes PIIX DMA Page Register 00A0 00A1 2 bytes PIIX Interrupt Controller 2 00C0 00DE 31 bytes PIIX DMA 2 00F0 1 byte Reset Numeric Error 0170 0177 8 bytes Second...

Страница 132: ... 1 03F6 1 byte Pri IDE Chan Cmnd Port 03F7 Write 1 byte Floppy Chan 1 Cmd 03F7 bit 7 1 bit Floppy Disk Chg Chan 1 03F7 bits 6 0 7 bits Pri IDE Chan Status Port 03F8 03FF 8 bytes On Board Serial Port 1 LPT 400h 8 bytes ECP port LPT 400h 04D0 04D1 2 bytes Edge Level INTR Control Reg 0CF8 0CFA 4 bytes PCI Config Address Reg 0CFB 1 byte Turbo Reset control Reg 0CFC 0CFF 4 bytes PCI Config Data Reg FF0...

Страница 133: ...ESCD Plug and Play configuration area 944 947K EC000 ECFFF 4K OEM LOGO available as UMB 896K 943K E0000 EBFFF 47K BIOS RESERVED Currently available as UMB 800 895K C8000 DFFFF 96K Available HI DOS memory open to ISA and PCI bus 640K 799K A0000 C7FFF 160K Available HI DOS Memory normally reserved for video 639K 9FC00 9FFFF 1K Extended BIOS Data moveable by QEMM 386MAX 512K 638K 80000 9FBFF 127K Ext...

Страница 134: ...rd buffer full 2 Reserved Cascade interrupt from slave PIC 3 Serial Port 2 4 Serial Port 1 5 User available 6 Floppy 7 Parallel Port 1 8 Real Time Clock 9 User available 10 User available 11 User available 12 On board Mouse Port Avail if no PS 2 mouse 13 Reserved Math coprocessor 14 Primary IDE 15 Secondary IDE if present else User available ...

Страница 135: ... DMA DMA Channel Data Width System Resource 0 8 or 16 bits Open 1 8 or 16 bits Open 2 8 or 16 bits Floppy 3 8 or 16 bits Parallel Port for ECP EPP Config 4 Reserved Cascade channel 5 16 bits Open 6 16 bits Open 7 16 bits Open ...

Страница 136: ...rease the separation between the equipment and the receiver Connect the equipment into an outlet on a circuit different from that to which the receiver is connected Consult the dealer or an experienced radio TV technician for help Any changes or modifications not expressly approved by the grantee of this device could void the user s authority to operate the equipment The customer is responsible fo...

Страница 137: ...Interference by Data Processing Equipment and Electronic Office Machines aimed at preventing radio interference in such residential area When used near a radio or TV receiver it may become the cause of radio interference Read the instructions for correct handling The system was tested and found to be compliant with CISPR 22 85 Class B and VCCI Class II regulations Declaration of the Manufacturer o...

Страница 138: ......

Страница 139: ......

Страница 140: ... tells about the Setup program 2 Insert the upgrade diskette in your system s diskette drive 3 Reboot the system 4 When the flash upgrade menu appears choose Update Flash Memory Area from a file 5 When the menu asks you to enter a path filename use the arrow keys to select the bio file and press Enter 6 The utility asks for a confirmation that you want to load the new flash into memory Select Cont...

Страница 141: ......

Страница 142: ... you must use the Setup Program located on each installation diskette Certain models are not supplied with this software Installing Plug and Play Software The Plug and Play software must be installed from Windows 1 Close any open applications so that only Windows is running 2 Insert the Plug and Play diskette into the diskette drive 3 From the Program Manager File menu select Run 4 In the Command ...

Страница 143: ...ialog box type A SETUP and press Enter 5 Follow the instructions in the Setup utility Refer to the README TXT file on the power management diskette for information about the APM software Turning the System Off with APM Installed There are three ways to power off the system In hardware Press the power button In software In Windows 3 1 or 3 11 click the PowerMan icon and select the PowerDown option ...

Страница 144: ...tem operation do one of the following Press a user defined keyboard hot key sequence the Hot Key option in the Power Management Configuration Subscreen described in Chapter 3 Wait until the Inactivity Timer automatically switches the system into suspended mode the Inactivity Timer option in the Power Management Configuration Subscreen described in Chapter 3 To resume system operation do one of the...

Страница 145: ......
Страница 146: ...to install audio software drivers This appendix is applicable only to DOS and Windows 3 x Audio System Features The audio system provides the following features Support for four major sound standards Sound Blaster Pro 2 0 Windows Sound System Ad Lib and MPU 401 16 bit and 8 bit stereo digital sound recording and playback Sampling rates selectable from 4 kHz to 44 kHz Stereo analog digital mixer Se...

Страница 147: ... IN audio stream into the audio system and redirecting the MONO OUT audio stream into the telephony modem This connector allows the telephony modem to be properly configured for use without requiring cables to be installed into the external audio jacks The connector is compatible with the typical cable that is supplied with CD ROM readers for interfacing to audio add in cards Audio Software The sy...

Страница 148: ...nd stay resident program and five applications The TSR and application executable files are described below CS32HMX EXE This is a memory resident utility that allows you to control the volume with hot keys CS32MIX EXE This command line utility allows you to control the sound mixer CS4232C EXE This utility lets you choose between running a DOS application in either the on board audio s Sound Blaste...

Страница 149: ...tton How to Play a WAV File The easiest way to play a WAV file is to use the Sound Recorder application in the Windows Accessories program group To play a sound do the following 1 Start the Sound Recorder in the Windows Accessories program group 2 From the Sound Recorder File menu open the WAV file you want to play 3 Click on the Play button How to Control the Volume Use the mixer utility software...

Страница 150: ... DDC2B that permits transfer of monitor identification and resolution support data for ease of use Note For Windows 95 you do not need to install software drivers This chapter is applicable only to DOS and Windows 3 x Installing Video Drivers The video drivers for Windows 3 x must be installed from Windows 1 Close any open applications so that only the Program Manager is running 2 Insert the video...

Страница 151: ... Current Configuration Driver Resolution 640 X 480 Driver Color Depth 256 Colors Driver Refresh Rate 72 Hz Driver Font Size Small Font GALILEO Resolution Color Depth Refresh Rate Switches About OK Cancel 640 x 480 800 x 600 1024 x 768 1152 x 864 1280 x 1024 1600 x 1200 Figure D 1 Galileo Graphics Control Panel The Galileo control panel provides five buttons that you can select to either make chang...

Страница 152: ...on what resolution you ve selected see Resolution above some refresh rates may not be available Any refresh rate that is not available will appear in faint gray and cannot be selected Switches The Switches menu allows you to select certain support modes to enhance graphics appearance and operation Small Large Fonts Enabled Switch Under certain resolutions this switch allows you to change the fonts...

Страница 153: ... that came with your monitor to see which resolutions and refresh rates are supported Also note that some resolutions require 2 MB of video DRAM Table D 1 Supported Resolutions Pixel Resolution Number of Colors Refresh Rate Hz Memory Required 640x480 16 60 1 MB 640x480 256 60 72 75 85 1 MB 640x480 65536 60 72 75 1 MB 640x480 16 7 million 60 72 75 2 MB 800x600 256 56 60 72 75 85 1 MB 800x600 65536 ...

Страница 154: ...AM BUSINESS PARK BIRMINGHAM B37 7YS UNITED KINGDOM APRICOT COMPUTERS LIMITED TRAVELLERS LANE HATFIELD HERTFORDSHIRE AL10 8XB UNITED KINGDOM MITSUBISHI ELECTRIC EUROPE GmbH GOTHAER STRASSE 8 POSTFACH 1548 40835 RATINGEN DEUTSCHLAND MITSUBISHI ELECTRIC ...

Отзывы: