36
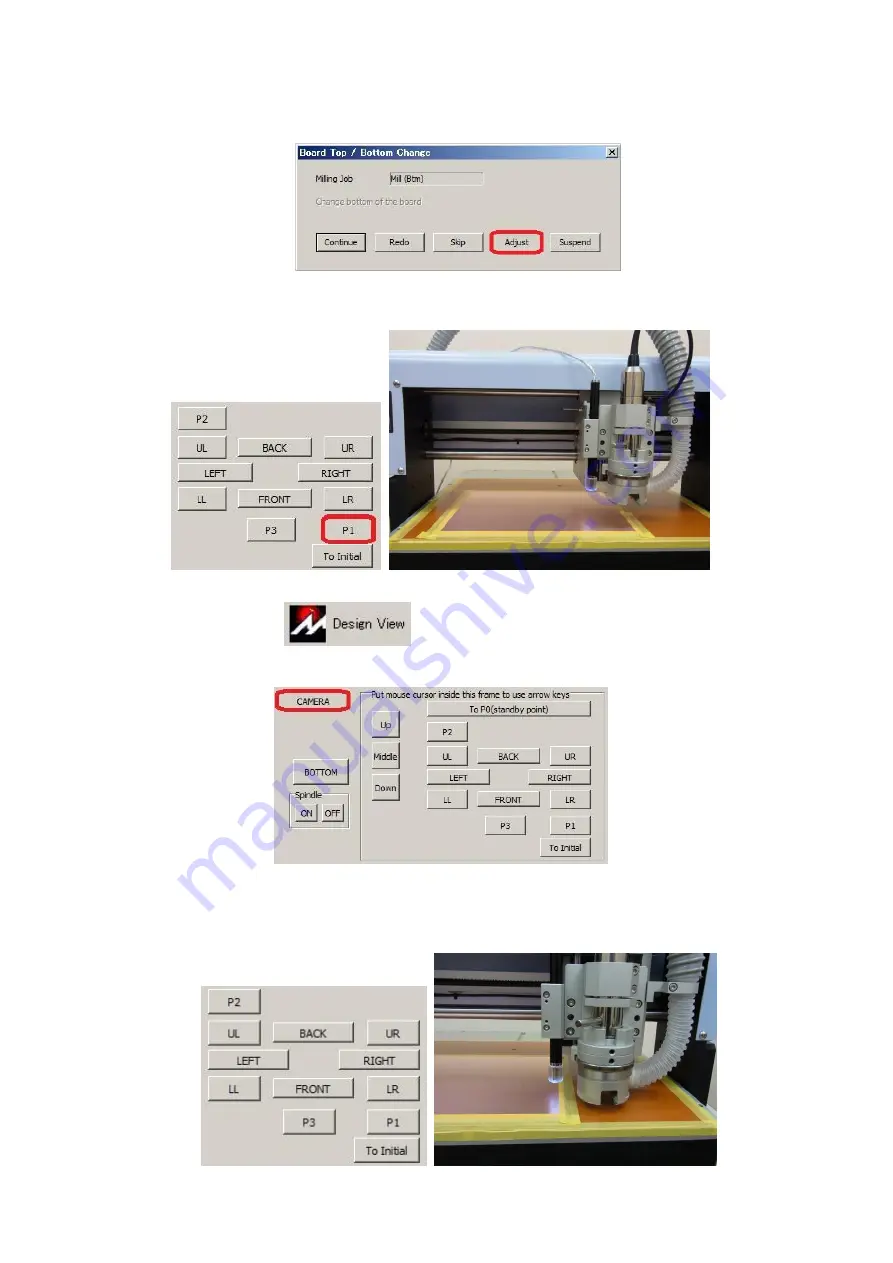
Next you will adjust/align P1 P2.
4.
On Design Pro, Board Top / Bottom Change window is shown. Click
Adjust
.
5.
Manual Operation window will show up. Click on P1.
6.
Open Design View
and click
CAMERA
button in Manual Operation
window.
7.
Use the movement button (FRONT, BACK, RIGHT, LEFT) to find the P1 hole on
the Design View screen.
Содержание Design Pro CAM-T
Страница 1: ...M MI IT TS S D De es si ig gn n P Pr ro o C CA AM M T T f fo or r F FP P 2 21 1T T...
Страница 7: ...6 9 Fuse Holder 10 AC IN Power Plug 11 AC OUT Vacuum Outlet 12 RS 232C Port 13 USB Port...
Страница 43: ...42 Closing Confirmation window will appear Click Close Prototyping is completed Top Layer Bottom Layer...


