background image


7. 

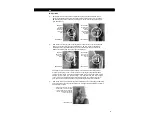
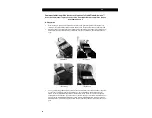
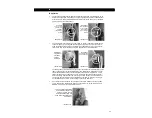
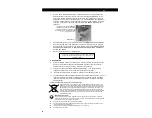
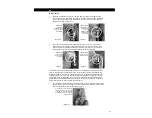
Once the QuickFinder® deluxe™ has detected the quick at the base of the nail, begin  

         moving cutting blades back toward tip of nail (see Illustration 11) until the frosted    
         signal strip illuminates GREEN indicating you have cleared the quick and it is safe to  
         cut. (The YELLOW light may briefly illuminate as the blade and sensor approach the  
         area of the nail near the quick.  It is not safe to clip when YELLOW or RED lights are  
         on.) 


8. 

When the frosted signal strip shows a GREEN LIGHT ONLY, hold the nail and clipper 
in a steady position, and squeeze clipper handles together to trim the nail.  IT IS ON-
LY SAFE TO CLIP THE NAIL WHEN THE LIGHT ON THE FROSTED SIGNAL STRIP 
IS GREEN. 

 
9.       Repeat Steps 4 thru 8 for each nail.   


Please note:  In the unlikely event that any one of the lights remain 

 lighted without cause, power off the unit and begin again at Step 3.


C. Power Supply  


10.  If the QuickFinder® deluxe™ is on, but not used for a period of more than 40 seconds  
          the unit will automatically shut off to conserve battery power.  If this occurs, begin  
          again at step 3. 
 
11.  When you are finished using the QuickFinder® deluxe™, the unit can be turned off 
          by holding and depressing the power button for 3 seconds. 
 
12.    Enclosed batteries should last 7 to 9 hours under normal operating conditions.  
 
13.    Batteries should be replaced when the power button is depressed and the unit does 
         not turn on (no lights appear), or when three lights come on and flash and blink. These  
         are indicators of declining battery life and the batteries should be replaced. 


Treatment of Used Electrical or Electronic Equipment

Applicable in all EU countries or other countries having a selective waste collection system, this symbol 

means the product should not be thrown away with household waste, but should be 
taken to an appropriate collection point for electrical and electronic equipment recy-
cling.  By doing this, you help prevent potential consequences on the environment and 
human health.  For additional information concerning recycling of this product, please 
contact your local administration or the point of sale where you purchased the 
QuickFinder® deluxe™ Nail Clipper. 
 

Battery Replacement

When replacing batteries, remember that batteries are dangerous to human health and the 
environment.  Please do not throw batteries away.  Take the batteries to a certified battery collec-
tion point for proper disposal.  

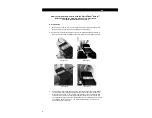
 

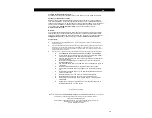
Requires two LR44 (AG13) batteries (included with purchase). 

 

Remove cover on battery compartment located in the upper handle by sliding cover toward the  

           frosted light strip. 

 

Insert two new LR44 (AG13 equivalent) batteries (+ side up). 

 

Replace cover securely. 


en 

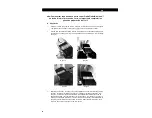
Illustration 11 

The lights will change from RED to 

YELLOW and then to GREEN as the 

sensor moves outward from the base of 

the nail toward the tip of the nail where 

the quick is no longer present. 

Содержание QuickFinder deluxe

Страница 1: ...ent afin d assu rer une compr hension correcte et l usage r ussi de ce produit Es importante leer este manual de instrucciones completamente para asegurar la comprensi n y uso correcto de este product...

Страница 2: ...ystem of illuminated red yellow and green lights When the QuickFinder deluxe Nail Clipper is positioned at the nail base and detecting quick the light will be red As the QuickFinder deluxe Nail Clippe...

Страница 3: ...gs Clipping Zones of the QuickFinder deluxe Definitions of Parts for the QuickFinder deluxe Nail Clipper Frosted Signal Strip provides visual light guides when it is safe green when to be cautious yel...

Страница 4: ...lades to open completely see Illustrations 2 and 3 3 Keeping nails fingers and paws away from the clipper sensor and cutting blades turn the clipper on by pushing and releasing the power button see Il...

Страница 5: ...process The sensor registers blood in the quick but will also register blood in your pet s paw or in your own finger It is important to be sure only the quick in your pet s nail is being detected and...

Страница 6: ...when the power button is depressed and the unit does not turn on no lights appear or when three lights come on and flash and blink These are indicators of declining battery life and the batteries sho...

Страница 7: ...e bleeding If bleeding does not stop take your pet to an emergency room When using an electrical appliance basic precautions should always be observed including the following WARNING KEEP OUT OF REACH...

Страница 8: ...rte faciles com prendre Lorsque le coupe griffes QuickFinder deluxe est plac la base de la griffe et d tecte la chair vive la lumi re est rouge Quand le coupe griffes QuickFinder deluxe est d plac ver...

Страница 9: ...la chair vive fr Dispositif de verrouillage Bande lumineuse Bouton d alimentation D tec Compartiment piles Termes utiles Base de la griffe la zone de rencontre entre la griffe et la patte Chair vive l...

Страница 10: ...et permettre aux lames de s ouvrir compl tement Voir les illustrations 2 et 3 3 Tout en gardant les griffes doigts et pattes l cart du d tecteur et des lames allumer l appareil en poussant et rel cha...

Страница 11: ...upe griffes pendant toute la proc dure Le d tecteur enregistre le sang dans la chair vive mais aussi dans la patte de l animal et dans votre doigt Il est important de s assurer que seule la chair vive...

Страница 12: ...ctionnement normal 13 Les piles devraient tre remplac es quand le bouton d alimentation est enfonc et que l appareil ne s allume pas lumi re n appara t pas ou quand les trois lumi res appa raissent et...

Страница 13: ...i l h morragie persiste emmener l animal chez le v t rinaire Lors de l utilisation d un appareil lectronique il est important d observer des pr cautions de base y compris ce qui suit MISE EN GARDE GAR...

Страница 14: ...marilla y verde Cuando el corta as QuickFinder deluxe se posiciona sobre la base de la u a y detecta el paquete vascular y nervioso la luz ser roja A medida que el corta as QuickFinder de luxe se muev...

Страница 15: ...detecta el paquete vascular y nervioso sp Mecanismo de seguridad Banda de se ales esmerilada Bot n de encendido Sensor Compartimiento de las bater as T rminos tiles Base de la u a el rea donde se une...

Страница 16: ...y permitir que las cuchillas abran completamente Ver las im ge nes 2 y 3 3 Manteniendo las u as sus dedos y las patas alejadas del sensor del corta as y de las cuchillas encienda el corta as presiona...

Страница 17: ...chillas del corta as El sensor detecta la sangre del paquete vascular y nervioso pero tambi n detecta la de la pata de su mascota o la de su propio dedo Es importante asegurarse de que solo el paquete...

Страница 18: ...deben reemplazarse cuando el bot n de encendido se presiona y la unidad no se enciende no aparece ninguna luz o cuando las tres luces se en cienden y titilan Estos son indicadores de que las bater as...

Страница 19: ...hemorragia Si no deja de sangrar lleve a su mascota a una sala de urgencia Cuando se usa un aparato el ctrico deben tomarse siempre las siguientes precauciones b sicas ADVERTENCIA MANTENER FUERA DEL A...

Страница 20: ...20...
Страница 21: ...MiracleCorp Products 2425 West Dorothy Lane Dayton Ohio 45439 USA 937 293 9994 info miraclecorp com www miraclecarepet com www quickfinderclipper com 2014 MiracleCorp Products Printed in China M3489_1...

Отзывы: