5
en
B. Operation
4.
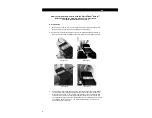
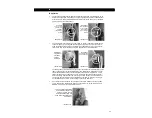
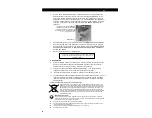
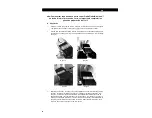
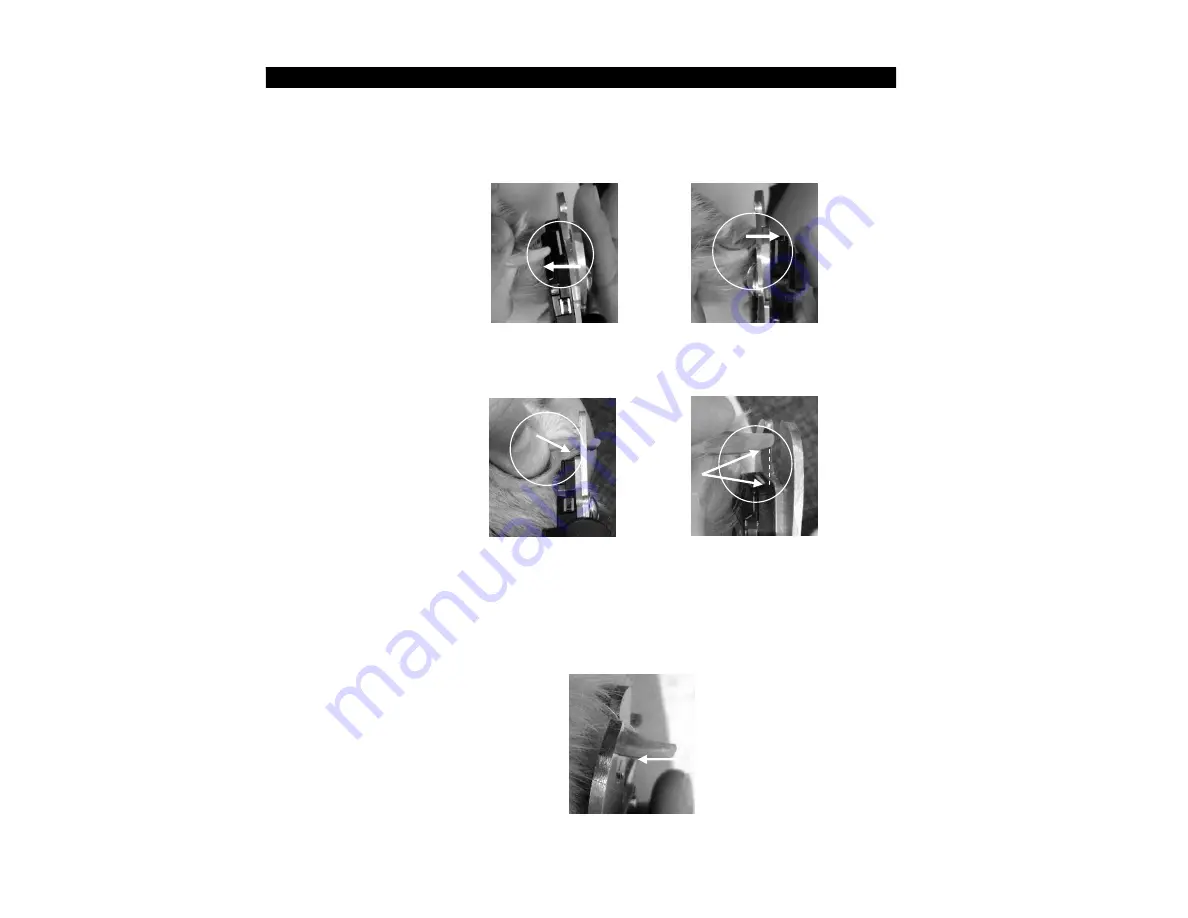
Hold clipper with the sensor side of clipper facing the paw (see Illustration 6). The
sensor must face the paw so that the nail will cross over the sensor prior to clipping.
DO NOT face the sensor side away from the paw, as it will not recognize the quick
(see Illustration 7).
5.
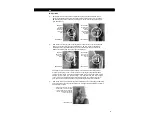
With the sensor ready to read the quick (Step 3), and with the sensor facing the paw
(Step 4), insert nail tip through the cutting blades. Be sure the nail is positioned
toward the sensor (See Illustration 8), and not outward near the open side of the
blades, too far away from the sensor (See Illustration 9).
The clipper and sensor are designed to operate correctly when the cutting blades
are at a right angle to the nail. Keep the nail at a right angle to the clipper blades
throughout the process. The sensor registers blood in the quick, but will also register
blood in your pet’s paw or in your own finger. It is important to be sure only the quick
in your pet’s nail is being detected and not the blood from your hand or your pet’s
paw. Be sure to keep the paw and your hand and fingers away from the sensor.
6.
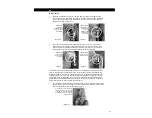
With the tip of the nail inserted through the cutting blades, move the clipper toward the
paw to the base of the nail (see Illustration 10). The light will remain RED even after it
has detected the quick.
Illustration 8
Illustration 7
Clipper is moved from the tip of
the nail inward, toward the base
of the nail, with the sensor facing
the paw and the nail positioned
close to the sensor.
INCORRECT
Do NOT hold
the clipper
with the
sensor facing
away from
the paw.
Illustration 9
Illustration 10
INCORRECT
Nail is too far
away from the
sensor.
Illustration 6
CORRECT
Hold the
clipper with
the sensor
facing the
paw.
CORRECT
Nail is placed
close to the
sensor.
Содержание QuickFinder deluxe
Страница 20: ...20...


