background image

5. Usage

MiR Charge 24V Operating Guide (en) 06/2020 - v.3.1 ©Copyright 2017-2020: Mobile Industrial Robots A/S.

34

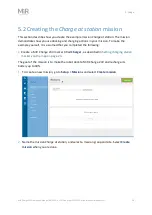
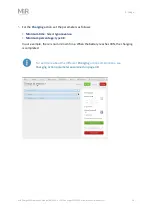
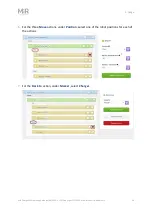
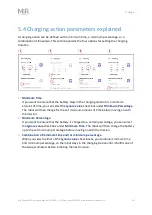
3.

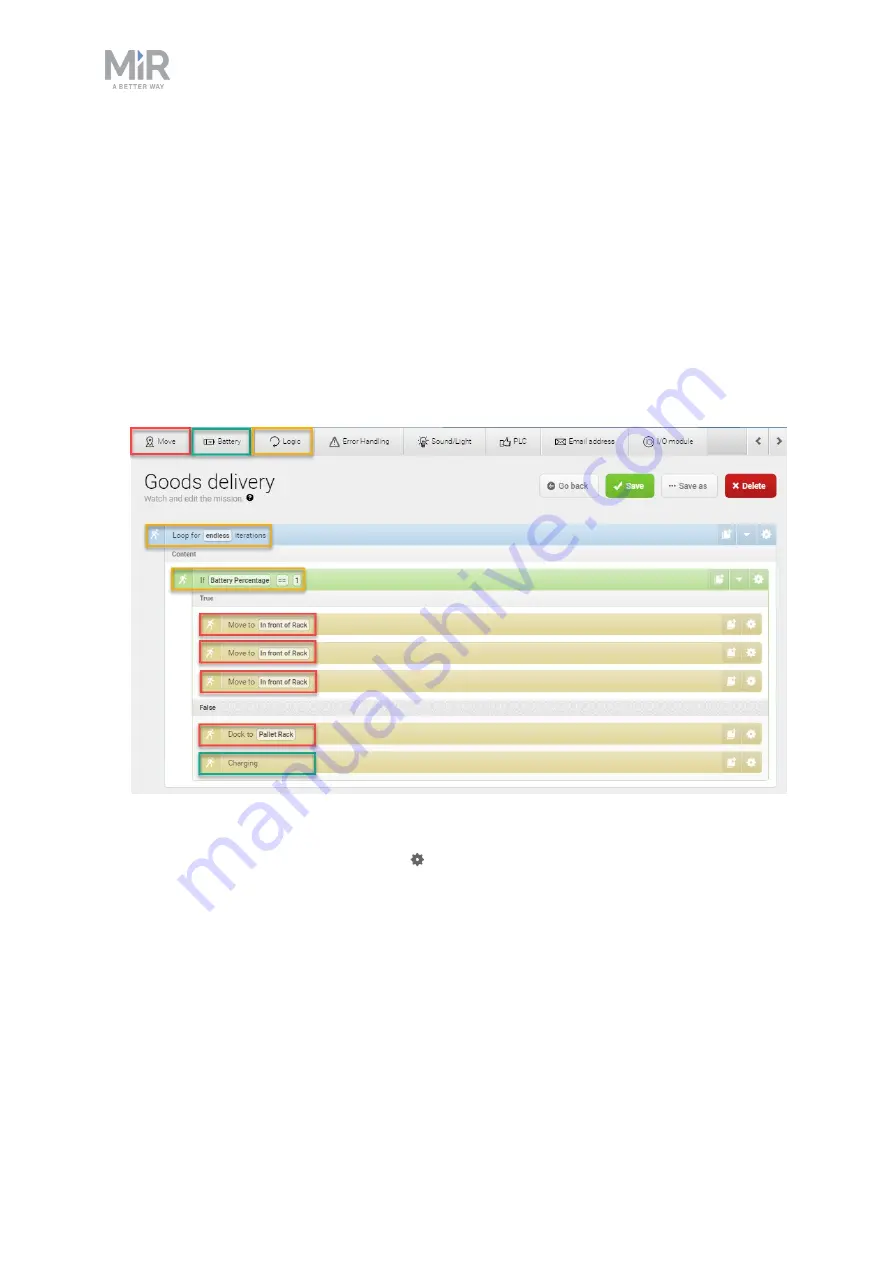
Select the following actions:

In the

Logic

menu, select

Loop

.

Select the gray bar that reads

Content

to embed the next action into the

Logic

action.

In the

Logic

menu, select

If

.

Select the gray bar that reads

True

to embed the next actions into the

If

action.

In the

Move

menu, select

Move

three times.

Select the gray bar that reads

False

to embed the next actions into the

If

action.

In the

Move

menu, select

Move

.

In the

Battery

menu, select

Charging

.

The following steps describe which parameters each action should be set to. To modify
the parameters, select the gearwheel

at the right end of the action line to open the

action dialog box. When you have set the parameters, select

Validate and close

.

Содержание MiR Charge 24V

Страница 1: ...Operating Guide en Date 06 2020 Revision v 3 1 ...

Страница 2: ...t or its contents In addition the contents of the document are subject to change without prior notice Every precaution has been taken in the preparation of this manual Nevertheless MiR assumes no responsibility for errors or omissions or any damages resulting from the use of the information contained Copyright 2017 2020 by Mobile Industrial Robots A S Contact the manufacturer Mobile Industrial Rob...

Страница 3: ... precautions 7 3 Product presentation 10 3 1 How charging works 10 3 2 Guide to light indicator 11 3 3 Nameplate 13 4 Getting started 15 4 1 In the box 15 4 2 Installing and powering up 17 4 3 Mark potentially hazardous floor areas and clear the required space 20 5 Usage 23 5 1 Setting charging station markers on the map 23 5 2 Creating the Charge at station mission 28 5 3 Creating the Recharge lo...

Страница 4: ...User guides provide all the information you need to operate and maintain MiR robots User guides are available in multiple languages Risk Analysis Guides include guidelines on how to create a risk assessment of your robot solution Commissioning guides describe how to commission your robot safely and prepare it to operate in the workplace Operating guides describe how to set up and use top modules a...

Страница 5: ...table shows current and previous versions of this document and their interrelations with hardware releases Revision Release date Description HW 1 0 2019 07 31 First edition 3 0 2 0 2019 10 07 Small updates to the document 3 0 3 0 2019 11 13 Corrections and layout changes 3 0 3 1 2020 06 17 New chapter Nameplate Small updates to the document 3 0 ...

Страница 6: ...d to MiR Charge 24V accessories or any other equipment due to programming errors or malfunctioning of MiR Charge 24V 2 1 Safety message types This document uses the following safety message types WARNING Indicates a potentially hazardous situation that could result in death or serious injury Carefully read the message that follows to prevent death or serious injury CAUTION Indicates a potentially ...

Страница 7: ...plosive gas atmosphere according to hazardous area classification zones 0 1 and 2 Sparks from static electricity may cause fire or explosions Do not install MiR Charge 24V in any of the mentioned zones WARNING Failure to ground MiR Charge 24V may cause electric shock Ensure to ground MiR Charge 24V properly using one of the supplied three prong plugs If none of the supplied plugs fit the local wal...

Страница 8: ...n area with restricted ventilation as well as covered or blocked vents on the sides of MiR Charge 24V can lead to overheating of the battery and or the charger Do not operate the charger in a closed in area restrict ventilation or cover or block the vents in any way CAUTION The only intended use of MiR Charge 24V is to charge the internal battery of MiR100andMiR200 robots Using it to charge other ...

Страница 9: ...g damage and injury to equipment and personnel Personnel operating near the robot must be informed on how to use an ABC fire extinguisher to put out an electrical fire should the robot malfunction and catch on fire CAUTION Risk of trapping or injury to personnel if robots malfunction or if personnel enter operating hazard zones Personnel operating near the robot must be informed on how to engage t...

Страница 10: ...are the same charging station However to avoid bottleneck situations we recommend integrating the robots in MiR Fleet For more information see the MiR Fleet Getting Started Guide 3 1 How charging works To connect to MiR Charge 24V the robot moves to a position in front of the charging station to locate the VL marker 1 It then moves forward to push the charging pins 2 and the charging begins 3 1 id...

Страница 11: ...0 and MiR200 comes with embedded charging hardware in the front charging plate and is ready to use with the charging station In previous models of the MiR100 the front charging plate is not included and needs to be retrofitted if the automatic charging functionality is required In this case please consult support mir robots com where we will assist you with the relevant documentation If the robot ...

Страница 12: ...A S 12 Label Status LED light operation 1 No robot docked OFF 2 Charging battery at low power state Slow green flashing 1 s on 0 2 s off 3 Charging battery at high power state Fast green flashing 0 4 s on 0 1 s off 4 Charge complete Constant green 5 Error Rapid amber flashing 0 5 s on 0 5 s off 6 Fault Constant red ...

Страница 13: ...arge 24V is delivered with a nameplate mounted to the charger The nameplate of MiR Charge 24V identifies the model and serial number and includes the CE mark the technical specifications and the address of Mobile Industrial Robots Figure 3 2 Example of MiR Charge 24V nameplate Item Description CE Mobile Industrial Robots A S declares that MiR ...

Страница 14: ...opyright 2017 2020 Mobile IndustrialRobots A S 14 Item Description Charge 24V meets the requirements of the applicable EC directives Serial number The 8 digit serial number is a unique identifier of the robot The last four digits form part of the original name of the robot ...

Страница 15: ...opyright 2017 2020 Mobile IndustrialRobots A S 15 4 Getting started This section describes how to get started with MiR Charge 24V NOTICE Read Safety on page 6 before powering up MiR Charge 24V 4 1 In the box This section describes the content of the MiR Charge 24V box ...

Страница 16: ...ialRobots A S 16 The box contains 1 MiR Charge 24V 2 Power cables for different wall outlets NEMA 5 15P plug for use in 110 120 V installations only delivers 50 of the max rated charging power CEE 7 7 plug for use in 230 240 V installations 3 MiR document folder containing EC Declaration of Conformity ...

Страница 17: ...harge 24V on an electric circuit that is protected by a circuit breaker with current rating 16 A EU 15 A US Make sure there s a suitable wall outlet that supports the necessary power For national electric codes consult a licensed electrician Make sure that the charger is connected to ground to avoid getting electric shock If you are in doubt consult a licensed electrician Wall fixing is not requir...

Страница 18: ... Operating Guide en 06 2020 v 3 1 Copyright 2017 2020 Mobile IndustrialRobots A S 18 Figure 4 1 Front view of MiR Charge 24V Figure 4 2 Inside view of MiR Charge 24V Pos Description Pos Description 1 Six front panel screws 2 Air vent ...

Страница 19: ... this precaution 3 Remove the front panel and mark the positions of the four mounting holes on the wall 4 Remove the charging station and drill four holes in the wall of a suitable size for M10 bolts at the marked positions Consider inserting wall plugs to ensure a secure mounting in which case the drilled holes must accommodate the size of the chosen plugs 5 Place the MiR Charge 24V against the w...

Страница 20: ... hazard zone Why marking is required When a robot approaches a charging station it slows down reducing the size of its protective field sets The status light band emits a wavering white light to indicate that it is docking when the robot reaches the entry position approximately one meter from the charging station marker WARNING Risk of being trapped or crushed between MiR100 MiR200 and MiR Charge ...

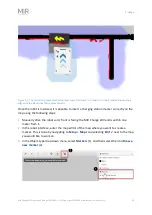
Страница 21: ...tion that should be marked as a hazard zone The marked area must span at least one meter from the identified hazards in General safety precautions on page 7 Figure 4 3 The striped black and yellow line identifies the hazard zone around a charging station that should be marked with signal tape or similar marking The dashed black line indicates the required minimum free space for the robot to dock s...

Страница 22: ... procedure The minimum required free space for a successful docking is indicated in Figure 4 3 with the black dashed line The space defined in Figure 4 3 is based on the robot s path going to the charging station and takes into account that the robot may have to make a turn of up to 90 when docking In some cases a larger free space may be required It must be determined during commissioning if more...

Страница 23: ...up MiR Fleet to enable auto charging This section describes how to do the following tasks Setting charging station markers on the map Creating the Charge at station mission The robot docks to a charger and recharges to 40 power Creating the Recharge loop mission A Loop and an If action makes the robot dock to the charger when it is low on power 5 1 Setting charging station markers on the map Befor...

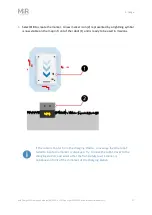
Страница 24: ...d it is possible to insert a charging station marker correctly on the map using the following steps 1 Manually drive the robot so its front is facing the MiR Charge 24V and is within one meter from it 2 In the robot interface enter the map editor of the map where you want to create a marker This is done by navigating to Setup Maps and selecting Edit next to the map you would like to work on 3 In t...

Страница 25: ...5 Usage MiR Charge 24V Operating Guide en 06 2020 v 3 1 Copyright 2017 2020 Mobile IndustrialRobots A S 25 4 In the Create marker window enter a name for the marker and select Type MiRCharge100 200 ...

Страница 26: ...t 2017 2020 Mobile IndustrialRobots A S 26 5 Select Detect marker The Detect marker function tracks the position of the charging station using the V marker and automatically sets the X Y and Orientation values in the robot enabling it to dock to the charging station ...

Страница 27: ...ightning symbol is now visible on the map in front of the robot 1 and is ready to be used in missions If the robot is too far from the charging station a message that the robot failed to locate the marker is displayed Try to move the robot closer to the charging station and ensure that the front safety laser scanner is positioned in front of the V marker of the charging station ...

Страница 28: ...n your mission To make the example yourself it is assumed that you completed the following Create a MiR Charge 24V marker titled Charger as described in Setting charging station markers on the map on page 23 The goal of the mission is to make the robot dock to MiR Charge 24V and recharge its battery up to 40 1 To create a new mission go to Setup Missions and select Create mission 2 Name the missio...

Страница 29: ... the Move menu select Relative move The following steps describe which parameters each action should be set to To modify the parameters select the gearwheel at the right end of the action line to open the action dialog box When you have set the parameters select Validate and close 4 For the Dock to action under Marker select Charger This is the marker you created on the map in front of the chargin...

Страница 30: ...he Charging action set the parameters as follows Minimum time Select Ignore value Minimum percentage type 40 In our example there is no minimum time When the battery reaches 40 the charging is completed To read more about the different Charging action combinations see Charging action parameters explained on page 38 ...

Страница 31: ...obot drive two meters backward after charging 7 The mission is now ready Select Save to save your mission The mission can also be inserted in other missions In that case the Relative move action is unnecessary Testing the mission To test that the robot executes the mission correctly you can try running the mission NOTICE Always test missions without payload to minimize potential hazards ...

Страница 32: ...reate the example mission Recharge loop The mission demonstrates how you use a Loop and If action to make the robot dock to a charger when it reaches low power To make the example yourself it is assumed that you completed the following Created a MiRCharge marker titled Charger as described in Setting charging station markers on the map on page 23 Created three robot positions titled Position 1 Pos...

Страница 33: ...6 2020 v 3 1 Copyright 2017 2020 Mobile IndustrialRobots A S 33 1 To create a new mission go to Setup Missions and select Create mission 2 Name the mission Recharge loop and select a mission group and site Select Create mission when you are done ...

Страница 34: ... bar that reads True to embed the next actions into the If action In the Move menu select Move three times Select the gray bar that reads False to embed the next actions into the If action In the Move menu select Move In the Battery menu select Charging The following steps describe which parameters each action should be set to To modify the parameters select the gearwheel at the right end of the a...

Страница 35: ... 2020 v 3 1 Copyright 2017 2020 Mobile IndustrialRobots A S 35 4 For the Loop action select Endless 5 For the If action dialog set the parameters as follows Compare Select Battery Percentage Operator Select greater than or equal to Value Type 20 ...

Страница 36: ...ng Guide en 06 2020 v 3 1 Copyright 2017 2020 Mobile IndustrialRobots A S 36 6 For the three Move actions under Position select one of the robot positions for each of the actions 7 For the Dock to action under Marker select Charger ...

Страница 37: ...rs explained on the next page 9 The mission is now ready Select Save to save your mission Testing the mission To test that the robot executes the mission correctly you can try running the mission NOTICE Always test missions without payload to minimize potential hazards 1 Go to Setup Missions 2 Select Queue mission next to the mission you just created The mission is now added to the mission queue 3...

Страница 38: ...heck box under Minimum Percentage The robot will then charge for the set minimum amount of time before moving on with the mission 2 Minimum Percentage If you want to ensure that the battery is charged to a certain percentage you can select the Ignore value check box under Minimum Time The robot will then charge the battery up to the set minimum percentage before moving on with the mission 3 Combin...

Страница 39: ...rging action is not included in a looped mission in which case the robot will continue after the set charging time or percentage is fulfilled Topping up cycle If the battery reaches 100 while the robot is waiting for a new mission the charger disconnects and lets the battery discharge until it has dropped to 90 It then connects again and tops up until the battery is back to 100 This may mean that ...

Отзывы: