background image

4-66

Using the Minolta PageWorks 8e 
Printer Driver Under Windows

Printer Driver

Chap

te

r 4

Using the Minolta PageWorks 8e Printer 
Driver Under Windows

The Minolta PageWorks 8e printer driver lets you control a number of 
printer parameters from your computer. The following describes how 
to use the PageWorks 8e driver under Windows 95 and Window 3.1, 
and provides brief explanations on the settings you can make. See the 
printer driver’s on-line help for full details about each setting.

• See the following sections for details on starting up the Page-

Works driver.
Windows 95 … See “Displaying the PageWorks 8e Driver Setup 
Dialog
” on page 4-8.
Windows 3.1 … See “Displaying the PageWorks 8e Driver Setup 
Dialog
” on page 4-16
Windows NT4.0… See “Displaying the PageWorks 8e Driver 
Setup Dialog
” on page 4-43.
Windows NT3.51… See “Displaying the PageWorks 8e Driver 
Setup Dialog
” on page 4-63

PageWorks.book  Page 66  Tuesday, April 21, 1998  3:55 PM

Содержание PAGEWORKS 8E

Страница 1: ...USER S MANUAL PageWorks8e ...

Страница 2: ... the ENERGY STAR Guidelines for energy efficiency What is an ENERGY STAR Printer ENERGY STAR printers have a feature that allows them to automatically go to sleep after a period of inactivity This auto feature can reduce a machine s annual electricity cost by 60 percent ...

Страница 3: ...e print head unit is NOT A FIELD SERVICE ITEM Therefore the print head unit should not be opened under any circum stance Laser Safety This printer is certified as a Class 1 Laser product under the U S Depart ment of Health and Human Services DHHS Radiation Performance Standard according to the Radiation Control for Health and Safety Act of 1968 This means that the printer does not produce hazardou...

Страница 4: ...rformance of procedures other than those specified in this manual may result in hazardous radia tion exposure This is a semiconductor laser The maximum power of the laser diode is 5mW and the wavelength is 770 810 nm PageWorks book Page ii Tuesday April 21 1998 3 55 PM ...

Страница 5: ... is encouraged to try to correct the interface by one or more of the following measures Reorient or relocate the receiving antenna Increase the separation between the equipment and the receiver Connect the equipment into an outlet on a circuit different from that to which the receiver is connected Consult the dealer or an experienced radio TV technician for help FCC Declaration of Conformity Produ...

Страница 6: ...tions must be registered with the FCC and are subject to FCC control Any changes made by the purchaser or user with out first contacting the manufacturer will be subject to penalty under FCC regulations USER INSTRUCTIONS For Canada Users INTERFERENCE CAUSING EQUIPMENT STANDARD ICES 003 ISSUE 3 WARNING This Class B digital apparatus complies with Canadian ICES 003 Cet appareil numérique de la class...

Страница 7: ...is not large enough to harm anyone adversely However be sure the room where the machine is being used has adequate ventilation espe cially if you are printing a high volume of materials or if the machine is being used continuously over a long period WARNING LABEL PageWorks book Page v Tuesday April 21 1998 3 55 PM ...

Страница 8: ...ieval system or translated into other languages without the express written prior consent of Minolta Co Ltd The contents of this manual are subject to change without notice Trademark Acknowledgements LaserJet 6P and PCL are registered trademarks of Hewlett Packard Com pany Centronics is a registered trademark of Centronics Inc MS DOS Microsoft and Windows are registered trademarks of Microsoft Cor...

Страница 9: ...l e mail requests for technical assistance at www minoltaprinters com Please be prepared to provide the following information when contacting Minolta Customer Support Model Name Serial number A detailed description of the problem For questions or problems with installation please be prepared to provide the following additional information Brand name and model number of the computer Type of process...

Страница 10: ... Lights 1 4 Control Panel Button 1 7 Counter Reset Mode 1 7 Job Cancel 1 7 Print Configuration 1 8 Form Feed 1 8 Chapter 2 Setting Up Installation Precautions 2 1 Selecting a Location for the Printer 2 1 Power Source 2 2 Grounding 2 2 Space Requirements 2 3 Operational Precautions 2 4 Operating Environment 2 4 PageWorks book Page viii Tuesday April 21 1998 3 55 PM ...

Страница 11: ...1 Selecting output direction printed side up or down 2 12 Connecting the Power Cord 2 14 Loading Paper 2 15 Turning on the Printer 2 17 Testing the Printer 2 18 Connecting to a Computer 2 20 Options 2 21 SIMM Single In line Memory Module 2 21 Installing the optional SIMM 2 21 IrDA Unit 2 24 Using the Infrared Port 2 24 To print with the infrared port 2 25 Network Interface Card NIC 2 27 PageWorks ...

Страница 12: ...3 9 Printing on Envelopes 3 11 Chapter 4 Printer Driver Introduction 4 1 System Requirements 4 1 Installing the PageWorks 8e Printer Driver Under Windows 95 4 2 Installing the PageWorks 8e Printer Driver 4 2 To uninstall the PageWorks 8e Printer Driver 4 6 Displaying the PageWorks 8e Driver Setup Dialog 4 8 Installing the PageWorks 8e Printer Driver Under Windows 3 1 4 10 PageWorks book Page x Tue...

Страница 13: ... 41 Displaying the PageWorks 8e Driver Setup Dialog 4 43 Installing the Printer Driver Under Windows NT3 51 4 45 To install the PageWorks 8e Printer Driver 4 45 To uninstall the PageWorks 8e Printer Driver 4 61 Displaying the PageWorks 8e Driver Setup Dialog 4 63 Using the Minolta PageWorks 8e Printer Driver Under Windows 4 66 Using the PageWorks 8e Driver Setup Dialog 4 67 Using the PageWorks 8e ...

Страница 14: ... 8 Tools Introduction 5 1 Starting Up the Status Display 5 1 To start up the Status Display under Windows 95 5 2 To start up the Status Display under Windows 3 1 5 3 Using the Status Display 5 4 To expand the size of the Status Display 5 5 To turn Popup Error Messages On and Off 5 6 To specify popup message conditions 5 7 Starting Up the Control Panel 5 8 To start up the Control Panel under Window...

Страница 15: ...er cartridge 6 1 To reset the counter of the toner cartridge 6 5 Replacing the Drum Cartridge 6 6 To replace the drum cartridge 6 6 To reset the counter of the drum cartridge 6 10 Cleaning the Printer 6 11 Cleaning the Outside of the Printer 6 11 Cleaning the Paper Transport Roller 6 11 Chapter 7 Troubleshooting Customer Support 7 1 Clearing a Paper Misfeed 7 2 PageWorks book Page xiii Tuesday Apr...

Страница 16: ...6 Inside the Printer 7 7 Print Quality Problems 7 9 Blank pages 7 9 Black pages 7 9 Printout too light 7 10 Printout too dark 7 10 Blurred background 7 11 Uneven print density 7 11 Irregularities 7 11 White or black line 7 12 Toner smudges 7 12 No output 7 13 Are you using the correct type of printer cable 7 13 Are your computer s communications port settings correct 7 13 PageWorks book Page xiv T...

Страница 17: ...pter 8 Specifications PageWorks 8e Printer 8 1 Second Paper Cassette Unit 8 3 Interface Connector and Cable 8 4 SIMM Option 8 5 Appendix A Glossary Appendix B Index PageWorks book Page xv Tuesday April 21 1998 3 55 PM ...

Страница 18: ...MEMO PageWorks book Page xvi Tuesday April 21 1998 3 55 PM ...

Страница 19: ...Chapter Introduction 1 Introduction Chapter 1 PageWorks book Page 1 Tuesday April 21 1998 3 55 PM ...

Страница 20: ...Introduction Chapter 1 PageWorks book Page 0 Tuesday April 21 1998 3 55 PM ...

Страница 21: ...dges that are smaller and easier to install Fine Micro Toning Fine MT cartridges for clearer and sharper images Fine ART Advanced Resolution Technology for resolution that actually exceeds 600 dpi Electrode comb image transfer system for sharper images and minimal ozone emissions Features software High speed performance Easy to use networking Special features like watermark printing image shift an...

Страница 22: ...cond paper Tray 2 500 sheet multipurpose tray cassette unit second cassette Face up tray Face down tray Control panel Manual feed tray Paper size guide Tray cover Cassette cover Paper size Paper support Power switch Top cover release button guide PageWorks book Page 2 Tuesday April 21 1998 3 55 PM ...

Страница 23: ...s Introduction Chapter 1 Power cord socket Image transfer roller Parallel interface Fusing unit connector Drum cartridge Toner cartridge Top cover Face up Face down selection switch PageWorks book Page 3 Tuesday April 21 1998 3 55 PM ...

Страница 24: ...by checking the information that appears on your computer screen Indicator Lights Printer Status Ready Paper Error Off Off Off Power is off Off Off On Cover is open Off Off Blinking Print job is too complex Push the panel button to perform a form feed Off On Off Out of paper Load more paper or clear the misfeed and continue printing Off Blinking Off Paper jam Clear the jam and continue printing Pa...

Страница 25: ... up Slow Blinking Off Off Power Save Mode On On Off Printer is standing by waiting for manual paper feed On Blinking Off Printer is standing by waiting for feeding from Tray 1 or Tray 2 On Blinking Blinking Second paper cassette unit is not installed Blinking On On Waiting for remaining print data Blinking Blinking Blinking Counter rest mode Blinking Blinking On Engine communication error Turn off...

Страница 26: ...ta customer support On On Blinking Engine error laser Turn off the printer and contact Minolta customer support Blinking Off Blinking Engine error polygon scanner Turn off the printer and contact Minolta customer support Indicator Lights Printer Status Ready Paper Error PageWorks book Page 6 Tuesday April 21 1998 3 55 PM ...

Страница 27: ...n off power 2 While holding down the control panel button turn on power Keep the button depressed for about five seconds 3 After all the indicator lights blink the printer enters the counter reset mode See page 6 5 and 6 10 for details Job Cancel Use the following procedure whenever you want to cancel the current job 1 Hold down the control panel button for about five seconds 2 After all the indic...

Страница 28: ...rocedure whenever you want to print a sheet that shows the current printer settings Hold down the control panel button for a few seconds Form Feed When a memory overflow occurs press the control panel button to perform a form feed PageWorks book Page 8 Tuesday April 21 1998 3 55 PM ...

Страница 29: ...Chapter Setting Up 2 Setting Up Chapter 2 PageWorks book Page 1 Tuesday April 21 1998 3 55 PM ...

Страница 30: ...Setting Up Chapter 2 PageWorks book Page 0 Tuesday April 21 1998 3 55 PM ...

Страница 31: ...ng generated in the area The power outlet you plan to connect to for power should be nearby and unobstructed Make sure that the printer is not exposed to direct sunlight Avoid areas in the direct airflow of air conditioners heaters or ventilators and areas subjected to temperature and humidity extremes Choose a sturdy level surface where the printer will not be exposed to strong vibration Keep the...

Страница 32: ...his printer Be sure to plug the power cord all the way into the outlet The outlet should be located near the printer and be easily accessible so you can unplug the power cord immediately should any problem occur Make sure the outlet you use is visible and not hidden behind the printer or any other object If any other electrical equipment is plugged into the same outlet make sure that the capacity ...

Страница 33: ...e space around the printer as indicated below to ensure easier printer operation paper and toner replacement and maintenance With Second Paper Cassette Unit 554 21 4 5 700 27 1 2 394 15 1 2 Unit mm inch 674 26 1 2 743 29 1 4 394 15 1 2 PageWorks book Page 3 Tuesday April 21 1998 3 55 PM ...

Страница 34: ...uids or objects that generate magnetic forces near the printer When unplugging the power cord always grasp the plug and never pull on the cord A damaged cord creates the danger of fire or electrical shock Never touch the power cord when your hands are wet Doing so creates the danger of electrical shock Always unplug the power cord before moving the printer Failure to do so can damage the power cor...

Страница 35: ...or electrical shock can occur should water or liquid come into contact with the printer Should liquid or any piece of metal accidently get inside the printer immediately turn it off unplug the power cord and con tact your local Minolta Customer Support Failure to take this immediate action creates the danger of fire or electrical shock Whenever the printer emits unsually high amounts of heat smoke...

Страница 36: ...h humidity Areas subjected to large amounts of dust Keep paper that has been removed from its wrapper but not yet loaded onto the printer tray in a sealed plastic bag and store it in a cool dark location Use only the toner cartridge and toner that is expressly specified for this printer Keep supplies out of the reach of children Should your hands become soiled with toner immediately wash them with...

Страница 37: ...igning its tabs into the position holders located on the upper portion of the printer Installing Tray1 1 Using the left and right slots in the printer as guides gently push Tray1 until it cannot be inserted any further Always use a shielded interface cable Use of an unshielded cable can result in radio interference with data Keep all the boxes and packing materials that the printer comes in for la...

Страница 38: ...2 8 Setting Up Setting Up Chapter 2 2 Attach the cover onto Tray1 PageWorks book Page 8 Tuesday April 21 1998 3 55 PM ...

Страница 39: ... find out how you can add these trays to increase the capabilities of your printer Installing the Second Paper Cassette Unit 1 Remove the second paper cassette unit and Tray 2 from their packaging including the protective tape used to hold the various components in place 2 Place the printer on top of the base unit Make sure to align the coupling pins of the base unit with the holes located underne...

Страница 40: ...p Chapter 2 4 Insert Tray 2 into the second paper cassette unit Note Be sure to use both hands whenever Tray 2 is removed from or inserted into the second paper cassette unit PageWorks book Page 10 Tuesday April 21 1998 3 55 PM ...

Страница 41: ... is recommended for thick paper or envelopes to avoid curling during the feeding process The maximum capacity of the face up tray is 20 sheets Installing the face up tray 1 Remove the face up tray from its carton as well as its protective plastic bag 2 Gently bend the output tray inwards toward the printer with both hands Align the insertion pins of the tray with the pin holders of the printer see...

Страница 42: ...rinted side down In this mode the output tray receives the printed documents in order This setting is controlled by a switch which is located on the right side of the printer toward the rear see illustration 1 When the switch is flush with the top of the printer prints are output printed side down factory default 2 When the switch is pressed in prints are output printed side up Face up tray Face d...

Страница 43: ...2 13 Setting Up Setting Up Chapter 2 Note Do not use the switch to change the setting while the printer is operating PageWorks book Page 13 Tuesday April 21 1998 3 55 PM ...

Страница 44: ...er Cord 1 Make sure that the printer s power switch is in the Off posi tion 2 Connect one end of the power cord that comes with the printer to the power cord socket Plug the other end into a power outlet PageWorks book Page 14 Tuesday April 21 1998 3 55 PM ...

Страница 45: ...2 15 Setting Up Setting Up Chapter 2 Loading Paper 1 Remove the cover from Tray1 2 Open the paper size guides PageWorks book Page 15 Tuesday April 21 1998 3 55 PM ...

Страница 46: ...p Secure the stack by adjusting the paper size guides Note 4 Replace the cover onto Tray1 A maximum level mark on the paper size guide shows how high you can stack paper on Tray 1 Make sure that paper is stacked no higher than this mark PageWorks book Page 16 Tuesday April 21 1998 3 55 PM ...

Страница 47: ... printer is warming up In about 20 seconds only the READY indicator remains lit indicating that the printer is ready to print Note The printer automatically enters a power saving mode if it receives no print commands for about 15 minutes Whenever the printer receives a print command while in the power saving mode it starts to warm up again and takes about 20 seconds before it is ready to print Pag...

Страница 48: ...rinter is working correctly 1 Place the paper onto Tray1 2 Make sure that both the PAPER and ERROR indicators are off and the READY indicator is on This indicates there is no existing error condition and no data remaining to be printed 3 Briefly press the panel button to start the self test page print operation PageWorks book Page 18 Tuesday April 21 1998 3 55 PM ...

Страница 49: ... See Chapter 7 of this manual for information on what to do if the self test page does not print when you press the panel button It is only possible to print the test page on A4 B5 Letter or Execu tive size paper PageWorks book Page 19 Tuesday April 21 1998 3 55 PM ...

Страница 50: ...nnect one end of the interface cable to the parallel port of the computer 3 Connect the other end of the cable to the parallel connector on the back of the printer Secure the cable using the two clips on the parallel connector See page 8 4 of this User s Manual for cable specifications and pin assignments PageWorks book Page 20 Tuesday April 21 1998 3 55 PM ...

Страница 51: ...rease memory capacity up to 34MB by installing an optional 1 2 4 8 16 or 32MB optional SIMM Installing the optional SIMM Warning 1 Turn off the printer and unplug the power cord 2 Disconnect the parallel cable from the printer 3 Press the cover release button and open the top cover 4 Remove the two screws that hold the side cover of the printer in place with a screwdriver Electric shock hazard Do ...

Страница 52: ...ful not to touch the connection points along the edge of the SIMM insert the board into the socket on the main circuit Apply pressure until the SIMM locks into place Do not touch any part of the main circuit inside the printer PageWorks book Page 22 Tuesday April 21 1998 3 55 PM ...

Страница 53: ...ws the increase in memory capacity If it does not repeat the above steps making sure that the SIMM is installed correctly Note To remove the SIMM from the main circuit press down on the metal taps on each side of the socket to release the SIMM Once the SIMM has been installed be sure to reset the Printer Memory Setting to reflect the new memory capacity PageWorks book Page 23 Tuesday April 21 1998...

Страница 54: ... printer complies with the specifications stipulated by the Infrared Data Association IrDA A status light in front of the infrared unit indicates when the port is active The infrared port can be used with a wide variety of IrDA compliant portable devices The actual method you should use for printing depends on the type of device and the operating system it uses Consult the user documentation that ...

Страница 55: ...nting again If you have to move the printer to add paper etc or the laptop make sure you keep the two pieces of equipment close enough to maintain the connection The printer s infrared port status light turns off if the connection is broken before the print job is complete If this happens you have anywhere from three to 40 seconds to re establish the connection indicated when the status light come...

Страница 56: ... devices may not be compatible with this printer If you continually have problems printing using the infrared port contact the manufacturer of the portable device or the retailer from whom you purchased it to verify compatibility with the IrDA standard 1 Meter or less 3 Feet or less PageWorks book Page 26 Tuesday April 21 1998 3 55 PM ...

Страница 57: ...rd is equipped with a 10BASE T interface connector for connection to the network server For details see the Network Interface Card User s Manual Important The NIC 401X is the only network card that is compatible with the PageWorks 8e PageWorks book Page 27 Tuesday April 21 1998 3 55 PM ...

Страница 58: ...MEMO Setting Up Chapter 2 PageWorks book Page 28 Tuesday April 21 1998 3 55 PM ...

Страница 59: ...Chapter Using the Printer 3 Using the Printer Chapter 3 PageWorks book Page 1 Tuesday April 21 1998 3 55 PM ...

Страница 60: ...Using the Printer Chapter 3 PageWorks book Page 0 Tuesday April 21 1998 3 55 PM ...

Страница 61: ... 2 to 14 This printer is designed to print on only the following types of paper Paper Feeding Port Plain Paper weighing 60 to 90 g m2 16 to 24 lbs Special Paper Recycled Paper weighing 60 to 90 g m2 16 to 24 lbs Trans parency Sheet Labels Letter head Enve lopes J Post Post card size 100 148 mm 4 5 3 4 Thick Paper weighing 90 to 163 g m2 24 to 43 lbs Tray 1 Tray 2 None None None None None Paper Fee...

Страница 62: ...n using this tray unit Whenever you are using special size paper be sure to use the printer driver installed on the computer to specify the printing area You may experience some variation in print quality when using special size paper Always remember that paper storage conditions greatly affect print quality Store paper in its original package Keep paper out of areas subject to extreme temperature...

Страница 63: ... of Tray1 Adjust the paper size guides so that both the left and the right sides of the paper stack are secure Note A maximum level mark on the paper size guide shows how high you can stack paper on Tray 1 Make sure that paper is stacked no higher than this mark PageWorks book Page 3 Tuesday April 21 1998 3 55 PM ...

Страница 64: ...o not load additional paper until the paper currently loaded onto Tray1 is completely used Never load paper while the printer is performing a reset operation page 1 7 Pull out the paper support in Tray 1 when printing on Legal size paper PageWorks book Page 4 Tuesday April 21 1998 3 55 PM ...

Страница 65: ...to the second paper cassette unit For instructions on inserting and removing the Tray 2 cassette into and from the second paper cassette unit refer to Chapter 2 The cassette is designed to remain in the unit during the normal loading and operation of the printer To remove Tray 2 from the unit pull it out as far as it will go without force Then gently raise the forward end up and remove Tray 2 from...

Страница 66: ... Paper Using the Printer Chapter 3 2 Remove the cover of the cassette from Tray 2 3 Press down on the paper lifting plate located inside of Tray 2 until it locks PageWorks book Page 6 Tuesday April 21 1998 3 55 PM ...

Страница 67: ...cing up Note A maximum level mark inside the inlet of Tray 2 shows how high you can stack paper on Tray 2 Make sure that paper is stacked no higher than this mark Tray 2 does not support landscape oriented paper feeding Do not load additional paper until all the paper currently on Tray 2 is completely used up Maximum level mark PageWorks book Page 7 Tuesday April 21 1998 3 55 PM ...

Страница 68: ...3 8 Loading Paper Using the Printer Chapter 3 5 Replace the cassette cover and insert Tray 2 into the second paper cassette unit PageWorks book Page 8 Tuesday April 21 1998 3 55 PM ...

Страница 69: ...nual Paper Feed 1 Make sure that the tray cover is properly attached to Tray1 2 Open the paper size guides 3 Insert the sheet of paper into the manual feed tray with the side to be printed facing up PageWorks book Page 9 Tuesday April 21 1998 3 55 PM ...

Страница 70: ... Printer Chapter 3 4 Adjust the paper size guides so that both sides of the paper are secure Note Insert only one sheet of paper or one envelope at a time when feeding manually PageWorks book Page 10 Tuesday April 21 1998 3 55 PM ...

Страница 71: ...nter of the tray and that it is secured by the paper size guides Note Note the following points whenever printing on envelopes Make sure that all edges are creased sharply and that all flaps are folded correctly Do not use envelopes that are self adhesive Use only envelopes that have standard sealing that sticks after it is moistened Because there is great variation in the quality of paper used fo...

Страница 72: ... feed properly Do not use envelopes that have a window Such envelopes can seriously damage the printer Do not use envelopes that are wrinkled Never use envelopes that have clasps or any other type of fastener that can damage the printer Do not store envelopes in an area that is subject to high humidity PageWorks book Page 12 Tuesday April 21 1998 3 55 PM ...

Страница 73: ...Chapter Printer Driver 4 Printer Driver Chapter 4 PageWorks book Page 1 Tuesday April 21 1998 3 55 PM ...

Страница 74: ...Printer Driver Chapter 4 PageWorks book Page 0 Tuesday April 21 1998 3 55 PM ...

Страница 75: ...3 1 Windows NT4 0 Windows NT3 51 or DOS Personal Computer IBM compatible PC with at least a 386DX 16MHz CPU Pentium processor recommended 1 44MB 3 5 inch floppy disk drive CD ROM drive I O Interface Standard PC parallel printer port and cable Memory At least 8MB of PC RAM Free Disk Space Approximately 20MB for files Note The printer driver for your PageWorks 8e is located on the CD ROM that comes ...

Страница 76: ...can use for installation of the PageWorks 8e Printer Driver Plug and play installation or manual installation To install the PageWorks 8e Printer Driver using Plug and play 1 Connect the printer to your computer and then turn on both the printer and the computer See 2 20 for details on connecting the printer to your computer 2 Turn on your computer and start up Windows 95 When an IEEE 1284 connect...

Страница 77: ...o your computer s CD ROM drive In this example we assume that D is the name of the CD ROM drive 5 Type D Driver 95setup and click the OK button 6 Follow the instructions that appear on your computer screen to complete the installation Note The plug and play procedure installs only the printer driver To install the Control Panel and Status Monitor for PageWorks 8e perform the manual installation pr...

Страница 78: ...he screen Click Printer Install to start the installer Note 4 Follow the instructions that appear on your computer screen to complete the installation Important The configuration of some computers may prevent the above screen from appearing automatically If the screen does not appear double click the Driver folder from the CD ROM and double click setup exe Installing the PageWorks 8e Printer Drive...

Страница 79: ...g you that installation is complete appears on your computer screen click OK 6 In the next dialog that appears click the Restart Windows button to restart Windows 7 After Windows restarts the MLT PageWorks_Pro 8e and 8 Tools dialog appears on your computer screen PageWorks book Page 5 Tuesday April 21 1998 3 55 PM ...

Страница 80: ...PageWorks 8e Printer Driver 1 Click the Start button point to settings and then click Control Panel 2 Double click Add Remove Programs to open the Add Remove programs Properties window 3 Select MLT PageWorks Pro 8e and 8 from the list and click Add Remove PageWorks book Page 6 Tuesday April 21 1998 3 55 PM ...

Страница 81: ...Printer Driver Under Windows 95 Printer Driver Chapter 4 4 In response to the warning dialog that appears click Yes to proceed with the uninstall operation or No to abort 5 Click OK PageWorks book Page 7 Tuesday April 21 1998 3 55 PM ...

Страница 82: ... click Printers to display the Printers dialog 2 On the Printers dialog click either the PageWorks 8e Standard or PageWorks 8e Enhanced icon to select it PageWorks 8e Standard is fully compatible with PCL 5e If you want output that is identical to that produced on a PCL 5e printer select this driver PageWorks 8e Enhanced has a number of additional features not available on the Standard version Use...

Страница 83: ... PageWorks 8e driver ver sion you selected 4 On the Details tab of the Properties dialog click the Setup button to display the PageWorks 8e driver setup dialog 5 Use the procedures under Using the PageWorks 8e Driver Setup Dialog on page 4 67 to make PageWorks 8e driver settings PageWorks book Page 9 Tuesday April 21 1998 3 55 PM ...

Страница 84: ...l the PageWorks 8e Printer Driver 1 Turn on your computer and start up Windows 3 1 2 Double click the File Manager icon which is located in the Main group within the Program Manager 3 Insert the Minolta PageWorks 8e Printer Drivers CD ROM into your computer s CD ROM drive In this example we assume that D is the name of the CD ROM drive 4 Use File Manager to display the contents of the CD ROM 5 Dou...

Страница 85: ...ver Chapter 4 7 In the Select Product Name dialog that appears select PageWorks Pro 8e and then click OK 8 In the Select port dialog that appears select the name of the port to which the printer is connected and then click OK PageWorks book Page 11 Tuesday April 21 1998 3 55 PM ...

Страница 86: ...r installed and then click OK The installation program automatically specifies a default direc tory of C MINOLTA8 If you want to leave the default directory as it is simply click OK 10 In the Set Additional Option dialog that appears click the checkboxes next to the options you want to select in accordance with your printer s configuration and then click OK PageWorks book Page 12 Tuesday April 21 ...

Страница 87: ...tant 11 When a dialog informing you that installation is complete appears on your computer screen click OK Installing the PageWorks 8e Printer Driver alters the Windows SYSTEM INI and WIN INI files and backs up their previous pre installation versions under the names SYSTEM 001 and WIN 001 PageWorks book Page 13 Tuesday April 21 1998 3 55 PM ...

Страница 88: ... Printer Driver Chapter 4 12 In the next dialog that appears click the Restart Windows button to restart Windows 13 After Windows restarts the MLT PageWorks Pro 8e and 8 Tools dialog appears on your computer screen PageWorks book Page 14 Tuesday April 21 1998 3 55 PM ...

Страница 89: ...tall the PageWorks 8e Printer Driver 1 Double click the MLT Uninstall Utility icon of the MLT Page Works Pro 8e and 8 Tools dialog box 2 In response to the warning dialog that appears click Yes to proceed with the uninstall operation or No to abort PageWorks book Page 15 Tuesday April 21 1998 3 55 PM ...

Страница 90: ... the Main group within the Program Manager 2 In the Control Panel dialog double click Printers 3 In the Installed Printers list click either the PageWorks 8e Standard or PageWorks 8e Enhanced icon to select it PageWorks 8e Standard is fully compatible with PCL 5e If you want output that is identical to that produced on a PCL 5e printer select this driver PageWorks 8e Enhanced has a number of addit...

Страница 91: ...r Driver Chapter 4 4 Click Setup which displays the Setup dialog for the printer version you selected 5 Use the procedures under Using the PageWorks 8e Driver Setup Dialog on page 4 67 to make PageWorks 8e driver settings PageWorks book Page 17 Tuesday April 21 1998 3 55 PM ...

Страница 92: ...ls you how to uninstall the printer driver when necessary To install the PageWorks 8e Printer Driver 1 Turn on your computer and start up Windows NT4 0 2 Insert the Minolta PageWorks 8e Printer Drivers CD ROM into your computer s CD ROM drive and then click OK In this example we assume that D is the name of the CD ROM drive 3 Click the Start button point to Settings and then click Printers PageWor...

Страница 93: ...printer through a network print server 6 What you should do next depends on how your printer is connected to your computer Printer connected directly to parallel port LPT See Direct Connection to Parallel Port LPT below Printer connected directly to network port LPR See Direct Connection to Network Port LPR on page 4 27 Computer accesses printer through network print server See Printer Access thro...

Страница 94: ... Driver Chapter 4 Direct Connection to Parallel Port LPT Continue with the following steps from the basic installation procedure started above 7 Click Next 8 Specify the ports you want to use and then click Next PageWorks book Page 20 Tuesday April 21 1998 3 55 PM ...

Страница 95: ... NT4 0 Printer Driver Chapter 4 9 Click Have Disk 10 Select the drive where you inserted the CD ROM with the Minolta PageWorks 8e Printer Driver in our example we used drive D and then click Browse PageWorks book Page 21 Tuesday April 21 1998 3 55 PM ...

Страница 96: ...e Printer Driver Under Windows NT4 0 Printer Driver Chapter 4 11 Select the folder named Driver and then click Open 12 Select the folder named nt40 and then click Open PageWorks book Page 22 Tuesday April 21 1998 3 55 PM ...

Страница 97: ...4 23 Installing the Printer Driver Under Windows NT4 0 Printer Driver Chapter 4 13 Click Open 14 Click OK PageWorks book Page 23 Tuesday April 21 1998 3 55 PM ...

Страница 98: ... 4 15 In the Printers list select Minolta PageWorks Pro 8e and then click Next 16 If you want to assign a different name to the printer type the name you want to use into the text box When the name is as you want it click Next PageWorks book Page 24 Tuesday April 21 1998 3 55 PM ...

Страница 99: ... Driver Chapter 4 17 Specify whether or not other users will be sharing the printer and then click Next 18 Specify whether or not you want to print a test page and then click Finish to start actual installation PageWorks book Page 25 Tuesday April 21 1998 3 55 PM ...

Страница 100: ... in order to make sure that the printer driver is installed correctly The Printers window with the Minolta PageWorks Pro 8e icon appears on your computer screen when installation is complete A page is also produced on the printer if you selected Yes in step 18 above PageWorks book Page 26 Tuesday April 21 1998 3 55 PM ...

Страница 101: ...n to Parallel Port LPT on page 4 20 If your computer accesses the printer through a network print server see Printer Access through a Network Print Server on page 4 34 Important Continue with the following steps from the basic installation procedure started under Installing the Printer Driver Under Windows NT4 0 on page 4 18 If your printer is part of a network be sure to contact your system admin...

Страница 102: ...4 28 Installing the Printer Driver Under Windows NT4 0 Printer Driver Chapter 4 7 Click Next 8 Click Add Port PageWorks book Page 28 Tuesday April 21 1998 3 55 PM ...

Страница 103: ...4 29 Installing the Printer Driver Under Windows NT4 0 Printer Driver Chapter 4 9 Select LPR Port and then click the New Port button PageWorks book Page 29 Tuesday April 21 1998 3 55 PM ...

Страница 104: ...he network interface card was installed In Name of printer on that machine type in PORT1 You will not be able to select LPR Port unless the following two settings are in effect in the Control Panel Network applet Protocol TCP IP Protocol Services TCP IP Print If you have a problem selecting LPR Port change these settings as shown above PageWorks book Page 30 Tuesday April 21 1998 3 55 PM ...

Страница 105: ...n the Printer Port dialog click Close The IP address shown below is an example only Be sure to check with the network administrator for the IP address that you need to use Be sure to use only PORT1 in Name of printer on that machine You will not be able to print if you use another name here PageWorks book Page 31 Tuesday April 21 1998 3 55 PM ...

Страница 106: ...r Driver Under Windows NT4 0 Printer Driver Chapter 4 12 After checking once more that the IP address you input in step 10 above is correct then click Next 13 Click Have Disk PageWorks book Page 32 Tuesday April 21 1998 3 55 PM ...

Страница 107: ...From here proceed from step 10 under the procedures titled Direct Connection to Parallel Port LPT on page 4 21 The Printers window with the Minolta PageWorks Pro 8e icon appears on your computer screen when installation is complete PageWorks book Page 33 Tuesday April 21 1998 3 55 PM ...

Страница 108: ...ly to your computer s network port LPR see Direct Connection to Network Port LPR on page 4 27 Important Continue with the following steps from the basic installation procedure started under Installing the Printer Driver Under Windows NT4 0 on page 4 18 If your printer is part of a network be sure to contact your system administrator before trying to install any software You should also refer to th...

Страница 109: ...nter Driver Under Windows NT4 0 Printer Driver Chapter 4 7 Click Next 8 From the Shared Printers list click the name of the print server to which your computer is connected PageWorks book Page 35 Tuesday April 21 1998 3 55 PM ...

Страница 110: ...Driver Under Windows NT4 0 Printer Driver Chapter 4 9 In the list of devices connected to the server that appears click the name of the printer you want to use and then click OK PageWorks book Page 36 Tuesday April 21 1998 3 55 PM ...

Страница 111: ...Under Windows NT4 0 Printer Driver Chapter 4 10 Specify whether or not you want to make this printer the default printer and then click Next 11 In the dialog that appears click Finish PageWorks book Page 37 Tuesday April 21 1998 3 55 PM ...

Страница 112: ...nter Driver Under Windows NT4 0 Printer Driver Chapter 4 Important If the message shown below appears click OK and proceed with the installation Click the Have Disk button PageWorks book Page 38 Tuesday April 21 1998 3 55 PM ...

Страница 113: ...rties to dis play the properties of the driver Confirm that the printer driver name Minolta PageWorks Pro 8e is shown in the Driver box of the General tab of the Properties window Now you should continue from step 10 of the procedure under Direct Connection to Parallel Port LPT on page 4 21 The Printers window with the Minolta PageWorks Pro 8e icon appears on your computer screen when installation...

Страница 114: ...If any other printer driver name besides Minolta PageWorks Pro 8e is shown in the Driver box of the General tab of the Properties window contact your system administrator and have the printer driver name changed to Minolta PageWorks Pro 8e PageWorks book Page 40 Tuesday April 21 1998 3 55 PM ...

Страница 115: ... 4 To uninstall the PageWorks 8e Printer Driver 1 Click the Start button point to Settings and then click Printers 2 Click Minolta PageWorks Pro 8e and select Delete from the File menu 3 Click Yes to remove the printer driver PageWorks book Page 41 Tuesday April 21 1998 3 55 PM ...

Страница 116: ...alling the Printer Driver Under Windows NT4 0 Printer Driver Chapter 4 4 Click Yes to delete all files related to the Minolta PageWorks Pro 8e printer driver PageWorks book Page 42 Tuesday April 21 1998 3 55 PM ...

Страница 117: ...Works 8e driver setup dialog under Windows NT4 0 To display the PageWorks 8e driver setup dialog 1 On your computer click Start point to Settings and then click Printers to display the Printers dialog 2 In the Printers dialog click the PageWorks Pro 8e icon to select it 3 In the Printers dialog s File menu click Properties PageWorks book Page 43 Tuesday April 21 1998 3 55 PM ...

Страница 118: ...n the Details tab of the Properties dialog click the Setup button to display the PageWorks 8e driver setup dialog 5 Use the procedure under Using the PageWorks 8e Driver Setup Dialog on page 4 67 to make PageWorks 8e driver settings PageWorks book Page 44 Tuesday April 21 1998 3 55 PM ...

Страница 119: ...a computer running Windows NT3 51 It also tells you how to uninstall the printer driver when necessary To install the PageWorks 8e Printer Driver 1 Turn on your computer and start up Windows NT3 51 2 Double click the Control Panel icon which is located in the Main group within the Program Manager 3 Double click the Printers icon in the Control Panel PageWorks book Page 45 Tuesday April 21 1998 3 5...

Страница 120: ...rinter connected directly to parallel port LPT See Direct Connection to Parallel Port LPT below Printer connected directly to network port LPR See Direct Connection to Network Port LPR on page 4 51 Computer accesses printer through network print server See Printer Access through a Network Print Server on page 4 57 PageWorks book Page 46 Tuesday April 21 1998 3 55 PM ...

Страница 121: ...river Chapter 4 Direct Connection to Parallel Port LPT Continue with the following steps from the basic installation procedure started above 5 Select Create Printer from the Printer menu in the Print Manager window PageWorks book Page 47 Tuesday April 21 1998 3 55 PM ...

Страница 122: ... want to use for the printer into the Printer Name box Select Other from the drop down list of the Driver box Then click the OK button 7 Type the directory in which the printer driver is located in this example D Driver nt351 and click the OK button PageWorks book Page 48 Tuesday April 21 1998 3 55 PM ...

Страница 123: ...t Minolta PageWorks Pro 8e is displayed in the Printer Driver box and click the OK button 9 If necessary type the text into the Description box Specify the port you want to use for example LPT1 Then click the OK button to start the installation PageWorks book Page 49 Tuesday April 21 1998 3 55 PM ...

Страница 124: ...4 50 Installing the Printer Driver Under Windows NT3 51 Printer Driver Chapter 4 10 After the installation has completed the following screen appears PageWorks book Page 50 Tuesday April 21 1998 3 55 PM ...

Страница 125: ...n to Parallel Port LPT on page 4 47 If your computer accesses the printer through a network print server see Printer Access through a Network Print Server on page 4 57 Important Continue with the following steps from the basic installation procedure started under Installing the Printer Driver Under Windows NT3 51 on page 4 45 If your printer is part of a network be sure to contact your system admi...

Страница 126: ... 5 Select Create Printer from the Printer menu in the Print Manager window 6 Type the name you want to use for the printer into the Printer Name box Select Other from the drop down list of the Driver box Then click the OK button PageWorks book Page 52 Tuesday April 21 1998 3 55 PM ...

Страница 127: ...er 4 7 Type the directory in which the printer driver is located in this example D Driver nt351 and click the OK button 8 Make sure that Minolta PageWorks Pro 8e is displayed in the Printer Driver box and click the OK button PageWorks book Page 53 Tuesday April 21 1998 3 55 PM ...

Страница 128: ...x Select Other from the drop down list of the Print to box 10 In the Print Destinations window select Local Port and click the OK button 11 In the Port Name window type in the printer IP address that was assigned when the network interface card was installed and click the OK button PageWorks book Page 54 Tuesday April 21 1998 3 55 PM ...

Страница 129: ...er check Share this printer on the network and specify the Share Name and Location Then click the OK button to start the installation The IP address shown below is an example only Be sure to check with the network administrator for the IP address that you need to use PageWorks book Page 55 Tuesday April 21 1998 3 55 PM ...

Страница 130: ...4 56 Installing the Printer Driver Under Windows NT3 51 Printer Driver Chapter 4 13 After the installation is completed the following screen appears PageWorks book Page 56 Tuesday April 21 1998 3 55 PM ...

Страница 131: ...ly to your computer s network port LPR see Direct Connection to Network Port LPR on page 4 51 Important Continue with the following steps from the basic installation procedure started under Installing the Printer Driver Under Windows NT3 51 on page 4 45 If your printer is part of a network be sure to contact your system administrator before trying to install any software You should also refer to t...

Страница 132: ...Installing the Printer Driver Under Windows NT3 51 Printer Driver Chapter 4 5 Select Connect to Printer from the Printer menu in the Print Manager window PageWorks book Page 58 Tuesday April 21 1998 3 55 PM ...

Страница 133: ...he Printer Driver Under Windows NT3 51 Printer Driver Chapter 4 6 From the Shared Printers list click the name of the print server to which your computer is connected PageWorks book Page 59 Tuesday April 21 1998 3 55 PM ...

Страница 134: ... Under Windows NT3 51 Printer Driver Chapter 4 7 In the list of devices connected to the server that appears click the name of the printer you want to use and then click the OK button PageWorks book Page 60 Tuesday April 21 1998 3 55 PM ...

Страница 135: ...iver Under Windows NT3 51 Printer Driver Chapter 4 To uninstall the PageWorks 8e Printer Driver 1 In the Print Manager window click the Minolta PageWorks Pro 8e icon to select it PageWorks book Page 61 Tuesday April 21 1998 3 55 PM ...

Страница 136: ...nter Driver Under Windows NT3 51 Printer Driver Chapter 4 2 Select Remove Printer from the Printer menu in the Print Manager window 3 Click OK to remove the printer driver PageWorks book Page 62 Tuesday April 21 1998 3 55 PM ...

Страница 137: ...ks 8e driver setup dialog under Window NT3 51 To display the PageWorks 8e driver setup dialog 1 Double click the Control Panel icon which is located in the Main group within the Program Manager 2 In the Control Panel dialog double click Printers 3 In the Print Manager window click the Minolta PageWorks Pro 8e icon to select it PageWorks book Page 63 Tuesday April 21 1998 3 55 PM ...

Страница 138: ...er Driver Under Windows NT3 51 Printer Driver Chapter 4 4 Select Properties from the Printer menu 5 Click Setup which displays the dialog for the printer driver setup dialog PageWorks book Page 64 Tuesday April 21 1998 3 55 PM ...

Страница 139: ...r Driver Under Windows NT3 51 Printer Driver Chapter 4 6 Use the procedures under Using the PageWorks 8e Driver Setup Dialog on page 4 67 to make PageWorks 8e driver settings PageWorks book Page 65 Tuesday April 21 1998 3 55 PM ...

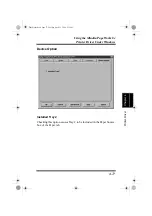
Страница 140: ... brief explanations on the settings you can make See the printer driver s on line help for full details about each setting See the following sections for details on starting up the Page Works driver Windows 95 See Displaying the PageWorks 8e Driver Setup Dialog on page 4 8 Windows 3 1 See Displaying the PageWorks 8e Driver Setup Dialog on page 4 16 Windows NT4 0 See Displaying the PageWorks 8e Dri...

Страница 141: ... setup dialog consists of a number of tabs Click on a tab and then make the settings for the items contained on the tab The following shows the contents of each of the tabs and provides brief explanations of each setting available See the PageWorks 8e driver on line help for full details on each setting PageWorks book Page 67 Tuesday April 21 1998 3 55 PM ...

Страница 142: ... return most printer driver values to their default values Help Click to view on line help About Click to view copyright and version information The following information is common to both the standard and enhanced versions of the Windows 95 PageWorks 8e driver and the Windows 3 1 driver unless otherwise noted See Using the PageWorks 8e Enhanced Driver Setup Dialog on page 4 78 for additional sett...

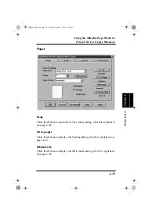
Страница 143: ...utton to display the Custom Paper Size dialog page 4 71 which lets you specify custom paper sizes that are not included in the standard Paper Size list Copies Use this box to specify how many uncollated copies you want to print Note that you should normally use the Copies setting in the Print dialog to specify the number of copies you want PageWorks book Page 69 Tuesday April 21 1998 3 55 PM ...

Страница 144: ...ource Orientation Choose Portrait or Landscape to select the default orientation of the printed page XY Image Shift Click this button to display the dialog shown below which lets you shift the printable area on the physical page The values you specify shift the image horizontally X and vertically Y on the page PageWorks book Page 70 Tuesday April 21 1998 3 55 PM ...

Страница 145: ...o expand the dialog and show the Custom Paper Edit settings Input a name for your custom paper size The name you input appears in the Paper Size list of the Paper tab Click a radio button to specify either millimeters mm or inches inch as the measurement unit Note that the setting ranges for paper width and height change in accordance with the unit you select PageWorks book Page 71 Tuesday April 2...

Страница 146: ...Paper List click the name of the paper you want to delete and then click this button Click OK to delete the custom paper or Cancel to abort Edit In the Custom Paper List click the name of the paper you want to edit and then click this button to expand the dialog and show the Custom Paper Edit settings Next use the procedure described for the Add button above to make the changes you want PageWorks ...

Страница 147: ...rinting Turn this option off for normal printing Printer Resolution Select 600 dpi for best quality or 300 dpi for higher speed Fine Art Changing this setting can improve the appearance of text and graphics by smoothing jagged edges Graphics Mode This setting specifies how graphic images should be sent to the printer PageWorks book Page 73 Tuesday April 21 1998 3 55 PM ...

Страница 148: ...inting of graphics See the on line help for this setting for information on how to select the setting you should use TrueType Mode The TrueType Mode you should use depends on the relationship between the graphics and TrueType fonts in your document See the on line help for this item for full details PageWorks book Page 74 Tuesday April 21 1998 3 55 PM ...

Страница 149: ...l fonts for your printer See the on line help for full details on the font management operations you can perform with this tab Important Note that the Fonts tab is available only with the PageWorks 8e Standard driver only The PageWorks 8e Enhanced driver does not have a Fonts tab PageWorks book Page 75 Tuesday April 21 1998 3 55 PM ...

Страница 150: ...ke sure the entire page is processed before it is printed Set the setting to ON only when the JOB TOO COMPLEX error occurs If Page Protection is set to ON printing speed may be slowed Auto Continue Auto continue lets the printer automatically recover from print overrun and memory overflow errors PageWorks book Page 76 Tuesday April 21 1998 3 55 PM ...

Страница 151: ...s 8e Printer Driver Under Windows Printer Driver Chapter 4 Device Option Installed Tray 2 Checking this option causes Tray 2 to be included in the Paper Source box of the Paper tab PageWorks book Page 77 Tuesday April 21 1998 3 55 PM ...

Страница 152: ...e same as the standard driver setup dialog except for the following two points The enhanced version does not have a Fonts tab The enhanced version has additional Paper tab settings The following describes how to use the additional Paper tab settings only See Using the PageWorks 8e Driver Setup Dialog on page 4 67 for information about other settings PageWorks book Page 78 Tuesday April 21 1998 3 5...

Страница 153: ...is button to open the N Up setting dialog which is explained on page 4 80 Fit to paper Click this button to display the Scaling dialog which is explained on page 4 81 Watermark Click this button to display the Watermark dialog which is explained on page 4 82 PageWorks book Page 79 Tuesday April 21 1998 3 55 PM ...

Страница 154: ...er 4 N Up Setting Dialog Use this dialog to specify the number of images arranged on each page Inactive Click this item to shut off the N up options N Up Use these settings to specify how many images should be printed on a single page PageWorks book Page 80 Tuesday April 21 1998 3 55 PM ...

Страница 155: ...his dialog to scale an image before printing it Inactive Click this option to turn off scaling and print the image at its normal size Fit To Paper Click this option when you want the image scaled automatically to fit the paper size specified by the drop down list PageWorks book Page 81 Tuesday April 21 1998 3 55 PM ...

Страница 156: ...atermark List Use this list to specify the watermark you want to use Note Delete Select the name of the watermark you want to delete and click this button Click OK to delete the custom Paper or Cancel to abort The selected watermark is printed on all pages PageWorks book Page 82 Tuesday April 21 1998 3 55 PM ...

Страница 157: ...a PageWorks 8e Printer Driver Under Windows Printer Driver Chapter 4 Add Click this button to open the Watermark Edit dialog which you can use for creating new watermarks PageWorks book Page 83 Tuesday April 21 1998 3 55 PM ...

Страница 158: ...button appears when you open the Watermark Edit dialog with the Add button and the Save Edit button appears when you open the Watermark Edit dialog with the Edit button Click either of these buttons to save the data in the Watermark Edit dialog under the name in the Watermark Name box No Save This button appears when you open the Watermark Edit dialog either with the Edit button or with the Add bu...

Страница 159: ...00 is black Font Specify the typeface and font size that you want to use for the watermark Position Use these settings to specify the relative position of the watermark on the page You can specify anywhere from the top 1 to the bottom 19 of the page for vertical and far left 1 to far right 19 for horizontal Style Click on the checkboxes to toggle italic and bold on and off Angle Use this box to sp...

Страница 160: ... In this example we assume that D is the name of the CD ROM drive 5 From the DOS prompt create a directory on your hard disk for the DOS software For example the following creates a directory named mltdos on drive C Type md c mltdos 6 Change to the directory you created in the above step Type cd c mltdos 7 Copy the Minolta PageWorks 8e DOS Printing Utility program file from the Minolta PageWorks 8...

Страница 161: ...under Installing DOS Print ing Utilities on page 4 86 Type cd c mltdos If you used the directory name we showed in our installation example type in the command exactly as shown above If you used a different directory name change mltdos to the name you used 2 Type the following command at the DOS prompt Type rep Installing DOS Printing Utilities updates your AUTOEXEC BAT add ing a command to load t...

Страница 162: ... under Installing DOS Print ing Utilities on page 4 86 Type cd c mltdos If you used the directory name we showed in our installation example type in the command exactly as shown above If you used a different directory name change mltdos to the name you used 2 Type the following command at the DOS prompt Type spcpdos You should use the above step to remove the Status Display from mem ory if the Sta...

Страница 163: ...el finishes reading the printer profile the Page Setup window appears See page 4 90 for details on getting around in the Printer Control Panel windows To exit the Printer Control Panel Select Exit from the File menu or press Alt x PageWorks book Page 89 Tuesday April 21 1998 3 55 PM ...

Страница 164: ...ween the menu bar at the top of the window and the selections inside of the displayed screen press Esc To select a menu use Esc to move the selection cursor to the menu bar and then use the and arrow keys to move the cur sor left and right between menus To pull down a menu first select the menu and then press the down arrow key To select an item inside of a menu first pull down the menu and then u...

Страница 165: ... profile 1 After making the Printer Control Panel settings you want select Save Profile from the File menu Note Note that any changes you make in the Printer Control Panel do not affect the settings of the printer until you export the settings to the machine You can also save a profile under a new name by selecting Save As from the File menu PageWorks book Page 91 Tuesday April 21 1998 3 55 PM ...

Страница 166: ...e File Name box 3 Select OK to save the profile To open a profile Important 1 Select Open Profile from the File menu 2 Specify the drive path and file name where the profile you want to open is located This procedure replaces the current profile with the one you open Make sure you no longer need the current profile or save it using the procedure under To save a profile on page 4 91 PageWorks book ...

Страница 167: ...o open the profile The settings of the Printer Control Panel change in accordance with the profile you opened To print a test page or demo page Select the test or demo page you want to print from the Option menu To change the printer port 1 Select Connect Port from the Option menu 2 Select the port you want to change to and then select OK PageWorks book Page 93 Tuesday April 21 1998 3 55 PM ...

Страница 168: ...inter Control Panel Screens Common Buttons OK Select this button to export the current settings to the printer Cancel Select this button to restore all fields to their previous settings without updating the printer profile Default Select this button to return all fields to their default settings PageWorks book Page 94 Tuesday April 21 1998 3 55 PM ...

Страница 169: ...ically selects the paper tray for feeding whether paper should be fed from a designated tray or whether paper will be fed manually Priority Feed Use this setting to specify Tray 1 or Tray 2 as the priority tray The priority tray is the one that the printer feeds from when the paper source setting is Automatic or if the same size paper is loaded in all trays PageWorks book Page 95 Tuesday April 21 ...

Страница 170: ...he paper time out condition exists when the printer is paused and nothing happens for about 10 minutes Tray 1 Setting Specify whether Tray 1 is a multi purpose Multiple Size tray or a fixed size tray When Multiple Size is selected a paper size error Load XX does not occur regardless of the size of paper loaded in Tray 1 When Fixed Size is selected you can specify the size you want in the Tray 1 Pa...

Страница 171: ...want to use either by scrolling the value in the upper box or by selecting a value from the lower box The values indicate points for proportional fonts and inches for fixed pitch fonts Note Symbol Set Select the symbol set for the typeface you are using When Typeface is set to Courier 99 99 is the maximum pitch possible PageWorks book Page 97 Tuesday April 21 1998 3 55 PM ...

Страница 172: ...er 300 dpi or 600 dpi printing Fine ART Specify OFF LIGHT MEDIUM or DARK for the Fine ART setting Turning Fine ART on smooths out jagged edges of text and graphics for very high quality printing The default setting for Fine ART is OFF which is generally acceptable for most applications Fine ART controls the size of dots along the edges of text lines and graphics so you might want to change the set...

Страница 173: ...e been printed on the current drum This value can be reset to zero by clicking the Reset button Toner Counter This value shows how many pages have been printed with the current toner cartridge This value can be reset to zero by clicking the Reset button Tray 2 Counter This value shows how many pages have been printed from Tray 2 This value can be reset to zero by clicking the Reset button PageWork...

Страница 174: ...er Name This box shows the name assigned to the connected printer Total Memory This box shows how much memory is installed on the printer Additional Accessories This box shows any additional accessories installed on the printer PageWorks book Page 100 Tuesday April 21 1998 3 55 PM ...

Страница 175: ...iod of time specified by the power save interval Power Save Interval Specify the amount of time in minutes that the printer should wait before entering its sleep mode Detect Size Error A size error occurs when the actual paper size is different from the paper size specified by the printer driver Use this setting to turn the size error detection on Active and off Inactive PageWorks book Page 101 Tu...

Страница 176: ...verrun and memory overflow errors Use this setting to turn auto continue on Active and off Inactive Page Protection Page protection allows the printer to process the data for the entire document before it is printed Use this setting to turn page protection on Active and off Inactive PageWorks book Page 102 Tuesday April 21 1998 3 55 PM ...

Страница 177: ... an operation to display the Status Display The following is the default hot key combination ctl alt R After the Status Display screen is displayed you can change the hot key combination To select an item on the Status Display first highlight it then press Return to advance to its setting screen You can clear the Status Display at any time by pressing Esc The following is a brief explanation of th...

Страница 178: ...e procedure under Change Popup Message Command below Change Hot Key Command Setup Menu The dialog that appears when you execute this command shows the current hot key combination that launches the Status Display While the dialog is open you can change the hot key combination by pressing the key you want to change Change Popup Message Command Setup Menu The dialog that appears when you execute this...

Страница 179: ... to close the Status Display screen Status Display remains in memory when you return to the DOS prompt and you can remove it by typing the following REP d Help button Select this button to display online help about the Status Display PageWorks book Page 105 Tuesday April 21 1998 3 55 PM ...

Страница 180: ...g system onto a floppy diskette 5 Remove the floppy diskette from the floppy disk drive and insert it into the PC that is not equipped with a CD ROM drive 6 Create a folder for the printer driver on the hard disk of the PC Copy the files that were saved onto the floppy diskette in step four to the new folder 7 After saving the files find the one that is titled XXXXX exe the full name of the file d...

Страница 181: ...Chapter Using MLT PageWorks 8 Tools 5 Using MLT PageWorks 8 Tools Chapter 5 PageWorks book Page 1 Tuesday April 21 1998 3 55 PM ...

Страница 182: ...Using MLT PageWorks 8 Tools Chapter 5 PageWorks book Page 0 Tuesday April 21 1998 3 55 PM ...

Страница 183: ...he Status Display The procedure you should use to start up the Status Display depends on whether you are running Windows 95 or Windows 3 1 Note In order for the Status Display and Control Panel to operate correctly the printer must be connected to your computer and turned on Otherwise the Control Panel refuses to start up and the Status Display shows an error message If you checked Setup to start ...

Страница 184: ...Click Start point to Programs and then point to MLT PageWorks_Pro 8e and 8 Tools 2 Click MLT PageWorks_Pro 8e and 8 Status Display The Status Display should appear on the screen at this time See Using the Status Display on page 5 4 for details on the Status Display screen PageWorks book Page 2 Tuesday April 21 1998 3 55 PM ...

Страница 185: ... 3 1 From the File Manager double click the MLT PageWorks Pro 8e and 8 Tools folder and then double click MLT Status Display The Status Display should appear on the screen at this time See Using the Status Display on page 5 4 for details on the Status Display screen PageWorks book Page 3 Tuesday April 21 1998 3 55 PM ...

Страница 186: ...e printer The description advice area gives further details about the status message If an error is being reported this area gives you advice about what you need to do to correct it Click Close when you want to close the Status Display window To exit the Status Display use the Exit command from the setup menu Click Help to display online help about the Status Display Status message area Setup menu...

Страница 187: ... The bottom part of the expanded Status Display shows the printer status in graphic form The graphic shows the location of the problem and even changes to reflect the installation of options To return the Status Display to its normal unexpanded size click the Setup menu s Reduce command PageWorks book Page 5 Tuesday April 21 1998 3 55 PM ...

Страница 188: ... is turned on a dialog box appears to alert you whenever an error condition occurs When a popup error message occurs correct the problem and then click OK You can control which error conditions cause popup error mes sages to appear using the following To specify popup message conditions procedure To turn off popup error messages click the Setup menu s Popup Error Message command to remove the chec...

Страница 189: ...cause popup error messages to appear To move an error condition from the Inactive Popup list to the Active Popup list click on the error condition to highlight it and then click Add To move an error condition from the Active Popup list to the Inactive Popup list click on the error condition to highlight it and then click Delete After you are finished click OK to register your settings or Can cel t...

Страница 190: ...depends on whether you are running Windows 95 or Windows 3 1 Important Attempting to start up the Control Panel while the printer is not connected to your computer or turned on causes an error message to appear Make sure the printer is connected and running before performing either of the following procedures PageWorks book Page 8 Tuesday April 21 1998 3 55 PM ...

Страница 191: ... Click Start point to Programs and then point to MLT PageWorks_Pro 8e and 8 Tools 2 Click MLT PageWorks_Pro 8e and 8 Control Panel The Control Panel should appear on the screen at this time See Using the Control Panel on page 5 11 for details on using the Control Panel PageWorks book Page 9 Tuesday April 21 1998 3 55 PM ...

Страница 192: ...s 3 1 From the File Manager double click the MLT PageWorks Pro 8e and 8 Tools folder and then double click MLT Control Panel The Control Panel should appear on the screen at this time See Using the Control Panel on page 5 11 for details on using the Control Panel PageWorks book Page 10 Tuesday April 21 1998 3 55 PM ...

Страница 193: ...n separate tabs Click on a tab to view its contents or to change its settings The following shows the contents of each of the tabs and provides brief explanations of each setting available See the Control Panel on line help for full details on each setting Note The following information is common to both Windows 95 and Windows 3 1 PageWorks book Page 11 Tuesday April 21 1998 3 55 PM ...

Страница 194: ...e tabs OK Click to exit the Control Panel saving any changes made Cancel Click to exit the Control Panel discarding any changes made Default Click to return Control Panel settings to their defaults Help Click to view online help About Click to view copyright and version information PageWorks book Page 12 Tuesday April 21 1998 3 55 PM ...

Страница 195: ...ext sheet The paper time out condition exists when the printer is paused and nothing happens for about 10 minutes Setting Paper Time Out Action Proceed Paper is automatically fed from another paper tray Clear The print job is cleared cancelled None The printer continues to wait until you feed paper or manually cancel the print job PageWorks book Page 13 Tuesday April 21 1998 3 55 PM ...

Страница 196: ...is Automatic or if the same size paper is loaded in all trays Tray 1 Setting Specify whether Tray 1 is a multi purpose Multiple Size tray or a fixed size tray When Multiple Size is selected a paper size error Load XX does not occur regardless of the size of paper loaded in Tray 1 When Fixed Size is selected you can specify the size you want in the Tray 1 Paper Size drop down list PageWorks book Pa...

Страница 197: ...performed for the number of minutes specified by the Power Save Interval The power save interval can be specified as a value of 0 Power Save turned off to 60 minutes Detect Size Error A size error occurs when the actual paper size is different from the paper size specified by the printer driver Use this setting to turn the size error detection on Active and off Inactive PageWorks book Page 15 Tues...

Страница 198: ...o Page Print Click to print a demo page Configuration Print Click to print a page that shows the current printer configuration Print the List of Resident Fonts Click to print a list of all fonts that are resident in printer memory PageWorks book Page 16 Tuesday April 21 1998 3 55 PM ...

Страница 199: ...have been printed on the current drum This value can be reset to zero by clicking the Reset button Toner Counter This value shows how many pages have been printed with the current toner cartridge This value can be reset to zero by clicking the Reset button Tray 2 Counter This value shows how many pages have been printed from Tray 2 This value can be reset to zero by clicking the Reset button PageW...

Страница 200: ...rinter Name This box shows the name assigned to the connected printer Total Memory This box shows how much memory is installed on the printer Additional Accessories This box shows any additional accessories installed on the printer PageWorks book Page 18 Tuesday April 21 1998 3 55 PM ...

Страница 201: ...Chapter Maintenance 6 Maintenance Chapter 6 PageWorks book Page 1 Tuesday April 21 1998 3 55 PM ...

Страница 202: ...Maintenance Chapter 6 PageWorks book Page 0 Tuesday April 21 1998 3 55 PM ...

Страница 203: ...rtridge depends on the image density of the pages you print If printed images start to get light remove the toner cartridge from the printer rock it back and forth a few times and then replace it in the printer If this does not solve the problem it probably means you need to replace the toner cartridge with a new one To replace the toner cartridge Caution 1 Press the top cover release button and o...

Страница 204: ...r cartridge is made up of non hazardous materials and can be disposed of freely Check local regulations in your area concerning dis posal of such items The life span of the toner cartridge is dependent upon the mode and application in which it is used PageWorks book Page 2 Tuesday April 21 1998 3 55 PM ...

Страница 205: ...indicated by the arrows in the illustration 4 Holding onto the toner cartridge s handle lower it into the printer Make sure that the four pins two on each side fit into the grooves inside the printer Note Color coordinated 2 labels have been affixed to the toner cartridge and to the inside of the printer Install the toner cartridge by aligning these labels PageWorks book Page 3 Tuesday April 21 19...

Страница 206: ...idge Maintenance Chapter 6 The cartridge will click into place when it is completely installed 5 Close the top cover and press it down gently but firmly until it locks into place PageWorks book Page 4 Tuesday April 21 1998 3 55 PM ...
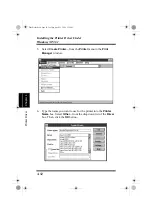
Страница 207: ... to blink release the control panel button 2 While the indicator lights are blinking briefly press the control panel button three times This causes the Ready indicator green to blink and all the other indicators to turn off 3 Hold down the control panel button again for at least five seconds After that release the button which causes all indicator light to blink again indicating that the toner car...

Страница 208: ...e pages you print After about 20 000 pages print images start to become faint and blurred If this happens use the following procedure to replace the drum cartridge with a new one To replace the drum cartridge Caution 1 Press the top cover release button and open the top cover The fuser unit inside the printer can become very hot during operation Do not touch the area to avoid injury PageWorks book...

Страница 209: ...he toner cartridge 3 Remove the old drum cartridge Note The drum cartridge is made up of non hazardous materials and can be disposed of freely Check local regulations in your area concerning dis posal of such items PageWorks book Page 7 Tuesday April 21 1998 3 55 PM ...

Страница 210: ... Note Note If you do not plan to immediately install the drum cartridge into the printer cover it with a cloth to protect it against overexposure to light Color coordinated 1 labels have been affixed to the drum cartridge and to the inside of the printer Install the frum cartridge by aligning these labels Make sure the drum cartridge is inserted inside the printer as far as it will go PageWorks bo...

Страница 211: ...ooves inside the printer The cartridge will click into place when it is completely installed Note 7 Close the top cover and press it down gently but firmly until it locks into place Color coordinated 2 labels have been affixed to the toner cartridge and to the inside of the printer Install the toner cartridge by aligning these labels PageWorks book Page 9 Tuesday April 21 1998 3 55 PM ...

Страница 212: ...t to blink release the control panel button 2 While the indicator lights are blinking briefly press the control panel button twice This causes the Paper indicator amber to blink and all the other indicators to turn off 3 Hold down the control panel button again for at least five seconds After that release the button which causes all indicator lights to blink again indicating that the drum cartridg...

Страница 213: ...ld detergent Cleaning the Paper Transport Roller 1 Turn off the printer and unplug the power cord 2 Press the top cover release button and open the top cover Use a soft cloth to clean the printer Never use abrasives or corrosive detergents The fusing unit can become very hot during operation Do not touch the area to avoid injury Wait for at least 10 minutes after the printer has been turned off an...

Страница 214: ... the drum cartridge Note 4 Pull back on the cover that protects the paper transport roller located at the bottom of the printer chamber Immediately wrap the drum cartridge with a cloth to protect it against overexposure to light PageWorks book Page 12 Tuesday April 21 1998 3 55 PM ...

Страница 215: ...e Printer Maintenance Chapter 6 5 Use a soft cloth to wipe the paper transport roller 6 Reinstall the drum cartridge and toner cartridge as shown on page 6 8 and 6 9 PageWorks book Page 13 Tuesday April 21 1998 3 55 PM ...

Страница 216: ...6 14 Cleaning the Printer Maintenance Chapter 6 7 Close the top cover and press it down gently but firmly until it locks into place PageWorks book Page 14 Tuesday April 21 1998 3 55 PM ...

Страница 217: ...Chapter Troubleshooting 7 Troubleshooting Chapter 7 PageWorks book Page 1 Tuesday April 21 1998 3 55 PM ...

Страница 218: ...Troubleshooting Chapter 7 PageWorks book Page 0 Tuesday April 21 1998 3 55 PM ...

Страница 219: ...andles all e mail requests for technical assistance at www minoltaprinters com Please be prepared to provide the following information when contacting Minolta Customer Support Model Name Serial number A detailed description of the problem For questions or problems with installation please be prepared to provide the following additional information Brand name and model number of the computer Type o...

Страница 220: ...ollowing procedure to remove paper jammed inside the printer Caution 1 Press the top cover release button and open the top cover The fusing unit inside the printer can become very hot during operation Do not touch the area to avoid injury PageWorks book Page 2 Tuesday April 21 1998 3 55 PM ...

Страница 221: ...and the drum cartridge Note 3 Clear the paper misfeed using one of the following procedures depending upon the location of the paper misfeed Immediately wrap the drum cartridge with a cloth to protect it against overexposure to light PageWorks book Page 3 Tuesday April 21 1998 3 55 PM ...

Страница 222: ...hooting Chapter 7 Paper Output Misfeed Face down tray Pull the jammed paper straight out of the printer Paper Output Misfeed Face up tray Pull the jammed paper straight out of the printer PageWorks book Page 4 Tuesday April 21 1998 3 55 PM ...

Страница 223: ... 7 Paper Input Misfeed from Tray 1 Remove the tray cover and pull the jammed paper straight out of the printer Paper Input Misfeed from Manual Feed Tray Pull the jammed paper straight out of the printer PageWorks book Page 5 Tuesday April 21 1998 3 55 PM ...

Страница 224: ... Unit Remove the cassette cover and pull out Tray 2 from the second paper cassette unit Press down on the stack of paper until the paper lifting plate locks Remove the stack of paper from the tray and pull the jammed paper straight out of the printer PageWorks book Page 6 Tuesday April 21 1998 3 55 PM ...

Страница 225: ... Misfeed Troubleshooting Chapter 7 Inside the Printer Pull the end of the paper that is visible straight out of the printer Caution Do not touch the image transfer roller PageWorks book Page 7 Tuesday April 21 1998 3 55 PM ...

Страница 226: ...leshooting Chapter 7 4 Reinstall the drum cartridge and toner cartridge as shown on page 6 8 and 6 9 5 Close the top cover and press it down gently but firmly until it locks into place PageWorks book Page 8 Tuesday April 21 1998 3 55 PM ...

Страница 227: ... and rock it left and right a few times to distribute remaining toner If the problem persists replace the toner cartridge page 6 1 The toner cartridge may be defective Remove the toner cartridge and check it for damage Replace the toner cartridge if necessary page 6 1 Black pages The toner cartridge may be defective Remove the toner cartridge and check it for damage Replace the toner cartridge if ...

Страница 228: ... it left and right a few times to distribute remaining toner If the problem persists replace the toner cartridge page 6 1 The toner cartridge may be defective Remove the toner cartridge and check it for damage Replace the toner cartridge if necessary page 6 1 Printout too dark The toner cartridge may be defective Remove the toner cartridge and check it for damage Replace the toner cartridge if nec...

Страница 229: ...he toner cartridge and rock it left and right a few times to distribute remaining toner The drum cartridge may be defective Remove the drum cartridge and check it for damage Replace the drum cartridge if necessary page 6 6 Irregularities The paper may have absorbed some moisture due to high humidity or because of direct contact with water Since toner will not adhere well to wet paper replace the p...

Страница 230: ...nevenly distrib uted inside the toner cartridge Remove the toner cartridge and rock it left and right a few times to distribute remaining toner The toner cartridge or drum car tridge may be defective Remove the cartridges and check them for damage Replace cartridges if necessary Smudges on the back of the paper indicate a dirty transport roller Contact your local Minolta Cus tomer Support PageWork...

Страница 231: ... all the applications currently open on your computer Next reset your computer to send a break signal to the printer Now check your printer cable against the specifications in Chapter 8 of this User s Manual Note Are your computer s communications port settings correct Refer to the documentation that comes with your computer and check if its current communications port settings are correct When co...

Страница 232: ...MEMO Troubleshooting Chapter 7 PageWorks book Page 14 Tuesday April 21 1998 3 55 PM ...

Страница 233: ...Chapter Specifications 8 Specifications Chapter 8 PageWorks book Page 1 Tuesday April 21 1998 3 55 PM ...

Страница 234: ...Specifications Chapter 8 PageWorks book Page 0 Tuesday April 21 1998 3 55 PM ...

Страница 235: ...Plain paper 60 to 90 g m2 16 to 24 lbs recycled paper 60 to 90 g m2 16 to 24 lbs transparencies letter head labels envelopes postcards thick paper 90 to 163 g m2 24 to 43 lbs Paper feeding Tray 1 Multipurpose tray manual feed Tray 2 500 sheet second cassette Input capacity Tray 1 Multipurpose tray 150 sheets Tray 2 Second cassette 500 sheets Output capacity 100 sheets face down 20 sheets face up W...

Страница 236: ...mode External dimensions Height 9 2 3 246 mm Width 15 1 2 394 mm Depth 11 2 5 290 mm Weight Approx 15 2 5 lbs 7 kg Interface Parallel Centronics IEEE 1284 ECP and Nibble IrDA Ver 1 1 4Mbps port option CPU Intel i80960JF 25 MHz Standard memory 2 MB expandable up to 34 MB Accessories Toner cartridge drum cartridge power cord User s Manual Quick Guide CD ROM Options NIC Network Interface Card Infrare...

Страница 237: ...ain paper 60 to 90 g m2 16 to 24 lbs recycled paper 60 to 90 g m2 16 to 24 lbs Paper cassettes Letter Legal Executive A4 B5 Tray capacity Up to 500 sheets plain and recycled paper Operating temperature 10 to 35 C Operating humidity 15 to 85 Weight Approximately 8 2 3 lbs 4 kg except the Legal Cassette Tray PageWorks book Page 3 Tuesday April 21 1998 3 55 PM ...

Страница 238: ...than 10 feet 3 meters Connectors Printer Parallel 36 pin connector PC EIA 25 pin connector Cable type Shielded Each signal and ground pair should be twisted Pin assignments IEEE 1284 type B connector Note Minolta does not warrant the use of any particular cable The user assumes all responsibility as to the quality and performance of the cable PageWorks book Page 4 Tuesday April 21 1998 3 55 PM ...

Страница 239: ...printer memory by adding one single in line memory module SIMM SIMMs are available from your local Minolta dealer Capacity 1 2 4 8 16 32 MB Parity Non parity Type Fast page Access speed 70 ns or less Number of Pins 72 PageWorks book Page 5 Tuesday April 21 1998 3 55 PM ...

Страница 240: ...MEMO Specifications Chapter 8 PageWorks book Page 6 Tuesday April 21 1998 3 55 PM ...

Страница 241: ...Appendix Glossary A Glossary Appendix A PageWorks book Page 1 Tuesday April 21 1998 3 55 PM ...

Страница 242: ...Glossary Appendix APageWorks book Page 0 Tuesday April 21 1998 3 55 PM ...

Страница 243: ...d to select an object SEE double click control panel A bank of indicators that show the current status of the printer Panel buttons that are located on the control panel make it possible to perform a variety of different operations default Settings that are preset in the absence of user specified settings dialog box A box that appears in order for the user to input information or settings required...

Страница 244: ...utted from the printer The tray can hold up to 20 sheets of paper face up face down selection switch This switch is used to specify the facing output direction of documents as they are output from the printer When the optional Face up tray is installed the position of this switch determines whether documents are output from the printer facing up to Face up tray or facing down to Face down tray 500...

Страница 245: ...A high resolution peripheral used to print text and graphics onto paper or other media A rotating disk is used to reflect laser beams onto a photosensitive drum the image of the page is then transferred via electrostatic charged toner The final image is fused onto a piece of charged paper using heat as it is rolled against the drum setting the toner onto the paper or other media manual feed tray A...

Страница 246: ...er tray paper support A expansion tray for long sized paper to be placed on the Tray 1 paper transport roller A rolling mechanism that carries the paper through the various functions of the printer during the printing process parallel interface An output input port utilizing multiple data circuitry parallel interface connector A connector that enables the transfer of data between the printer and t...

Страница 247: ...i ROM Acronym for read only memory screen font A typeface that can be displayed on the computer s monitor second paper cassette unit A tray unit that feeds an additional 500 sheets of paper to the printer SIMM Acronym for single in line memory module toner Ink in the form of a plastic powder that is contained in a cartridge toner cartridge A tube shaped cartridge containing toner powder that is us...

Страница 248: ...n This button releases the hinge that locks the cover of the printer SEE top cover Tray 1 A tray that can hold up to 150 sheets of paper for feeding into the printer Tray 2 Five types of Tray 2 cassettes can be installed into the second paper cassette unit SEE second paper cassette unit Each cassette can hold up 500 sheets of one of the following paper sizes A4 B5 Legal Letter and Executive typefa...

Страница 249: ...Appendix Index B Index Appendix B PageWorks book Page 1 Tuesday April 21 1998 3 55 PM ...

Страница 250: ...Index Appendix BPageWorks book Page 0 Tuesday April 21 1998 3 55 PM ...

Страница 251: ...playing the Driver Setup Di alog 4 8 4 16 4 43 4 63 DOS Printing Utilities 4 86 Drum Cartridge 1 3 Replacing the Drum Car tridge 6 6 Drum Counter 5 17 Resetting the Drum Counter 6 10 E Enhanced Driver Setup Dialog 4 78 F Face Down Tray 1 2 2 7 Face Up Tray 1 2 2 11 Features 1 1 Hardware 1 1 Software 1 1 Fit to Paper Dialog 4 81 Font Selection Screen 4 97 Fonts 4 75 Functions 4 76 G Grounding 2 2 I...

Страница 252: ...nel Win dows Starting Up 5 8 Using the Control Panel 5 11 Printer Name 5 18 Printer Pard and Accessories 1 2 Printer Setting 5 15 Printer Specifications 8 1 Printer Supplies 2 6 Printing on Envelopes 3 11 Printing Paper 3 1 Printout too dark 7 10 Printout too light 7 10 Priority Feed 5 14 Profiles 4 91 Q Quality 4 73 S Second Paper Cassette Unit 2 9 8 3 Selecting a Locationg for the Printer 2 1 Se...

Страница 253: ...mory 5 18 Tray 1 Setting 5 14 Tray 2 Counter 5 17 Turning on the Printer 2 17 Type 3 1 U Uneven print density 7 11 Uninstalling the Printer Driver 4 6 4 15 4 41 4 61 Using the Infrared Port Op tion 2 24 Using the Printer Driver Under Windows 4 66 Using the Printer Control Panel 4 90 5 11 Using the Status Display 4 103 5 4 W Watermark Dialog 4 82 White or black line 7 12 PageWorks book Page 3 Tuesd...

Страница 254: ...MEMO PageWorks book Page 4 Tuesday April 21 1998 3 55 PM ...

Страница 255: ...2 chome Azuchi machi Chuo ku Osaka 541 0052 Japan 4109 7701 01 1998 5 Copyright 1998 MINOLTA CO LTD Printed in Japan The information contained in this manual is subject to change without notice to incorporate improvements made on the product or products the manual covers ...

Отзывы: