background image


29

Chapter 6. Machine adjustment and setting up 

GB


6.1. Control panel 

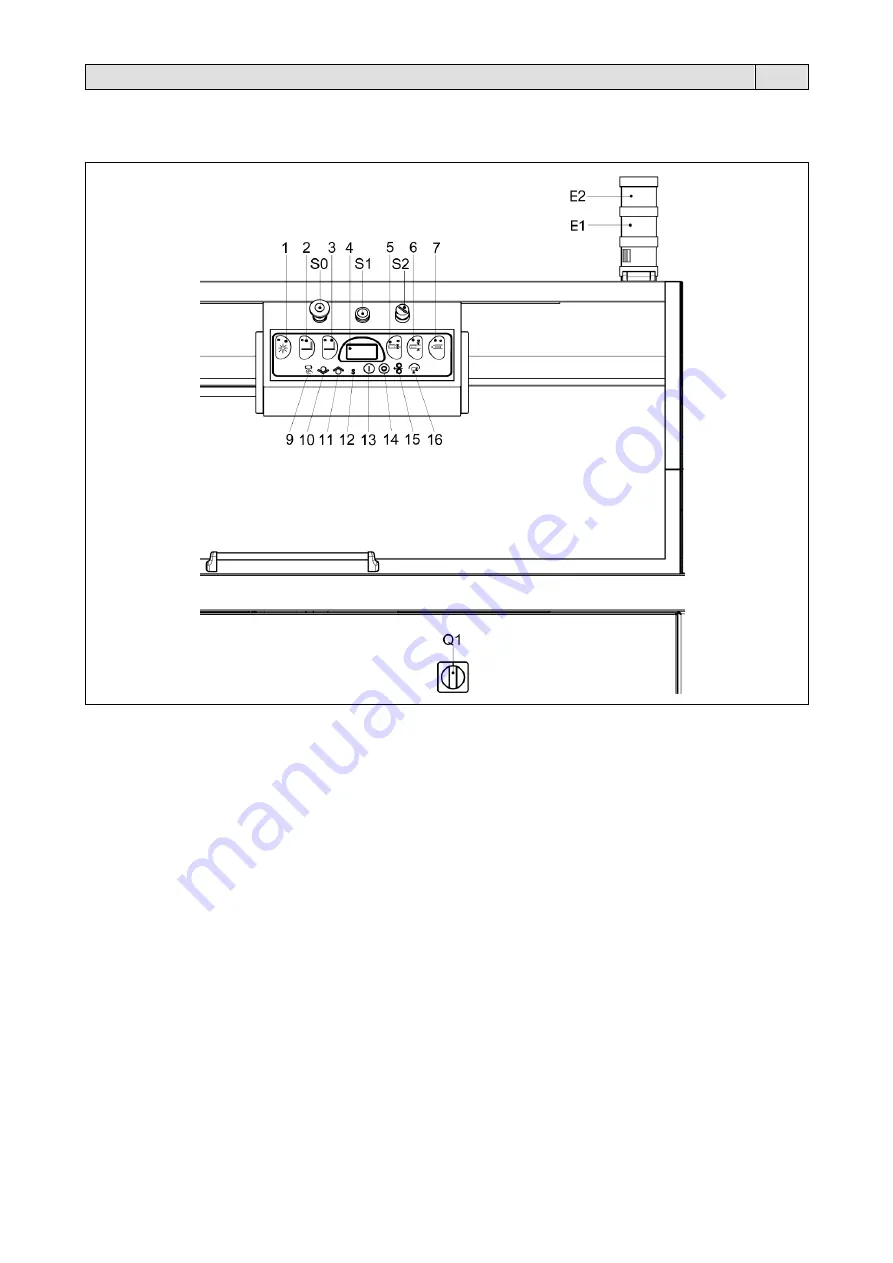
The machine is fitted with a control panel, mounted on support, from which all programming and operation functions can 
be set. 


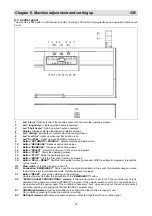
1


Led “alarm”

. Flashes if one of the machine sensors shuts down the operating process. 

2


Led “long heater”

. Lights up when heater is powered. 

3


Led “short heater”

. Lights up when heater is powered. 

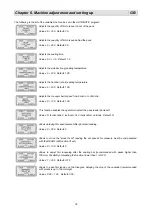
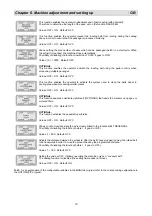
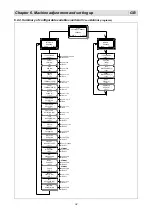
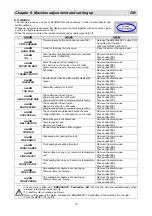
4 Display

. Displays selected functions and relative settings. 

5


Led “sealing”

. Illuminates to indicate machine sealing process. 

6


Led “rear film”

. Lights up when rear film position is on. 

7


Led “front film”

. Lights up when front film position is on. 

9


Button “AUTOMATIC – MANUAL”

. Selects machine operation mode. 

10


Button “DECREASE”

. Reduces set function values. 

11


Button “INCREASE”

. Increases set function values. 

12 Button 

“SELECT”

. Selects functions set in the various programs. 

13


Button “START”

. Starts the operating process. 

14


Button “STOP”

. Stops the operating process. 

15


Button “DRIVE”

. Start the “film drive” function (in manual). 

16


Button “SEAL – RESET”

. Start the film sealing function (in manual). With the automatic programm it resets the 

cycles counter. 

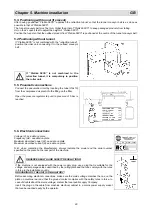
Q1 Main 

switch. 

Turns the machine on and off. 

S0 Pushbutton


“EMERGENCY”

. Shuts down the machine immediately in the event of immediate danger or when 

the machine is set to maintenance mode. Rotate clockwise to release. 

S1 Button 

“RESET”.

 Press when starting up the machine. 

Restores the machine after the intervention of the “

EMERGENCY

” button.


S2 

“BYPASS SAFETY PROTECTIONS” selector.

 If this selector switch is set to OFF, the machine may only be 

operated if the panels are closed (AUTOMATIC program). If this selector switch is set to ON, the machine may 
be operated with the panels open. This condition is necessary “only” when carrying out the set-up procedures 
and when inserting or changing the film reel (MANUAL program only). 

E1 

GREEN light element. 

Flashes (intermittent green light) when the machine is ready for use.  

On (continuous green light) when the machine is running. 

E2 

RED light element

. Illuminated whenever an alarm is activated, together with an acoustic signal.


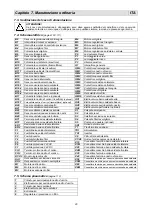
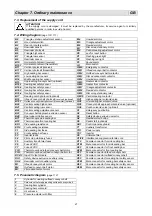
Содержание Pratika 56 CS Series

Страница 1: ...EN E INSTRUCCIONES PARA LA INSTALACIÓN USO Y MANTENIMENTO Pratika 56CS I LEGGERE ATTENTAMENTE QUESTE ISTRUZIONI PRIMA DI USARE LA MACCHINA GB BEFORE USING THE MACHINE PLEASE CAREFULLY READ THE INSTRUCTIONS D BITTE LESEN SIE DIESE ANLEITUNG GENAU DURCH BEVOR SIE DIE MASCHINE BENÜTZEN F PRIERE DE LIRE ATTENTIVEMENT CE MANUEL D INSTRUCTIONS AVANT D UTILISER LA MACHINE E LEER ATENTAMENTE ESTE MANUAL A...

Страница 2: ...UTOMATICO e MANUALE 09 6 2 1 1 Modalitá AUTOMATICO 09 6 2 1 2 Modalitá MANUALE 10 6 2 2 Scelta della lingua 10 6 2 3 Elenco e spiegazione delle variabili impostabili programma AUTOMATICO 10 6 2 4 Schema riassuntivo delle variabili impostabili programma AUTOMATICO e MANUALE 13 6 3 Allarmi 14 6 4 Inserimento del film 15 6 5 Regolazioni 17 6 5 1 Regolazione del triangolo superiore 17 6 5 2 Regolazion...

Страница 3: ... eventuale irregolarità di funzionamento Non utilizzare la macchina se in avaria È vietato manomettere i dispositivi ed i circuiti di sicurezza È vietato operare con le sicurezze disinserite o ripari fissi non installati È vietato abbandonare la macchina con ripari smontati o montati non correttamente È vietato eseguire modifiche alla macchina senza l autorizzazione del costruttore Il quadro elett...

Страница 4: ... macchina Peso e dimensioni dell imballo 2940 x 1440 x 1870mm Peso 774Kg Peso della macchina 724Kg Alimentazione pneumatica 120 l min Produzione massima 2400 confezioni ora I Collegamento elettrico P Collegamento pneumatico C Presa attacco supplementare ...

Страница 5: ...e misure indicate nella tabella si riferiscono alla misura max della singola dimensione Per la misura max della confezione b x c bisogna comunque fare riferimento al capitolo 2 2 dove si vede che la somma di b c è comunque uguale alla larghezza della bobina del film meno 100mm 3 2 Ciò che si può confezionare Queste macchine sono in grado di confezionare una vasta gamma di prodotti completamente di...

Страница 6: ... interruttore generale nella posizione 0 OFF 4 2 Rischi residui La macchina non presenta rischi di elevato grado di pericolosità ciò nonostante è necessario attenersi ai divieti ed alle avvertenze indicate di seguito Pericolo di trascinamento Pericolo generato da elementi mobili nastri trasportatori rulli motorizzati con i quali si può venire a contatto durante le fasi di lavoro Pericolo di ustion...

Страница 7: ...ere le viti e le eventuali piastrine che fissano la macchina al pallet Sollevare la macchina dal pallet utilizzando un carrello elevatore a forche e posizionarla sul pavimento Per il sollevamento della macchina posizionare le pale del carrello elevatore in corrispondenza del punto indicato dall adesivo specifico applicato sulla macchina Disimballare la sirena AS e agganciarla al supporto S 5 2 Con...

Страница 8: ... pressione fino ad ottenere la pressione di 5 bar 5 6 Collegamento elettrico Tensione V vedere dati targhetta Frequenza Hz vedere dati targhetta Potenza massima assorbita W vedere dati targhetta Corrente massima assorbita A vedere dati targhetta N B Per qualsiasi comunicazione con il costruttore citare sempre il modello della macchina e il numero di matricola indicati sulla targhetta applicata nel...

Страница 9: ...mmi 13 Pulsante START Avviamento del processo operativo 14 Pulsante STOP Arresto del processo operativo 15 Pulsante TRAINO Attiva la funzione traino film in manuale 16 Pulsante SALDA AZZERA Attiva la funzione di saldatura film in manuale In programma automatico azzera il conta colpi Q1 Interruttore generale Accende e spegne la macchina S0 Pulsante EMERGENZA Arresta immediatamente la macchina in ca...

Страница 10: ...mma attivo AUTOMATICO con indicato il numero oppure MANUALE XXXXXXX indica il numero di pezzi prodotti F XXX X indica la temperatura della barra frontale L XXX X indica la temperatura della barra laterale Durante la fase di riscaldamento della macchina sono accesi i led 2 e 3 I led si spengono quando le barre saldanti hanno raggiunto la temperatura impostata nel programma in esecuzione Iniziare un...

Страница 11: ...niziale premere il pulsante 12 Premere il pulsante 11 Premere il pulsante 12 Premere il pulsante 11 Premere il pulsante 12 Compare la videata con la nuova lingua per selezionare la lingua desiderata tra quelle in elenco es ENG ITA italiano ENG inglese FRA francese GER tedesco ESP spagnolo per confermare la lingua scelta 6 2 3 Elenco e spiegazione delle variabili impostabili programma AUTOMATICO Pe...

Страница 12: ...00 Default 100 Permette la scelta della fotocellula di lettura del pacco Valori O orizzontale V verticale O V orizzontale verticale Default O Permette di ritardare l avanzamento del film dopo la lettura della fotocellula Valori 0 250 Default 0 Permette di spostare la lettura fine del prodotto dello spazio impostato Questa misura va compensata con la funzione FILM POSTERIORE nel caso sia impostata ...

Страница 13: ...tura per il passaggio di pezzi piccoli Valori OFF ON Default OFF OPTIONAL Abilita la lettura da una apposita fotocellula optional di tacche marcate sul film opaco o colorato Valori OFF ON Default OFF OPTIONAL Attiva il perforatore pneumatico optional Valori OFF ON Default OFF Permette di impostare un lunghezza della confezione fissa ed è strettamente legata alla funzione INVERSIONE NASTRO Possibil...

Страница 14: ... 0 100 Default 100 Valori O V O V Default O Valori 0 250 Default 0 Valori 0 100 Default 0 Valori 1 250 Default OFF Valori 0 00 1 00 Default 0 02 Valori OFF ON Default OFF Valori 0 230 Default 185 Valori OFF ON Default OFF Valori 10 10000 Default OFF OPTIONAL Valori OFF ON Default OFF TEMPO DI SALDATURA s 1 2 VELOCITA TAPPETI 100 RITARDO SBOBINATORE s 0 02 LETTURA TACCHE OFF INVERSIONE NASTRO mm OF...

Страница 15: ...ensore barra alta é guasto Manca aria compressa o l elettrovalvola è guasta Rimuovere la causa dell allarme Premere il pulsante 16 Premere il pulsante 13 ALLARME FOTOCELLULE Le fotocellule rimangono oscurate oltre un tempo massimo oppure non allineate o guaste Rimuovere la causa dell allarme Premere il pulsante 16 Premere il pulsante 13 ALLARME RITORNO NASTRO Il nastro mobile non é arretrato Manca...

Страница 16: ...ntroduzione del film premere il pulsante che trovate alla destra della bobina Tenendo premuto il pulsante si aziona il rullo motorizzato su cui appoggia la bobina rilasciando la quantità di film necessaria Inserire i due lembi del film uno sopra e uno sotto il triangolo di guida superiore Ts Afferrare le due estremità del film e svolgere per circa 1 metro FASE 2 Prendere il lato inferiore del film...

Страница 17: ...ad annodare il film sul perno presente sulla flangia posteriore F FASE 6 Regolare quindi le aste di posizionamento B agendo sulle manopole M3 in modo da bloccare la bobina lasciando 5 mm di spazio tra le aste e la bobina Nota Il corretto posizionamento della bobina si ha quando stando dietro alla macchina il lato sinistro del film si trova ad una distanza A pari alla metà della distanza H apertura...

Страница 18: ... regolare la posizione del nastro di ingresso N1 Allentare la manopola M1 e regolare la posizione del nastro in modo che il prodotto abbia un minimo di gioco tra l asta di guida circa 20mm e la spalla posteriore del nastro circa 10mm 6 5 3 Regolazione delle fotocellule La macchina è predisposta per il posizionamento della fotocellula a lettura verticale B11 indicata per i prodotti particolarmente ...

Страница 19: ...e essere posizionato in modo che la saldatura del film si trovi a metà dell altezza della confezione Per alzare o abbassare il telaio di saldatura agire come segue Premere il pulsante 9 e mettere in funzione MANUALE Premere il pulsante START 13 Premere contemporaneamente i pulsanti 9 e 11 per alzare il telaio Premere contemporaneamente i pulsanti 9 e 12 per abbassare il telaio 6 6 Confezionamento ...

Страница 20: ...in contatto col film utilizzando stracci o carta Non utilizzare oggetti che possano danneggiarne la superficie Ogni 2 settimane Impianto pneumatico Assicurarsi che i raccordi non abbiano perdite Eliminare l eventuale condensa formatasi nel gruppo filtro Ogni 12 mesi Supporti Effettuare la lubrificazione con grasso tipo NLGI 2 Ogni 12 mesi Accoppiamenti tra ingranaggi Controllare la presenza di gra...

Страница 21: ... optional QV2 Elettrovalvola barra saldante bassa B20 Sensore saldatura centrale alto QV3 Elettrovalvola avvicinamento nastro B21 Sensore saldatura centrale basso QV4 Elettrovalvola perforatore optional B22 Sensore altezza saldatura centrale S1 Pulsante emergenza B23 Sensore esclusione avvicinamento nastri S2 Pulsante reset B40 Sensore carrello supporto bobina S3 Selettore esclusione sicurezza BT1...

Страница 22: ...a garanzia consiste nella sostituzione o riparazione gratuita di tutte quelle parti riscontrate da noi difettose per anomalie di materiali Le riparazioni o sostituzioni avvengono normalmente presso la casa costruttrice con l addebito all acquirente delle spese di trasporto o manodopera Qualora le riparazioni o sostituzioni vengano eseguite presso la sede dell acquirente quest ultimo sarà tenuto a ...

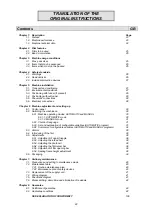
Страница 23: ...ting modes AUTOMATIC and MANUAL 30 6 2 1 1 AUTOMATIC mode 30 6 2 1 2 MANUAL mode 31 6 2 2 Choice of language 31 6 2 3 List and explanation of configurable variables AUTOMATIC program 31 6 2 4 Summary of configurable variables AUTOMATIC and MANUAL programs 34 6 3 Alarms 35 6 4 Introducing of the film 36 6 5 Adjustments 38 6 5 1 Adjustment of upper triangle 38 6 5 2 Adjusting the infeed belt 38 6 5 ...

Страница 24: ... all times Eliminate all safety hazard conditions before using the machine and always notify the head personnel of any malfunction Never use the machine in the event of fault Never tamper with safety devices or circuits Never operate the machinery with safety devices disabled or fixed guards removed Never leave the machine unattended with guards disassembled or mounted incorrectly Never perform mo...

Страница 25: ...hine technical data Package weight and sizes 2940 x 1440 x 1870mm Peso 774Kg Machine weight 724Kg Pneumatic supply 120 l min Maximum production 2400 packages hour I Electrical connections P Pneumatic connections C Supplementary coupling ...

Страница 26: ...1 Max pack sizes a 600mm b 400mm c 240mm N B measurements shown refer to the maximum for the single dimension Refer to chapter 2 2 to get max dimension of pack b x c the addition of b c is equal to film roll width minus 100mm 3 2 Items that may be packaged These machines are capable of packing a wide range of completely different products They are used successfully in the following sectors food ma...

Страница 27: ...achine unattended switch it off by turning the main switch to the 0 OFF position 4 2 Residual risks The machine does not feature high hazard risks nevertheless the following warnings and precautions must be observed Dragging hazard Hazard generated by moving elements conveyor belts motor driven rollers in the event of contact during operation phases Burn hazard Risk due to hot sealing knives for f...

Страница 28: ...board Remove the screws and any plate intended to fasten the machine to the pallet Lift the machine from the pallet by using a fork lift truck and arrange it on the floor For the machine lifting place the lift truck vanes up to the point stated on the specific label applied on the machine Unpack the siren AS and hook it up to the support S 5 2 Environmental conditions Place the machine level on th...

Страница 29: ... fitting on the filter Open the pressure regulator tap until a pressure of 5 bar is reached 5 6 Electrical connections Voltage V see data on plate Frequency Hz see data on plate Maximum absorbed power W see data on plate Maximum absorbed current A see data on plate N B when contacting the Manufacturer always indicate the model and the serial number specified on the plate on the rear part of the ma...

Страница 30: ...5 Button DRIVE Start the film drive function in manual 16 Button SEAL RESET Start the film sealing function in manual With the automatic programm it resets the cycles counter Q1 Main switch Turns the machine on and off S0 Pushbutton EMERGENCY Shuts down the machine immediately in the event of immediate danger or when the machine is set to maintenance mode Rotate clockwise to release S1 Button RESE...

Страница 31: ...TART AUTOMATIC 01 MANUAL indicates the program enabled AUTOMATIC with the number indicated or MANUAL XXXXXXX indicates the number of pieces produced F XXX X indicates the temperature of the front bar L XXX X indicates the temperature of the side bar LEDs 2 and 3 are lit while the machine is heating up The LEDs turn off when the sealing bars have reached the set temperature in the execution program...

Страница 32: ...escribed below From home menu Press the button 12 Press the button 11 Press the button 12 Press the button 11 Press the button 12 The screen appears with the new language to select the language you desire from among those on the list e g ITA ITA Italian ENG English FRA French GER German ESP Spanish to confirm the language chosen 6 2 3 List and explanation of configurable variables AUTOMATIC progra...

Страница 33: ...m min to 30m min Values 0 100 Default 100 This function enables the operator to select the pack reader photocell Values O horizontal V vertical O V horizontal vertical Default O Allows delaying film advancement after photocell reading Values 0 250 Default 0 Allows to move the product end reading the set space This measure must be compensated with the REAR FILM function if set Values 0 100 Default ...

Страница 34: ...stem used to move the belts closer to sealing area when processing smaller pieces Values OFF ON Default OFF OPTIONAL This function enables a dedicated photocell OPTIONAL that reads the markers on opaque or coloured films Values OFF ON Default OFF OPTIONAL This function activates the pneumatic perforator Values OFF ON Default OFF Allows to set a fixed pack length and is closely linked to the functi...

Страница 35: ...ange 0 230 Default 185 Range OFF ON Default OFF Range 10 10000 Default OFF MARK READOUT OFF FUNCTION QUALIFICATION ON BELT REVERSAL mm OFF PACKET LENGTH mm OFF PUNCH OFF Range 1 600 Default OFF OPTIONAL Range OFF ON Default OFF OPTIONAL Range OFF ON Default OFF Range 1 500 Default OFF STOP AUTOMATIC MANUAL XXXXXXX FRONT FILM mm 25 SEALING TIME s 1 2 Range 0 0 3 0 Default 1 2 FRONT TEMPERATURE C 18...

Страница 36: ... button 13 ALARM BAR DESCENT The sealing bar doesn t open Upper bar sensor is out of order Compressed air lack or solenoid valve is faulty Remove the alarm cause Press button 16 Press button 13 ALARM PHOTOCELLS The photocells are darkened beyond the max configuration time or not aligned or our of order Remove the alarm cause Press button 16 Press button 13 ALARM BELT RETURN Mobil conveyor is not d...

Страница 37: ...ce the film press the button on the right of the reel Press and hold this button to activate the motorised roller that the reel rests on in order to release the required quantity of film Insert the two film flaps one above and one below the upper guide triangle Ts Grasp the two ends of the film and unwind about 1 metre PHASE 2 Take the lower edge of the film corresponding to the rear edge of the i...

Страница 38: ...and secure it to the pin on the rear flange F PHASE 6 Next adjust the positioning bars B regulating the knob M3 in order to lock the reel and leaving a gap of 5 mm between the bars and the reel N B The reel is positioned correctly when the left edge of the film viewed from the rear of the machine is at a distance A equivalent to half the distance H aperture of the triangles ...

Страница 39: ...ccording to the width L of the product to be packaged Loosen the knob M1 and adjust the position of the belt so that the product has a minimum amount of play between the guiding rod approx 20mm and the rear frame of the belt approx 10mm 6 5 3 Adjusting the photocell The machine is set up for the positioning of the vertical reading photocell B11 recommended for extra low products and the horizontal...

Страница 40: ...g frame should be positioned in such a way that the film welding is made at half the packaging height To raise or lower the sealing frame Press the button 9 and choose the MANUAL mode Press the button START 13 Press simultaneously the buttons 9 and 11 to raise the sealing frame Press simultaneously the buttons 9 and 12 to lower the sealing frame 6 6 Packaging Once all adjustments have been made th...

Страница 41: ...Every day Blade Clean surfaces that come into contact with the film using cloths or paper Never use objects that may damage the surfaces Every 2 weeks Pneumatic circuit Ensure that there are no leaks from fittings Eliminate all condensate formed in the filter unit Every 12 months Supports Carry out lubrication with grease type NLGI 2 Every 12 months Gear couplings Ensure sufficient lubrication Eve...

Страница 42: ...olenoid valve B20 Central sealing high sensor QV3 Conveyor belt approach solenoid valve optional B21 Central sealing low sensor QV4 Punch solenoid valve optional B22 Central sealing adjustment sensor S1 Emergency pushbutton B23 Conveyor belt approach exclusion sensor S2 Reset button B40 Reel support trolley sensor S3 Safety device exclusion selector BT1 Thermocouple side sealing bar S4 Rewinder st...

Страница 43: ... 12 months and comes into force on the installation date of the machine The guarantee covers free replacement or repair of any parts due to defects arising from faulty material The repairs or replacement are usually carried out at the manufacturer s premises with transport or labour charged to the buyer If the repair or replacement is carried out at the buyer s premises he shall bear the travellin...

Страница 44: ...schine AUTOMATISCH und MANUELL 51 6 2 1 1 AUTOMATISCHE Betriebsart 51 6 2 1 2 MANUELLE Betriebsart 52 6 2 2 Sprachwahl 52 6 2 3 Liste und Erklärung der programmierbaren Variablen AUTOMATISCHES Programm 52 6 2 4 Übersichtsplan der programmierbaren Variabeln AUTOMATISCHES und MANUELLES Programm 55 6 3 Alarme 56 6 4 Einsetzen der Folie 57 6 5 Einstellungen 59 6 5 1 Einstellung des oberen Dreiecks 59 ...

Страница 45: ...b Wenden Sie die Maschine nicht an wenn sie eine Störung hat Es ist verboten Veränderungen an den Sicherheitsvorrichtungen und kreisen vorzunehmen Es ist verboten zu arbeiten wenn die Sicherheitsvorrichtungen ausgeschaltet oder die feststehenden Schutzeinrichtungen nicht eingebaut sind Es ist verboten die Maschine alleine zu lassen wenn die Schutzeinrichtungen ausgebaut oder nicht richtig montiert...

Страница 46: ...der Maschine Gewicht und Größen der Verpackung 2940 x 1440 x 1870mm Gewicht 774Kg Gewicht der Maschine 724Kg Druckluftversorgung 120 l min Höchstproduktion 2400 Verpackungen pro Stunde I Elektrischer Anschluß P Luftverbindung C Zusätzlicher Anschluss ...

Страница 47: ...essungen der Packung a 600mm b 400mm c 240mm ANM Die in der Tabelle angegebenen Maβe beziehen sich auf die max Größe der einzelnen Packung Was die Höchstmaße der Packung b x c betrifft beziehen Sie sich bitte in jedem Fall auf das Kapitel 2 2 aus dem hervorgeht dass die Summe von b c gleich der Breite der Folienspule 100mm ist 3 2 Was verpackt werden kann Diese Maschinen können für die Verpackung ...

Страница 48: ...schalter der Stromversorgung der Schalttafel abschalten Falls sich der Bediener von der Maschine entfernt muss er die Maschine ausschalten und den Hauptschalter auf 0 OFF stellen 4 2 Restrisiken Die Maschine weist keine Risiken mit hoher Gefahr auf Dennoch ist es notwendig sich an die Verbote und Warnungen zu halten die in der Folge aufgeführt sind Gefahr des Mitschleifens Diese Gefahr entsteht du...

Страница 49: ...tte befestigen Heben Sie die Maschine von der Palette durch einen Hubwagen Legen Sie sie auf den Boden Um die Maschine zu heben die Gabel vom Gabelstapler bei den entsprechenden Aufkleber auf der Maschine positionieren Die Sirene AS auspacken und an dem Halter S befestigen 5 2 Umweltbedingungen Das Gerät muss eben auf dem Boden aufgestellt werden sowie in einer geeigneten Umgebung die trocken ist ...

Страница 50: ...ausführen Das Druckreglerventil auf 5 bar öffnen 5 6 Elektrischer Anschluss Spannung V siehe Typenschild Frequenz Hz siehe Typenschild Höchste Leistungsaufnahme W siehe Typenschild Höchste Stromaufnahme A siehe Typenschild ANM Für jede Mitteilung mit dem Hersteller immer das Modell und die Registriernummer nennen die auf dem Schild hinter der Maschine spezifiziert sind BEACHTEN SIE DIE VORSCHRIFTE...

Страница 51: ...ktionen 13 Taste START Start des Betriebsprozesses 14 Taste STOP Beenden des Betriebsprozesses 15 Taste ZUG Aktiviert die Funktion Folienzug im manuellen Betriebsmodus 16 Taste SCHWEISSEN ZURÜCKSETZEN Aktiviert das Folienschweißen im manuellen Betriebsmodus Im automatischen Betriebsmodus wird der Zähler zurückgesetzt Q1 Hauptschalter Schaltet die Maschine ein und aus S0 NOTTASTE Schaltet bei Gefah...

Страница 52: ...UTOMATISCH mit der Nummer oder MANUELL XXXXXXX Zeigt die Anzahl der hergestellten Stücke an F XXX X Zeigt die Temperatur der vorderen Stange an L XXX X Zeigt die Temperatur der seitlichen Stange an Während der Heizphase der Maschine sind die LEDs 2 und 3 eingeschaltet Die LEDs erlöschen wenn die Heizstangen die für das laufende Programm eingestellte Temperatur erreicht haben Nur einen Zyklus begin...

Страница 53: ...cken Die Taste 11 drücken Die Taste 12 drücken Die Taste 11 drücken Die Taste 12 drücken Es erscheint die Bildschrimseite mit der neuen Sprache um die gewünschte Sprache aus der Liste auszuwählen z B ENG ITA Italienisch ENG Englisch FRA Französich GER Deutsch ESP Spanisch um die gewählte Sprache zu bestätigen 6 2 3 Liste und Erklärung der programmierbaren Variablen AUTOMATISCHES Programm Um die im...

Страница 54: ...rmöglicht die Wahl der Fotozelle für die Paketerfassung Werte O horizontal V vertikal O V horizontal vertikal Default O Die Funktion ermöglicht es nach der Erfassung der Fotozelle den Filmvorschub zu verzögern Werte 0 250 Default 0 Die Funktion ermöglicht die Verschiebung der Paketende Ablesung Dieser Wert wird mit dem Wert der Funktion FILM HINTEN wenn eingestellt verrechnet Werte 0 100 Default 0...

Страница 55: ...ereich für die Durchführung kleiner Produkte Werte OFF ON Default OFF OPTIONAL Diese Funktion ermöglicht die Erfassung von auf matter oder farbiger Folie angebrachten Markierungen durch eine Photozelle Werte OFF ON Default OFF OPTIONAL Diese Funktion aktiviert den pneumatischen Locher Werte OFF ON Default OFF Die Funktion ermöglicht es eine feste Länge der Verpackung einzustellen und ist eng mit d...

Страница 56: ...ault 0 Werte 0 100 Default 0 Werte 1 250 Default OFF Werte 0 00 1 00 Default 0 02 Werte OFF ON Default OFF Werte 0 230 Default 185 Werte OFF ON Default OFF Werte 10 10000 Default OFF OPTIONAL Werte OFF ON Default OFF STUFENABLESEN OFF FUNCTIONS BEFAHIGUNG ON BANDWENDUNG mm OFF PACKETLANGE mm OFF DURCHBORUNG OFF Werte 1 600 Default OFF OPTIONAL Werte OFF ON Default OFF OPTIONAL Werte OFF ON Default...

Страница 57: ...en oben ist beschädigt Keine Druckluft oder defektes Elektroventil Die Alarmursache beseitigen SCHWEISSEN ZURÜCKSETZEN 16 drücken START 13 drücken ALARM PHOTOZELLE Die Fotozellen bleibt über die Höchstdauer hinaus verdeckt sind nicht ausgerichtet oder beschädigt Die Alarmursache beseitigen SCHWEISSEN ZURÜCKSETZEN 16 drücken START 13 drücken ALARM BANDER RUCKKEHR Das Transportband ist nicht zurückg...

Страница 58: ... der Abbildung einführen Für ein einfacheres Einlegen der Folie die Taste rechts der Rolle drücken Die Taste gedrückt halten die motorisierte Rolle auf der die Rolle aufliegt wird angetrieben und gibt die erforderliche Folienmenge aus Die beiden Folienseiten über und unter das obere Führungsdreieck Ts einsetzen Die Folie an beiden Enden festhalten und zirka 1 Meter ausrollen PHASE 2 Die untere Fol...

Страница 59: ...Flansch F vorhandenen Bolzen festgemacht werden kann PHASE 6 Schließlich die Positionierungsstäbe B einstellen Dazu die Knöpfe M3 so betätigen dass die Rolle blockiert wird und ein Freiraum von 5 mm zwischen den Stäben und der Rolle belassen bleibt Hinweis Die Rolle ist dann korrekt positioniert Ansicht von der Rückseite der Maschine wenn sich die linke Folienseite in einem Abstand A gleich der Hä...

Страница 60: ...ingangsbandes einstellen N1 Den Knauf M1 lockern und die Position des Bandes so einstellen dass dem Produkt ein minimales Spiel zwischen dem Führungsstift circa 20mm und der hinteren Schulter des Bandes circa 10mm zur Verfügung steht 6 5 3 Einstellung der Fotozellen Die Maschine ist für die Positionierung der Fotozelle für die vertikale Ablesung B11 vorbereitet die sich für besonders niedrige Prod...

Страница 61: ...llen man soll die Verpackung stellen mit der Schweissung genau in der Mitte der Verpackung Um den Schweissrahmen höher stellen oder senken soll man wie folgt machen Taste 9 drücken und in MANUELLEN Betrieb setzen Taste START 13 Drücken Taste 9 und 11 gleichzeitig drücken um den Schweissrahmen erheben Taste 9 und 12 gleichzeitig dr ücken um den Schweissrahmen zu senken 6 6 Verpacken Wenn alle Einst...

Страница 62: ...tigen Täglich Klingen Reinigen Sie die Fläche die mit der Folie in Berührung kommt mit Lappen oder Papier Verwenden Sie keine Werkzeuge die die Fläche beschädigen könnten Alle 2 Wochen Druckluftanlage Stellen Sie sicher dass die Anschlüsse keine Lecks haben Lassen Sie mögliches Kondensat das sich in der Filtereinheit gebildet haben kann ab Alle 12 Monate Halterungen Träger Schmieren Sie die Elemen...

Страница 63: ...ngsgerät Zubehör QV2 Elektroventil Stange unten B20 Sensor Zentralschweissung oben QV3 Elektroventil Bänderannäherung Zubehör B21 Sensor Zentralschweissung unten QV4 Elektroventil Perforierung Zubehör B22 Sensor Höhe Zentralschweissung S1 Not Aus Schalter B23 Sensor Auschliessung Bänderannäherung S2 Resettaste B40 Sensor des Spulenhaltewagens S3 Wähler zum Ausschluss der Sicherheitsvorrichtung BT1...

Страница 64: ...ie erstreckt sich auf den kostenlosen Austausch oder die Reparatur all jener Teile die wir aufgrund von Werkstoffanomalien als fehlerhaft einstufen Die Reparaturen bzw der Austausch werden normalerweise im Werk des Herstellers vorgenommen wobei der Käufer die Transportkosten und den Arbeitslohn trägt Sollte die Reparatur oder der Austausch beim Käufer vorgenommen werden so trägt dieser die Reiseko...

Страница 65: ...e de fonctionnement de la machine AUTOMATIQUE et MANUEL 72 6 2 1 1 Mode AUTOMATIQUE 72 6 2 1 2 Mode MANUEL 73 6 2 2 Sélection de la langue 73 6 2 3 Liste et définition des variables paramétrables programme AUTOMATIQUE 73 6 2 4 Schéma récapitulatif des variables paramétrables programme AUTOMATIQUE et MANUEL 76 6 3 Alarmes 77 6 4 Amorçage du film 78 6 5 Réglages 80 6 5 1 Réglage du triangle supérieu...

Страница 66: ...hine si elle est en panne Il est interdit de modifier les dispositifs et les circuits de sécurité Il est interdit d opérer avec les sécurités exclues ou les protecteurs fixes non installés Il est interdit d abandonner la machine avec les protecteurs déposés ou posés non correctement Il est interdit d effectuer des modifications à la machine sans l autorisation du fabricant Le tableau électrique do...

Страница 67: ... Poids et dimensions de l emballage 2940 x 1440 x 1870mm Poids 774Kg Poids et dimensions de la machine 724Kg Alimentation pneumatique 120 l min Production maximale 2400 conditionnements heure I Raccordement électrique P Raccordement pneumatique C Prise raccord supplémentaire ...

Страница 68: ...N B les dimensions indiquées dans le dessin permettent de définir la taille maximale de l emballage admissible Pour connaître les emballages admissibles voir rubrique 2 2 où il est expliqué plus en détail que la somme de b et c ne doit pas dépasser la largeur de la bobine de film moins 100mm 3 2 Ce que l on peut emballer Ces machines peuvent emballer une large gamme de produits complètement diffèr...

Страница 69: ...éteinte en mettant l interrupteur général en position 0 OFF 4 2 Risques résiduels La machine ne présente pas de risques élevés de dangerosité mais il est toutefois nécessaire de respecter les interdictions et les mises en garde indiquées ci après Danger de happement Danger généré par des éléments mobiles bandes transporteuses rouleaux motorisés avec lesquels le personnel peut entrer au contact pen...

Страница 70: ...euillard ayant soins de se protéger les yeux avec des lunettes de protection et enlever le carton d emballage Retirer les vis et toute plaquette éventuelle fixant la machine à la palette Soulevez la machine à l aide d un chariot élévateur et placez la au sol Pour le levage de la machine placer le du palleteur en correspondance du point indiqué l adhésif appliqué sur la machine Déballer la sirène A...

Страница 71: ...groupe filtre Ouvrir le robinet du régulateur de pression jusqu à obtenir la pression de 5 bar 5 6 Brancher la machine Tension V voir plaquette Fréquence Hz voir plaquette Puissance maximum absorbée W voir plaquette Intensité maximale A voir plaquette N B quand vous nous contactez citez toujours le modèle et le numéro de série indiqués sur la plaquette apposée sur la partie arrière de la machine R...

Страница 72: ...rogrammes 13 Bouton START Il démarre le processus de fonctionnement 14 Bouton STOP Il arrête le processus de fonctionnement 15 Bouton ENTRAÎNEMENT Il démarre la fonction entraînement film en manuel 16 Bouton SOUDE MISE À ZERO Il démarre la fonction de soudure film en manuel Q1 Interrupteur général Allume et éteint la machine S0 Bouton ARRET D URGENCE Arrête immédiatement la machine soit en cas de ...

Страница 73: ...MANUEL indique le programme activé AUTOMATIQUE en indiquant le numéro ou MANUEL XXXXXXX indique le nombre de pièces produites F XXX X indique la température de la barre frontale L XXX X indique la température de la barre latérale Lors de la phase de réchauffement de la machine les leds 2 et 3 sont allumées Les leds s éteignent lorsque les barres de soudure ont atteint la température configurée dan...

Страница 74: ...r sur le bouton 11 Appuyer sur le bouton 12 Appuyer sur le bouton 11 Appuyer sur le bouton 12 La page écran s affiche dans la nouvelle langue pour sélectionner la langue désirée dans la liste ex ENG ITA italien ENG anglais FRA français GER allemand ESP espagnol pour confirmer la langue sélectionnée 6 2 3 Liste et définition des variables paramétrables programme AUTOMATIQUE Pour afficher les variab...

Страница 75: ...ut 100 La fonction permet de choisir la photocellule de lecture du paquet Valeurs O horizontale V verticale O V horizontale verticale Par défaut O Permet de retarder l avancement du film après la lecture de la photocellule Valeurs 0 250 Par défaut 0 Permet de déplacer la lecture fin du produit de l espace configuré Cette mesure est compensée par la fonction FILM POSTERIEUR si elle est configurée V...

Страница 76: ...zone de soudure pour le passage de petites pièces Valeurs OFF ON Par défaut OFF OPTIONNEL La fonction active la lecture d une photocellule prévue à cet effet OPTIONNEL pour les spots marqués sur le film opaque ou coloré Valeurs OFF ON Par défaut OFF OPTIONNEL La fonction active le perforateur pneumatique Valeurs OFF ON Par défaut OFF Permet de configurer une longueur d emballage fixe et est strict...

Страница 77: ...leurs 1 250 Default OFF Valeurs 0 00 1 00 Default 0 02 Valeurs OFF ON Default OFF Valeurs 0 230 Default 185 Valeurs OFF ON Default OFF Valeurs 10 10000 Default OFF EN OPTION Valeurs OFF ON Default OFF LECTURE ENCOCHES OFF HABILITATION FONCTIONS ON INVERSION TAPIS mm OFF LONGUEUR PAQUET mm OFF PERFORATEUR OFF Valeurs 1 600 Default OFF EN OPTION Valeurs OFF ON Default OFF EN OPTION Valeurs OFF ON De...

Страница 78: ...ce d air comprimé ou électrovanne cassée Eliminer la cause de l alarme Appuyer sur le bouton 16 Appuyer sur le bouton 13 ALARME PHOTOCELLULES Les photocellules restent obturées trop longtemps ou elles ne sont pas alignées ou bien elles sont en panne Eliminer la cause de l alarme Appuyer sur le bouton 16 Appuyer sur le bouton 13 ALARME RETOUR TAPIS La bande mobile ne recule pas Absence d air compri...

Страница 79: ...à la droite de la bobine Maintenir le bouton pressé pour commander le rouleau motorisé sur lequel la bobine est posée pour débiter la quantité de film nécessaire Introduire les deux bouts du film un au dessus et l autre en dessous du triangle de guidage supérieur Ts Prendre les deux extrémités du film et le dérouler sur 1 mètre environ PHASE 2 Prendre la face inférieure du film à hauteur de la fac...

Страница 80: ...ter le film sur la broche située sur la flasque arrière F PHASE 6 Régler ensuite les tringles de position B avec les boutons M3 de manière à immobiliser la bobine en laissant 5 mm d espace entre les tringles et la bobine N B Pour vérifier si la bobine est correctement mise en place se placer derrière la machine et voir si la face gauche du film se trouve à une distance A égale à la moitié de la di...

Страница 81: ... de la bande d entrée N1 Desserrer la manette M1 et régler la position de la bande de façon que le produit ait un minimum de jeu entre la tige de guidage environ 20mm et le montant arrière de la bande environ 10mm 6 5 3 Réglage des cellules photoélectriques La machine est prédisposée pour le positionnement de la photocellule à lecture verticale b11 indiquée pour les produits particulièrement bas e...

Страница 82: ...ositionné de façon à ce que la soudure du film se trouve à la moitié de la hauteur de la confection Pour monter ou baisser le chassis de soudure Appuyer sur le bouton 9 et selectionner le mode MANUEL Appuyer sur le bouton START 13 Appuyer simultanément les boutons 9 et 11 pour monter le chassis de soudure Appuyer simultanément les boutons 9 et 12 pour baisser le chassis de soudure 6 6 Conditionnem...

Страница 83: ... ou du papier Ne pas utiliser d objets qui peuvent abîmer la surface de la machine Toutes les 2 semaines Equipement pneumatique Vérifier si les raccords n ont pas de fuites Eliminer l éventuelle condensation qui se forme dans le groupe filtre Tous les 12 mois Supports Effectuer la lubrification avec de la graisse de type NLGI 2 Tous les 12 mois Couplages entre engrenages Contrôler la présence de g...

Страница 84: ... inférieure B20 Capteur soudure centrale en haut QV3 Electropompe approche tapis accessoire B21 Capteur soudure centrale en bas QV4 Electropompe approche perforateur accessoire B22 Capteur hauteur soudure centrale S1 Bouton arrêt d urgence B23 Capteur exclusion approche rubans S2 Bouton de Reset B40 Capteur du chariot de support de la bobine S3 Sélecteur d exclusion de la sécurité BT1 Thermocouple...

Страница 85: ... garantie nous engage à échanger ou réparer gratuitement toutes les pièces sur lesquelles nous trouvons un vice de matériel Les réparations ou les échanges s effectuent habituellement chez le fabricant l expédition ou la main d œuvre étant aux frais du client Si la réparation ou l échange a lieu chez le client c est à ce dernier qu incombent les frais de déplacement et de main d œuvre Les réparati...

Страница 86: ... y MANUAL 93 6 2 1 1 Modo AUTOMÁTICO 93 6 2 1 2 Modo MANUAL 94 6 2 2 Selección del idioma 94 6 2 3 Lista y descripción de variables programables programa AUTOMÁTICO 94 6 2 4 Esquema de variables configurables programa AUTOMÁTICO y MANUAL 97 6 3 Alarmas 98 6 4 Introducción del film 99 6 5 Regulaciones 101 6 5 1 Regulación del triángulo superior 101 6 5 2 Regulación de la cinta de entrada 101 6 5 3 ...

Страница 87: ...uncionamiento No utilizar la máquina si está averiada Se prohíbe manipular los dispositivos y los circuitos de seguridad Se prohíbe trabajar con los dispositivos de seguridad desactivados o las protecciones fijas no instaladas Se prohíbe abandonar la máquina con las protecciones desmontadas o montadas de modo incorrecto Se prohíbe modificar la máquina sin autorización del fabricante El cuadro eléc...

Страница 88: ...cos de la máquina Peso y dimensiones del embalaje 2940 x 1440 x 1870mm Peso 774Kg Peso de la máquina 724Kg Alimentación neumática 120 l min Producción máxima 2400 envases hora I Conexión eléctrica P Conexión neumática C Toma de conexión auxiliar ...

Страница 89: ... máx de la confección a 600mm b 400mm c 240mm N B las medidas indicadas en la tabla se refieren a la medida màx de cada una de las dimensiones Para la medida màx del paquete b x c hay que referirse al capítulo 2 2 donde se ve que la suma de b c es de todos modos igual al ancho de la bobina del film menos 100mm 3 2 Productos que pueden ser envasados Estas máquinas pueden embalar una amplia gama de ...

Страница 90: ...áquina hay que apagar la máquina poniendo el interruptor general en posición 0 OFF 4 2 Riesgos residuales Aunque los riesgos presentes en la máquina no revisten peligro grave es necesario respetar las prohibiciones y advertencias siguientes Peligro de arrastre Peligro generado por elementos móviles cintas transportadoras rodillos motorizados con los que se puede entrar en contacto durante las fase...

Страница 91: ... y quitar la caja de carton Quitar los tornillos y las eventuales placas que fijan la máquina al pallet Izar la máquina del palet con una carretilla elevadora y depositarla sobre el pavimento Para izar la máquina insertar las horquillas de la carretilla en el punto indicado por el adhesivo aplicado en la máquina Desembalar la sirena AS y acoplarla en el soporte S 5 2 Condiciones ambientales Posici...

Страница 92: ...ón de 5 bar 5 6 Conexión eléctrica Tensión V véanse los datos en la tarjeta Frecuencia Hz véanse los datos en la tarjeta Potencia máxima absorbida W véanse los datos en la tarjeta Corriente máxima absorbida A véanse los datos en la tarjeta NOTA para cualquier comunicación con el constructor citar siempre el modelo de la máquina y el número de matricula indicados en la tarjeta situada en la parte p...

Страница 93: ... proceso operativo 14 Botón STOP Parada del proceso operativo 15 Botón ARRASTRE Activa la función arrastre del film en manual 16 Botón SUELDA PONE EN CERO Activa la función de soldadura del film en manual En programa automático pone en cero el contador de golpes Q1 Interruptor general Enciende y apaga la máquina S0 Pulsador de EMERGENCIA Detiene inmediatamente la máquina en caso de peligro inmedia...

Страница 94: ...START AUTOMATICO 01 MANUAL muestra el programa activo AUTOMÁTICO indicando el número oMANUAL XXXXXXX indica el número de piezas producidas F XXX X indica la temperatura de la barra frontal L XXX X indica la temperatura de la barra lateral Durante la fase de calefacción de la máquina se encienden los led 2 y 3 Los led se apagan cuando las barras soldantes alcanzan la temperatura configurada en el p...

Страница 95: ... inicial presione el botón 12 Presione el botón 11 Presione el botón 12 Presione el botón 11 Presione el botón 12 Aparece la pantalla en el idioma nuevo para seleccionar el idioma deseado entre los que aparecen en la lista ej ENG ITA italiano ENG inglese FRA francese GER tedesco ESP spagnolo para confirmar la lengua seleccionada 6 2 3 Lista y descripción de variables programables programa AUTOMÁTI...

Страница 96: ...res 0 100 Default 100 Esta función permite seleccionar la fotocelula de lectura del paquete Valores O horizontal V vertical O V horizontal vertical Default O Permite atrasar el avance del film después de la lectura de la fotocélula Valores 0 250 Default 0 Permite desplazar la lectura de fin de producto del espacio configurado Esta medida se compensa con la función FILM POSTERIOR en caso de que no ...

Страница 97: ...intas en la zona de sellado para el paso de piezas pequeñas Valores OFF ON Default OFF OPCIONAL La función habilita la lectura de una célula fotoeléctrica OPCIONAL que controla las marcas del film opaco o en color Valores OFF ON Default OFF OPCIONAL La función activa el taladrador neumático Valores OFF ON Default OFF Permite configurar las dimensiones de un embalaje fijo y está íntimamente relacio...

Страница 98: ...lores 1 250 Default OFF Valores 0 00 1 00 Default 0 02 Valores OFF ON Default OFF Valores 0 230 Default 185 Valores OFF ON Default OFF Valores 10 10000 Default OFF Valores OFF ON Default OFF STOP AUTOMATICO START CON PEDAL OFF OPCIONAL Valores 10 10000 Default OFF ACERCAR CINTAS OFF LECTURA MELLAS OFF OPCIONAL Valores OFF ON Default OFF PERFORADORA OFF OPCIONAL Valores OFF ON Default OFF LARGO PAQ...

Страница 99: ...barra de soldadura no se abre Se averió el sensor de la barra de arriba Falta aire comprimido o se averió la electroválvula Quitar la causa de la alarma Apretar el botón 16 Apretar el botón 13 ALARMA FOTOCÉLULAS Las fotocélulas permanecen cubiertas un tiempo máximo o no están alineadas o están averiadas Quitar la causa de la alarma Apretar el botón 16 Apretar el botón 13 ALARMA RETORNO CINTAS La c...

Страница 100: ... presionar el pulsador situado a la derecha de la bobina Sin soltar el pulsador accionar el rodillo motorizado sobre el que se apoya la bobina y liberar la cantidad de film necesaria Introducir las dos pestañas de film por encima y por debajo del triángulo de guía superior Ts Sujetar los dos extremos del film y desenvolver un metro aproximadamente FASE 2 Agarrar el lado inferior del film que coinc...

Страница 101: ... anudarlo al perno de la brida posterior F FASE 6 Regular las varillas de posicionamiento B con los mandos M3 para bloquear la bobina dejando una separación de 5 mm entre las varillas y la bobina Nota La bobina está montada correctamente cuando observando la máquina por detrás el lado izquierdo del film se encuentra a una distancia A equivalente a la mitad de la distancia H apertura de los triángu...

Страница 102: ...osición de la cinta de entrada N1 Afloje la manija M1 y regule la posición de la cinta de manera que el producto tenga un mínimo de juego entre la varilla de guía aprox 20mm y la parte trasera posterior de la cinta aprox 10mm 6 5 3 Regulación de las células fotoeléctricas La máquina está predispuesta para la colocación de la fotocélula con lectura vertical B11 indicada para los productos particula...

Страница 103: ...e que ser posicionado en manera que la soldadura del film sea a mitad de la altura de la confección Para levantar o bajar el chasis de soldadura Presione el botón 9 y seleccionar el modo MANUAL Presione el botón START 13 Presione contemporaneamente los botónes 9 y 11 para levantar el chasis de soldadura Presione contemporaneamente los botónes 9 e 12 para bajar el chasis de soldadura 6 6 Envasado U...

Страница 104: ...ie que entra en contacto con el film utilizando un paño o papel No utilizar objetos que puedan dañar la superficie Cada 2 semanas Sistema neumático Comprobar que los racores no pierdan Eliminar la condensación que se forma en el grupo del filtro Cada 12 meses Soportes Lubricar con grasa de tipo NLGI 2 Cada 12 meses Acoplamientos entre engranajes Comprobar que estén lubricados Cada 3 meses Lamina y...

Страница 105: ...ra de soldadura inferior B20 Sensor soldadura central superior QV3 Electrobomba acercamiento de cintas extras B21 Sensor soldadura central inferior QV4 Electrobomba perforador extras B22 Sensor altura soldadura central S1 Botón de emergencia B23 Sensor exclusion acercamiento cintas S2 Botón de Reset B40 Sensor del carro de soporte de la bobina S3 Selector de exclusión de seguridad BT1 Termopar bar...

Страница 106: ...r de la fecha de instalación de la máquina La misma consiste en la reparación o sustitución gratis de todas aquellas partes que nosotros consideramos defectuosas por anomalías en los materiales La reparación o sustitución se realizan en la sede de nuestra sociedad adeudando al comprador los gastos de trasporte o mano de obra Cuando la reparación o sustitución sean efectuadas en el domicilio del co...

Страница 107: ...e väsentliga säkerhetskraven och relevanta bestämmelser i gällande direktiv P é conforme os requisitos essenciais de segurana e a todas as disposições pertinentes das directrizes aplicáveis GR συμμορφώνεται με τις βασικές απαιτήσεις ασφαλείας και όλες τις συναφείς διατάξεις των εφαρμόσιμων οδηγιών 2006 42 CE 2004 108 CE 2006 95 CE I E inoltre dichiariamo che sono state applicate le seguenti norme ...

Страница 108: ...107 7 4 ...

Страница 109: ...108 7 4 ...

Страница 110: ...109 7 4 ...

Страница 111: ...110 7 4 ...

Страница 112: ...111 7 4 ...

Страница 113: ...112 7 5 ...

Страница 114: ...113 ...

Страница 115: ...s F N de série Date et timbre du revendeur E Nº de matrícula Fecha y timbre del revendedor P Número de série Data e carimbo revendedor GR Κωδικός Ημερομηνία και σφραγίδα μεταπωλητή I Collaudo GB Test D Abnahmeprüfung F Essai E Ensayo P Teste GR οκιμή I Indirizzo acquirente GB Customer address D Adresse des Kunden F Adresse de l acheteur E Dirección del comprador P Endereço comprador GR ιεύθυνση αγ...

Страница 116: ...orre S p A Via Provinciale 54 24044 DALMINE BG ITALY Tel 035 563525 Fax 035 564945 E mail info minipack torre it http www minipack torre it Spett le minipack torre S p A Via Provinciale 54 24044 DALMINE BG ITALY ...

Отзывы: