miniDSP Ltd, Hong Kong /
www.minidsp.com
/ Features and specifications subject to change without prior notice
12
3.1.2
2x4 HD plugin installation
1.
Navigate to the
Windows
folder of the software download.
2.
Double-click on the
MiniDSP_2x4_HD.exe
installer program to run it. We recommend that you accept the
default installation settings.
3.
The plugin will start automatically if you accepted the default installation settings. To make it quicker to run
in future, right-click on its icon in the taskbar a
nd select “Pin to taskbar.”
3.1.3
USB Driver installation
1.
Connect the 2x4 HD to the computer using the supplied USB cable, and power it on.
2.
Navigate to the
WinDrivers
folder of the software download and double-click on the appropriate installer:
miniDSP_UAC2_v2.29.0_ForWinXP_Vista.exe
for Windows XP and Vista
miniDSP_UAC2_v3.34.0_ForWin7_8_10.exe
for Windows 7, 8, and 10
(The version number embedded in the filename may be different.)
We recommend accepting the default installation location. Once the driver installation completes, click the
Finish
button.
The Windows PC will not be able to communicate properly with the 2x4 HD if you did not have the it
connected by USB and powered on when you installed the driver. If that is the case, you will need to
uninstall the driver, connect the 2x4 HD, power it on, and run the installer again.
Note
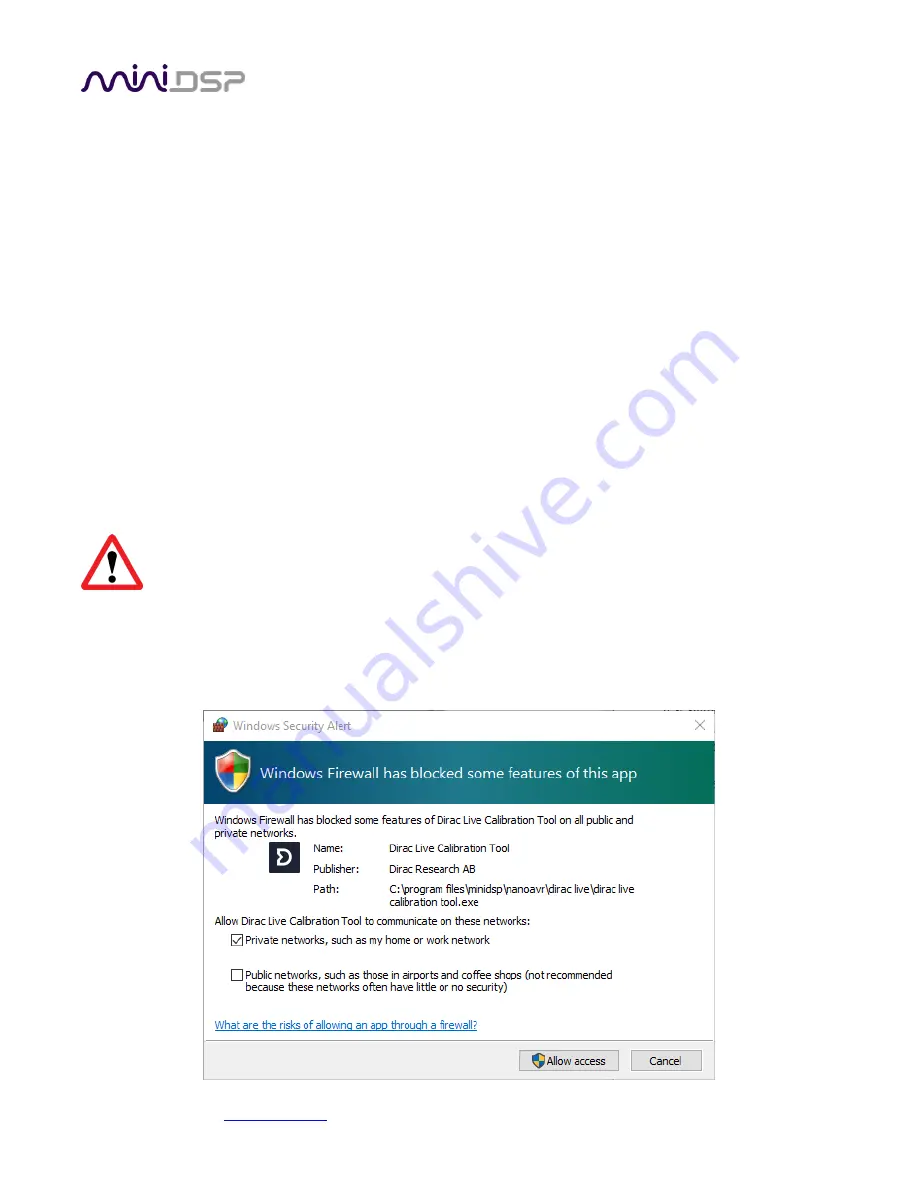
: the first time you run the plugin, you may see a warning from Windows Firewall as shown below. If so,
ensure that “Private networks...” is checked and “Public networks...” is not checked. Then click on “Allow
access.”


